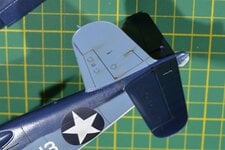
1/48 Tamiya F4U-1 Bird Cage Corsair

Ad: This forum contains affiliate links to products on Amazon and eBay. More information in Terms and rules

Ok - so its been well over a month since I last did any work on the Corsair. I seem to have some difficulty in just finishing a model. I get to the stage where I can finalise the paint work and try my hand at some weathering and detailing and just go blank. I think it's because I find these last stages a little intimidating and don't want to screw up after all the work that has already been put in... :scratch:

To get past this creative(?) block I sat down on Sunday and put a clear coat on over the decals and while it was drying managed to get the prop and a number of other sticky-outy bits painted.

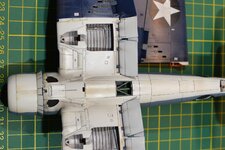
The first thing I did once the clear had dried was attempting to add some exhaust staining running along the bottom at the wing roots. I am moderately pleased with how it turned out, it could possibly be a bit darker and maybe varied in terms of whitish-grey to dark grey but I'll live with it at this point.
F4U-1 Weathering_1.JPG

Looking at the photo now I've added it to the thread it seems a bit light on - it seems much more pronounced IRL.

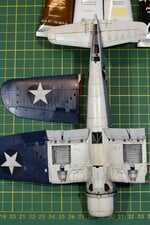
The next step was to apply some very thin clear/grey/black over the decals so they didn't look quite so stark. Hopefully you can tell this from the star in the underside photo above. Once that dried I set about highlighting panel lines with Indian Ink. I've never tried this method before and the results are a bit patchy, but overall I do like the effect - it certainly does make the aircraft look a bit more "used" than I usually turn out.

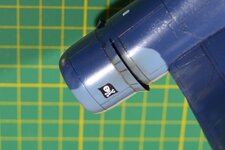
On the top side I've been methodically working my way over panel lines, some I did highlight some I didn't just to mix it up a bit. Here the Corsair is perched on the undercarriage dry fitted and the same with the prop. I am thinking that the next steps could be some light chipping and scuffing on the access panels and wing where the cockpit is accessed. Not sure what method I will use just yet, but I am probably not going down the silver pencil route like I did with my last effort.
F4U-1 Weathering_2.JPG


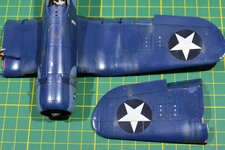
I've just gently placed the folded wing onto the spar in this shot to see how the kit looks in this pose. Not sure if wings were folded singly or both together IRL but for the sake of interest when the model is sitting on the shelf I wanted to do it this way.
F4U-1 Weathering_3.JPG


You can see in this shot that I have struggled to get the panel lines to show across the 3 in the code. If a second attempt doesn't work I may try using some super fine drafting pens I have in my kit.
F4U-1 Weathering_4.JPG


This last shot shows just how dark the Indian Ink is - even on the darker blue. I've not yet done the decal in this shot, but it did turn out alright when I got back to it after taking these progress shots.
F4U-1 Weathering_5.JPG


So - at this point I am not sure how much further to go with weathering. I have a lot of photos of Corsairs that show some really significant paint fade and chipping from being based in the tropics, but shots I have of VF-17 on a carrier indicate that they may have been less exposed to continuous baking sunshine and possibly(?) were a little better looked after. I think I may add a little "muddy" white to the final matt clear coat to "fade" out the paint a bit more - dunno...

My thanks to all for the encouragement and hints/tips along the way. Despite hitting a bit of a wall I am still enjoying this kit and am kind of happy with the outcome to date. Lets hope I don't stuff it up!!!
 
Lovely work so far!

Ok - so its been well over a month since I last did any work on the Corsair. I seem to have some difficulty in just finishing a model. I get to the stage where I can finalise the paint work and try my hand at some weathering and detailing and just go blank. I think it's because I find these last stages a little intimidating and don't want to screw up after all the work that has already been put in... :scratch:

To get past this creative(?) block I sat down on Sunday and put a clear coat on over the decals and while it was drying managed to get the prop and a number of other sticky-outy bits painted.

The first thing I did once the clear had dried was attempting to add some exhaust staining running along the bottom at the wing roots. I am moderately pleased with how it turned out, it could possibly be a bit darker and maybe varied in terms of whitish-grey to dark grey but I'll live with it at this point.
View attachment 639115
Looking at the photo now I've added it to the thread it seems a bit light on - it seems much more pronounced IRL.

The next step was to apply some very thin clear/grey/black over the decals so they didn't look quite so stark. Hopefully you can tell this from the star in the underside photo above. Once that dried I set about highlighting panel lines with Indian Ink. I've never tried this method before and the results are a bit patchy, but overall I do like the effect - it certainly does make the aircraft look a bit more "used" than I usually turn out.

On the top side I've been methodically working my way over panel lines, some I did highlight some I didn't just to mix it up a bit. Here the Corsair is perched on the undercarriage dry fitted and the same with the prop. I am thinking that the next steps could be some light chipping and scuffing on the access panels and wing where the cockpit is accessed. Not sure what method I will use just yet, but I am probably not going down the silver pencil route like I did with my last effort.
View attachment 639116

I've just gently placed the folded wing onto the spar in this shot to see how the kit looks in this pose. Not sure if wings were folded singly or both together IRL but for the sake of interest when the model is sitting on the shelf I wanted to do it this way.
View attachment 639117

You can see in this shot that I have struggled to get the panel lines to show across the 3 in the code. If a second attempt doesn't work I may try using some super fine drafting pens I have in my kit.
View attachment 639118

This last shot shows just how dark the Indian Ink is - even on the darker blue. I've not yet done the decal in this shot, but it did turn out alright when I got back to it after taking these progress shots.
View attachment 639119

So - at this point I am not sure how much further to go with weathering. I have a lot of photos of Corsairs that show some really significant paint fade and chipping from being based in the tropics, but shots I have of VF-17 on a carrier indicate that they may have been less exposed to continuous baking sunshine and possibly(?) were a little better looked after. I think I may add a little "muddy" white to the final matt clear coat to "fade" out the paint a bit more - dunno...

My thanks to all for the encouragement and hints/tips along the way. Despite hitting a bit of a wall I am still enjoying this kit and am kind of happy with the outcome to date. Lets hope I don't stuff it up!!!
Hi grant. great work so far. this is my first time posting, long time reading. One of my favorite planes. glad to see you got the gear bays right, most paint them green. I would like to point out, although it probably too late, that the underside of the outer wings should be intermediate blue not sea blue. and i'm not sure but the inner wing fold may be interior green or insignia white. Dana Bell will know. I like the paint job so far and great work on the cockpit. much neater and realistic than i can do with that photo etch.
Joe
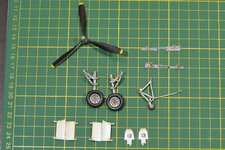
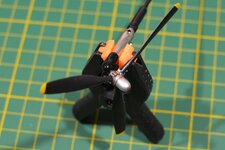
Thanks Joe. I have to admit I just followed the Tamiya colour instructions on this and didn't take the time to do more research. I was lucky to have input from Dana wrt the salmon primer on early Birdcage versions so maybe the colour options for inner wing would have been salmon or insignia white. I did think it could be white but couldn't easily source any references either way. To be honest I pretty much was keen to just get the kit finished... which I have not touched since my last post. Unfortunately life has gotten in the way and I've had to shelve both projects I have on the go for a while. Fingers crossed I'll get back to the bench in a month or so!! Cheers.
 
I'm back! So much for planning on getting back to this kit within a month of the last post...

Much has happened in the time between October and now. What was just some repairs to damage done to the living room ended up being a complete refresh of the entire house and placing it on the market. In amongst all that we have also now moved about 100km outside of Melbourne. Sadly this is only an interim move - we are yet to decide where we want to retire to and how much we can afford to splurge on a yet to be found new house.

So, lots of packing and lots of boxes later I've managed to get back to this model with the intention of finally completing it. These past months have not been totally wasted. I did spend a lot of time thinking about what I can do to "age" this model and make it look a bit more used and abused. Thankfully I stumbled across some weathering techniques with oil paints in the Encyclopedia of Aircraft Modelling Techniques books I bought a few years ago. I've adapted some of the techniques shown in these books to the specific needs of this kit. I decided not to try to fade the paint with a white-wash type clear coat. Instead I have added lots of wear & tear with oil stains and dirt to give the impression that the aircraft has at least a number of flying hours under its belt (so to speak!!!). I haven't been able to find my camera to take some shots - my wife told me that she saw it just the other day in a box - very clever - we only have about 30 boxes still sitting in the spare bedroom....thinks she was real funny!!!

Anyway - as soon as I have some shots I'll get them uploaded. I'm hoping that the impact of the weathering is noticeable but not over the top. The photos will be an excellent test to see if I've hit that mark.

As always thanks for looking in on my ramblings... cheers!
 
Camera found - crisis averted...

F4U-1 U-Carriage Weathering.JPGF4U-1 Weathering_10.JPGF4U-1 Weathering_9.JPGF4U-1 Weathering_8.JPGF4U-1 Weathering_7.JPGF4U-1 Weathering_6.JPGF4U-1 Weathering_11.JPG
Inserted these ones as thumbnails - not 100% sure you can view these full size, I'm sure someone will be kind enough to confirm either way.

As you can see I have added some oily marks, a bit of weathering from the gun ports and various other places oil and dirt can accumulate and be spread out via the airflow. I think the underside came up ok, but I'm a bit disappointed with the upper side, especially across the wings. Using the same colours as underneath did not work and the lighter shades I used on the blues just don't quite look right. All part of the learning process I suppose.

Rapidly approaching the point where I just want to get it done. Hoping to put in a bit more time at the bench this evening so another update might be soon.

Thanks again for looking in on this project. 🍻
 
Ok - calling this one as done.

Below is the only photo I have for the finished kit. Unfortunately immediately after taking this shot I dropped the model and broke the wing off and a few other pieces. I'm looking at how I can best repair the damage, but the shot below (a bit blurry sorry) is it for now.
F4U-1 Final_1.JPG
 

Users who are viewing this thread

Back