3D printed Horten HoVII

Ad: This forum contains affiliate links to products on Amazon and eBay. More information in Terms and rules

StuartA

Airman 1st Class
137
117
Nov 4, 2022
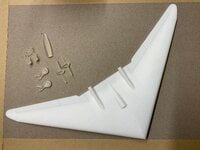
The model has arrived from Shapeway,pleased to say that the small parts have a much finer finish than the HoX.
'That's all folks,I need to complete the Fokker before starting this.
bit of history
 

Attachments

  • image.jpg
    image.jpg
    1.6 MB · Views: 74
Last edited:
Oops!Same as the HoX,1/60.9(don't ask why…but anything smaller I'd be struggling with,going bigger gets expensiv)
 
Was hoping to complete the Fokker before starting here,but thats delayed,so I hope to be able to do some work on this soon.Miserable grey weather always puts a damper(pun)on my enthusiasm
 
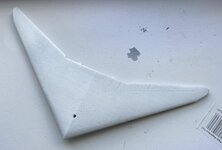
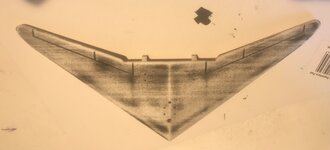
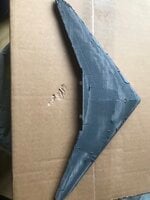
A while ago I had a slight scrape on my cars front bumper.Plastic filler and primer used to prepare it for paint.So ….I mixed a bit of the filler and tried it on the underside of the VII.Took ok, so sanded it back with 120 and then progressively finer wet'n dry.
'Then a coat of the primer.If this holds up to sanding I'll give another coat and then go topside
 

Attachments

  • 5A02ABB6-9B16-46A2-92D9-BE2E38D9C37D.jpeg
    5A02ABB6-9B16-46A2-92D9-BE2E38D9C37D.jpeg
    905.8 KB · Views: 28
  • 2D6E6237-4673-43D1-9F07-C29C26C61F22.jpeg
    2D6E6237-4673-43D1-9F07-C29C26C61F22.jpeg
    343.6 KB · Views: 29
  • 00BA4D4F-8C98-4E8D-B30E-790734528232.jpeg
    00BA4D4F-8C98-4E8D-B30E-790734528232.jpeg
    1.3 MB · Views: 29
:thumbright:

Quite a lot of work IMHO. If I were you I would make a "thin" putty of an grey enamel with a talc powder and applied that as the first coat. Then slightly sanded with a sandpaper of 400-600 grade. If needed I would repat the procedure twice ( usually it is not needed ). And just then ( having a smooth surface ) I would applied the primer.
 
It's nylon.I'm not sure an enamel(which I don't use,only acrylics) would adhere.In my situation time and the amount of work are the least of my worries
 
Oh yes the nylon ... so the enamel could be a problem. But I'm notr sure. Enamels are of better adhesion than acrylics.
 
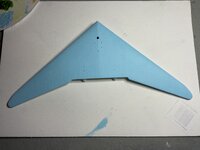
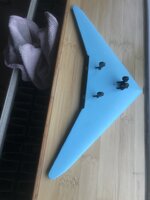
Light Sky blue,couple of coats.I need to open the u/c mounting points with a 1mm drill,the larger hole I'll enlarge to 5mm to allow me to pour some shot in to get the balance.Another 5mm hole forward of that to fix a magnet to hold the shot in place.
 

Attachments

  • image.jpg
    image.jpg
    1.2 MB · Views: 25
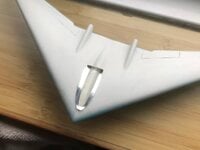
Painted u/c;no steel grey so iron grey over silver.Dry fitted it first to check the balance.Sits ok so I won't have to add weight.
'After a coat of matt varnish glued the parts on,they'll give me something to hold whilst working on the topside.
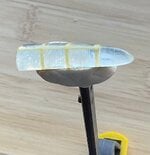
Gave the canopy a Polish then glued some foil on the underside as it looks better than white or black.Next job is the glazing bars which will be fun.I've painted the outer wrap of a roll of 1mm masking tape silver,I reckon one circumference will give me enough length.Once the bars are on(if I can manage it)I'll give it a coat of clear epoxy to seal it.
 

Attachments

  • E4F0BB22-FF92-4DD5-BEB5-C8349BD6692C.jpeg
    E4F0BB22-FF92-4DD5-BEB5-C8349BD6692C.jpeg
    877.4 KB · Views: 25
  • 59E494C1-9859-4DED-B32C-9442CB1E050C.jpeg
    59E494C1-9859-4DED-B32C-9442CB1E050C.jpeg
    664.7 KB · Views: 26
Complete failure with the tape painting,the paint had bled leaving an uneven edge.So bars are Tamiya tape yellow.
'There should be two longitudinal bars,but I think one looks ok.Sealed with clear epoxy
 

Attachments

  • EA0BBF42-87AA-4DC9-894B-16FD999E47F4.jpeg
    EA0BBF42-87AA-4DC9-894B-16FD999E47F4.jpeg
    79.2 KB · Views: 23
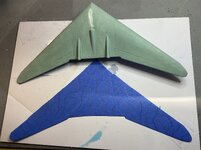
Painted the topside,still needs another coat and hinge lines redefining.
Drawn out a paint mask for camo,double layer of tape onto a plastic base.
 

Attachments

  • AF51122F-C760-46F0-B410-A3EA2100370C.jpeg
    AF51122F-C760-46F0-B410-A3EA2100370C.jpeg
    1.4 MB · Views: 26

Users who are viewing this thread

Back