modlbldralex
Airman
Hi All,
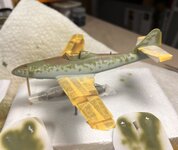
Academy 1/72 Me262 Kg54 markings.
Used Quinta Studios 3D cockpit details QD72047. Added electrical wiring on backside of main instrument panel and painted yellow.
Made a simple gunsight from spare piece of styrene, looped electronic wire, and spare piece of clear plastic for gunsight lens.
It's tiny. It's like looking for Waldo.
Carved seat cushion from small piece of styrene and painted brown.
Added main gearbay-cockpit tub details using small electronic wire bound and twisted together and painted yellow with brown water color wash using water color pencil.
Outter cockpit tub was painted with Vallejo dark aluminum.
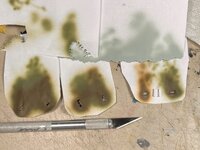
Upper surface painted with Vallejo RLM81 Brown-Violet and Mission Models RLM82 Bright Green.
Under surface painted with Vallejo RLM76 Light Blue.
Dried brushed lighter shades of all three main colors with custom mixed artist oil paints for weathering affect.
Used brown and black water color pencils to add streaking stains.
Clear gloss coat with Tamiya acrylic.
Used national insignias from AeroMaster decal sheet 72-054C Me-262 Sturmbird Part1.
Cobbled tail serial numbers from Ministry of Small Aircraft Production Decals - Me262 - 7205.
Kg54 unit shield decal came from EagleCals Decals 1/72 MESSERSCHMITT Me-262A KG(J) UNITS.
Applied oil paint wash to highlight panel lines.
Sealed oil paint wash with another coat of Tamiya acrylic clear gloss.
Final clear flat coat with Mr.Color GX113 UV Cut Flat Super Clear.
Attached radio lines using "Fly tying nylon thread" called Uni-Caenis.
I found this thread at Cabela's sporting goods store last summer.
It comes in black and appears to be perfect for 72nd scale.
Used kit canopy windscreen and rear clear parts.
Canopy center section came from Falcon Clear-Vax canopy.
Attached radio lines using "Fly tying nylon thread" called Uni-Caenis.
I found this thread at Cabela's sporting goods store last summer.
It comes in black and appears to be perfect for 72nd scale.
Hope you enjoy it.
Last edited:


