**** DONE: 1/72 Sea Fury FB11 RAN 21 CAG - Your Favorite Aircraft of All Time GB

Ad: This forum contains affiliate links to products on Amazon and eBay. More information in Terms and rules

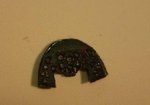
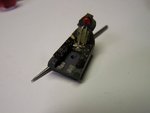
Need to change your setting for closeups or change your distance to suit what the camera can do Michael, pic is too blurred to pick up the details.

If your not sure on the settings then take a series of pics at different distances to get the right range.
 
Yeah I agree, they are rubbish. I have taken a couple more, not sure if they are clearer or not but they show where Im up to as off bedtime tonite
 

Attachments

  • P1070199.jpg
    P1070199.jpg
    19.8 KB · Views: 87
  • P1070198.jpg
    P1070198.jpg
    9.1 KB · Views: 77
Thanks, yes its tiny, but its part of my overall scheme to represent the entire FAA at that scale

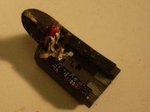
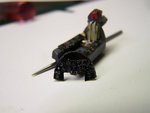
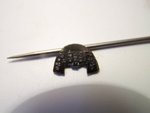
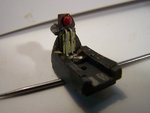
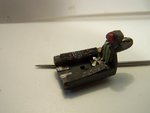
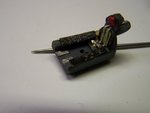
Anyway, Im still not happy with the photos, so heres a few more. I think these ones arent so bad.....
 

Attachments

  • Cockpit close ups.jpg
    Cockpit close ups.jpg
    21.6 KB · Views: 76
  • Cockpit close ups 2.jpg
    Cockpit close ups 2.jpg
    18.6 KB · Views: 79
  • Cockpit close ups 3.jpg
    Cockpit close ups 3.jpg
    22.6 KB · Views: 73
  • Cockpit close ups 4.jpg
    Cockpit close ups 4.jpg
    24.6 KB · Views: 87
  • Cockpit close ups 5.jpg
    Cockpit close ups 5.jpg
    22.9 KB · Views: 80
  • Cockpit close ups 6.jpg
    Cockpit close ups 6.jpg
    20.9 KB · Views: 84
  • Cockpit close ups 7.jpg
    Cockpit close ups 7.jpg
    18.8 KB · Views: 74
Last edited:
Thanks guys, much appreciated .

Spent today finishing as far as i could the cocpit. I will post photosd tomorrow , but it was a mixed day to be honest. Everything that I fitted went in okay......compass, throttle and pitch levers fusdelage mounted controls. But ther were some items on the PE sprue that quite simply defeated me. Quite simply they were too small for me to fit them. There were six items out of the 26 pieces in the accessory kit that I could not fit, and they were all the same. They measure 0.25 mm in length, and about a 1/4 of that in breadth. They were little control knobs that I was supposed to fit to the control panels. I could only see them with the help of my most powerful magnifying glaas (about a 5x zoom). I have no tool that will work to such fine standards, and really, who is going to see that level of detail fromn outside the cockpit. So I made a decisdion not to risk smearing glue everywhere trying to get these knobsand levers into place. A silly concept IMO.

I have to make some further adjestments to the instrument panel to get it into the cockpit area. It needs about 1.5mm off the height and about 1mm off the width. Have to go carefully and slowly to avoid damaging the item. Should be ready by tommorow, and then I can fit the whole cocpit assembly to the fuselage, and can close up the fuselage.

I have decided to have an open cocpit (as iff the hood slide was removed. Ive seen that are parked like that. So I cut out the middle of the canopy, leaving the two end bits for fitting. I have just about got tyhe fuselage fully preped for joining.

So the interesting bits are on the way.
 
Michael,before you cut the instrument panel, see if any plastic can be removed from the fuselage, by filing and sanding. Might make fitting the part a bit easier.
 
Thanks for the advice Terry, and very sound. I actually did grind out the inner cures of the fuselage as you suggested , but that stll wasnt enough to close the fuelage halves. I actually stil had to file back the instrument panel, and unforatnately I did slightly mark it, but only in a spot that cannot be seen any way. I am disappointed i marked it even more, but this isnt a wessex scale disaster.

I seem to have another issue to tackle at the moment....the cockpit shape at the front of the cockpit well isnt well rounded, and doesnt seem to match up to the straight light the canopy has that is suppoed to fit over it. I need to try and find a detail of the cockpit well, prefereably loking down and to show the shape of the well when looking fro above. at the moment its sort of oval shaped with a slightly pointed front bit. i dont think that is the right shape somehow.

I dont suppose anyone has a photo that shows the cockpit well shape, or would even like to take a guess
 
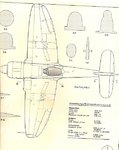
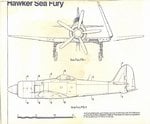
I've got a scale plan of the Sea Fury, although in 1/48th scale. Leave it with me and I'll scan and post it tomorrow. (Computer is running very slow at the moment, as I'm doing a back-up of my hard drive to an external drive.)
 
Thanks Rochie. Te drawing you posted is very helpful. Whilst the outline of the fuselage under the canopy assembly at the front is not shown, the cockpit well outline in the vivnity of the access hatch is shown, and suggests a "pointed ellipse" where the two halves meet. I'll wait until Airframes digs his plan out as well to confirm my current hypothesis .

Whilst I was waiting I fitted the wheels arch assembly and dry fitted the wing assembly. I painted the wheel arches and underwing areas, I taped the wing assembly together after all that was dry and also taped the two fuselage halves together. I dry fitted the rear wings after some major adjustments to the fitting guide lugs. They otherwise did align the two tailwings properly.

I coulnt resist and dry fitted the wings and fuselage toether. I was surprised to see that pretty much eveything lines up nicely, there wont be too much fiddling about when it comes final assembly.....I knew there was a reason why I liked this plane.....
 
Here you go Michael. I've re-sized the plans to fit the monitor screen allowance of the forum, but they're not at 1/72nd scale.
If you have a look at the pics on the Kiwi Images site I mentioned in an earlier post, you'll see the shape of the inside of the cockpit at the windscreen, which follows the screen outline.
 

Attachments

  • Can Jan 549.jpg
    Can Jan 549.jpg
    44 KB · Views: 75
  • Can Jan 550.jpg
    Can Jan 550.jpg
    60 KB · Views: 74
It is squared off, plus I just realized my dash is set too deep into the fuselage. I'll have to carefully apply some of that debonder to the back of the dash assembly and file back even more the dash.

Mind you if I have to also square of the front of the cockpit well, which i estimate will require removal of about 1mm of the fuselage body, it will be a bit easier to get the dash into the right position .

I should have taken more time and care getting the dimensions of my scratch built dash into place. Now i pay for my haste.

Thanks guys...the help has been invaluable
 
Last edited:

Users who are viewing this thread

Back