**** DONE: 1/72 Sea Fury FB11 RAN 21 CAG - Your Favorite Aircraft of All Time GB

Ad: This forum contains affiliate links to products on Amazon and eBay. More information in Terms and rules

Accelerator has worked well for me, i use it primarily when I fill gaps or seams. Can get stuck into filing and sanding straight away and if needed add more CA and accelerator speeds up the process on that count....
 
Thankyou Wurger. With the greatest respect to Steve, what is your opinion on this stuff.....and advantage for micro photo etching work, or not worth the effort? at only $5-10 dollars its seems like a small purchase. I can see advantages to spraying this stuff to one component, and the CA to another for more or less instant adhesion.

Is ther material for removing CA adhesion if the process goes wrong...that is if the piece is not placed correctly or similar?

I agree with Jelmer's post here. His opinion is just I would say myself. Personally I don't use it because I don't need it. A small amount of a CA glue applied with a steel needle is usually enough to keep the process of a correct time. Also I use a CA glue as a gel what gives me some of time for setting all parts at a correct location.

Concerning removing CA adhesives you should use a lquid called Debonder ( Czech invention).

debonder.jpg


Also it is offered as Turbo Debonder.....

Cyanoacrylate Adhesives | Turbo Debonder | Cyanoacrylate*Debonder
 
Last edited:
Thankyou everybody for your advice. There is no right or wrong answer here.....its what suits each inidvidual and each circumstance. I am at a disadvantage here because ive never used the stuff. I can see that having an accelarator could be a good thing, but it could also do bad things. For me i think mostly bad. I generally need to move things around even when I am gluing them into place. Once they are in, I dont mind taking a few minutes to let them dry. I am invariably slow in my builds, so this shouldnt be a problem for me.

I am definately however going to source out some of that debonder Wurger was talking about. It looks the business to me. you can use acetone to unstick CA glue but its messy
 
I wouldn't suggest using anything what contains acetone..... ( unless it is a glue ). The substance is a kind of a "thinner" and "melts" polystyrene. In the past it was the basic component of all glues for plastic kits. It is quite bitchy to plastic surfaces and damages them severely usually. Also it damages paint, enamel or varnish layers applied on models.
 
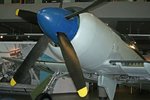
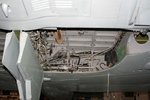
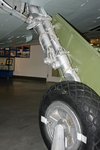
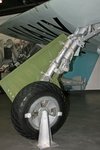
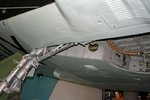
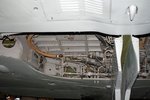
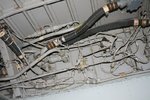
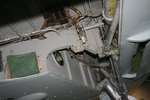
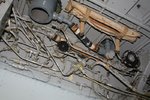
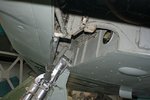
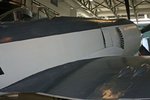
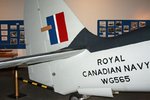
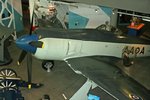
As requested Michael, pics of a Sea Fury in Royal Canadian Navy livery. These pictures were taken of the specimen at the Alberta Military Musem near my home. Unfortunately the aircraft is tucked into a very dark corner and the upper blue/gray colour contributes to the darkness.
 

Attachments

  • IMG_1854 Resized.jpg
    IMG_1854 Resized.jpg
    83.4 KB · Views: 91
  • IMG_1877 Resized.jpg
    IMG_1877 Resized.jpg
    78.3 KB · Views: 97
  • IMG_1878 Resized.jpg
    IMG_1878 Resized.jpg
    82.8 KB · Views: 92
  • IMG_1879 Resized.jpg
    IMG_1879 Resized.jpg
    133.4 KB · Views: 90
  • IMG_1880 Resized.jpg
    IMG_1880 Resized.jpg
    135.6 KB · Views: 93
  • IMG_1881 Resized.jpg
    IMG_1881 Resized.jpg
    73.3 KB · Views: 94
  • IMG_1882 Resized.jpg
    IMG_1882 Resized.jpg
    81.8 KB · Views: 92
  • IMG_1883 Resized.jpg
    IMG_1883 Resized.jpg
    108 KB · Views: 88
  • IMG_1884 Resized.jpg
    IMG_1884 Resized.jpg
    82.2 KB · Views: 93
  • IMG_1885 Resized.jpg
    IMG_1885 Resized.jpg
    113 KB · Views: 95
  • IMG_1886 Resized.jpg
    IMG_1886 Resized.jpg
    75.5 KB · Views: 90
  • IMG_1887 REsized.jpg
    IMG_1887 REsized.jpg
    66.1 KB · Views: 85
  • IMG_1888 Resiized.jpg
    IMG_1888 Resiized.jpg
    72.3 KB · Views: 91
Thankyou so much for the photos. The cockpit and undercarriage well details are particulalry welcome as is the engenie exhaust detail
 
I found some intersting pictures of a 1/96 scale model of the Sydney, with her Korean War era sir group embarked. The model is 87 inches long (7'3"). The plane models are each 4.5" long. The model gives a good idea of the scale and poise of the aircraft


I wish i had the time, the money and the space to try someting like this

Here is the link to the photos

ANMM - HMAS SYDNEY III mopdel images - Cutting Edge Models
 
I have a few more questions regarding working with PE parts. One site I have been reading says

"The photoetched details are attached to a fret, the same way the plastic is attached to the sprue. The best way to cut them lose is to use a rounded knife blade (I use a no. 10 blade). They must be cut on a hard surface, such as a steel or glass plate, or a cheramic tile, or else they will bend. First, cut about 0.5 mm. from the part, and the remove the remaining fret with a pin file or knife".

This contrasts with another instructional site that says

"The PET Shears from Xuron make cutting PE parts from their sprue easy. They also allow one to trim away any excess, especially those sprue tags. To access the part on the sprue I like to start by removing the outer frame. Once I have removed the outer frame I can easily access the part. Be sure to examine the parts around the one you are removing, you want to leave them as protected as possible. Always keep you PE sprue frames laying flat when not handling them to remove parts. A crease or bend can cause you great difficulties later".

One guy is recommending using a knife blade, another says use xuron shears (which i dont have, but could get if that is the best way to go.

The first guy also says use a very hard surface to cut on, like a tile, or a sheet of glass. Is that what others do? I was planning to just cut the parts on standard green modelling mat...you know that green stuff (made out of dense rubber i think) as i can see my modelling knife being made blunt by a glass or ceramic cutting undersurface

With regard to bending the PE parts, these two guys also have differing opinions. guy 1 says

"Photoetched details often need to be bended, in order to give the appearence of crates, fastening clips, etc. Because the metal is so thin, repeated bending will cause the metal to break. Especially steel will easily break. Heating the piece with a flame first will make the part softer, thus making it possible to bend the part more, but will also make it more likely to bend in the wrong place. Obviously, the heating should be done carefully, so as to not melt the metal.

To bend a part correctly is probably the hardest thing about photoetched details. The best way to do it is to place the part on the edge of your steel plate/glass plate/cheramic tile, place one straight (no. 11) scalpel blade or the blade from a stanley knife on top of one side of the photoetched part (with the sharp edge of the blade along the line that need to be bended), and another no. 11 or stanley knife blade under the other side in the same manner. Then, lift the lower blade to the required angle, while holding upper blade steady. This should give you a sharp edge".

I dont like the idea of heating, and his suggesting to use two knives to achieve a fold suggests to me a strong possibility of scratching the part

guy 2 says the following

"Parts can be "folded" by either using a razor blade or a chisel blade inserted in a hobby knife handle…I prefer the hobby knife setup because it give me greater control and keeps my fingers away from the part in case of slippage.

Be sure to refer to the instructions as to how the part is suppose to look after all folding occurs. You might have to think the process through to get the part into the right shape and size. It can get difficult so take your time and give it some serious thought. I've even cut out piece of paper to represent the part so I can figure the folds before I start on the PE part itself.

If you don't have a PE folding jig, you can use basic tools you already have. A flat machinist steel ruler can be used to hold down the part while you use a razor blade to fold the PE part. You can also use pliers…such as these el-cheapo duck billed pliers that have been in my modeling tool kit for decades. Modelers seem to collect a pelethora of tools, you probably have something useful in your toolbox"

Obviously the first question here is how necessary is the folding jig. I twiould have thought using a straight edge mini steel rule would be the most controllable

The full articles i have been reading are linked below

How to use photo etched parts

How to use Photo Etched parts | Hawkeye's Squawkbox


I get the feeling there is no hard and fast method, though everyone doe have similar basic rules. Perhaps working out the best way is a matter of what suits me the best.


Anyway, hopefully the parts will arrive by the end of the week. Hopefully.
 
Alot depends on the thickness of the PE parts I think.
Older frets like those from Verlinden, Dragon and 1990's Hasegawa frets were alot thicker and harder to cut and bend than much of the current stuff.

The thicker stuff will need to be trimmed fom the sprue with thin nosed side cutters, not cutting too close to the edge in case it warps the part, then filed down with a coarser flat file till you're close to the part, then same with a fine toothed flat file.

For newer Eduard or CMK PE, taped down on a flat, hard, light-coloured surface (to see part outlines clealy), a sharp scalpal or craft knife is enough to remove the items. I cut as close as possible to the outline to keep sanding to a minimum, which IMO is the trickiest part of the process. For this I tape the item down on an old metal die I have, the part to be removed protruding over the edge. I then file it down as carefully as possible with a fine toothed flat file.

As for folding, I've always used a makeshift system of the previously mentioned die, metal plate off-cuts from an old workplace (you could also use a metal ruler), and a razor blade or craft knife blade. The part gets taped down to the die, the appropriate shaped off cut to the part at the folding line. pressing down the off cut with one hand (to be sure, to be sure...). you then just slide the blade carefully under the part at a low angle, then when as close as possible to the bend line, bend up.
You will need to improvise when making boxes or radios for example, and two sides are already bent up, but that's the basic technique I use. (in these latter cases, one of my off-cuts has cut outs within it, which allows me to fit it inside tight spaces as a back support.)

Last year I did buy some Tamiya PE bending pliers, but haven't done any PE work since then, so can't comment on their usefulness.

Either way you're right, though - there is no hard and fast way, and you just 'pays your money and makes your choice'...


Attached pic: most of my PE tools (varies now and again)

STA51467.JPG
 
Last edited:
I think Even has about covered it all for you. I use a knife blade reserved specially for that purpose on a hard surface and cut as close as I can to the part with the more modern PE but with the older it's a case of using cutters and filing back the excess. As for bending, it's a case of whatever you feel comfortable with, pliers, knife, razor blades for right angles and knife handles, electric wire and even nails to make curves. I am luck as I have an etched bending jig and some multi-tooled bending curves but these do not come cheap.

As a foot note: If doing a right angle bend, place one flat blade on the seam and a second blade as flat as you can under the part you want to bend and the bring the second blade up to the right angle.
 
Ive made a start with the cockpit detail. The trumpeter PE is very detailed, and some parts dont quite fit into my Special Hobby kit. For example the instrument panel of my czech kit wasnt the right height, so i fabricated a new back board to suit the Trumpeter instrument panel.

I havent progressed far, I am going slowly because I have never used PE parts before. So far am reasonably happy with the result. here is a pic of the instrument panel. My camera is struggling as you can see, and i havent yet tidied everything up, but the gauges align and the panel looks fine without a 5x optical zoom gazing at it


Ive also posted a photo of the other parts of the cockpit, and just realized the pilot headrest and backboard is completely the wrong shape. I am going to try an adjust the backboard shape later tonite, but the rear seat and main harness went in reasonably okay. I found that bending is a tricky undertaking with this PE stuff
 

Attachments

  • P1070182.JPG
    P1070182.JPG
    30.5 KB · Views: 59
  • P1070184.jpg
    P1070184.jpg
    11.1 KB · Views: 68
Last edited:

Users who are viewing this thread

Back