**** DONE: GB-53 1/72 Fw189 A-2 - Eastern Front

Ad: This forum contains affiliate links to products on Amazon and eBay. More information in Terms and rules

Looked at both links. I'll test the sprues at the temperature steps described, and see if I can fix that wing.
Thank a million all for responding and helping. I'll follow up with my results.
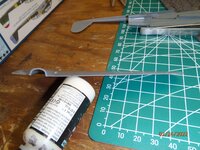
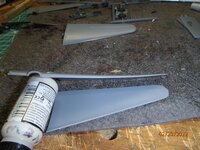
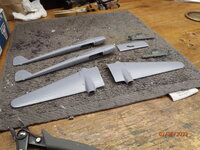
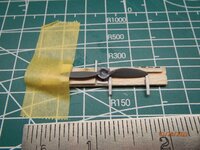
Use something un important to test with till you get the hang of it first. It will work out.
 
I wouldn't suggest using of the heat to correct a such warped wing. Especially that it is of the 1/72 scale. It always threatens with getting damaged either the trailing edge or leading one or even both. The part walls in the scale are quite thin and a such attemept may end up in trouble. I would suggest using one or two additional stringers/stiffeners glued to the inner surface of the wing half. If there is not too much of room you may scrape some of the plastic from there in order to get more space. Additionally, the thinner walls allow to bend the part without heating up easier. The way of making the part correct has been described by me in the thread about the 1/24 Bf 109E. Check posts on the page 14 and 15... I'm sure you can grasp what I'm talking about. The key is to put and attach the wing part on a flat and even surface while the glue is till flexible. When the adhesive is hardened, the part should still be straight and keep the shape. Because of the part size and way the part was warped I had to use the wooden straight slats as the surface .But you may use a piece of a quite thick and flat board.


P.S ... heating and cooling down of polystyrene is someting like tempering. The plastic becomes stiff but also delicate and more vulnerable to breaking or cracking.
I looked at the Me109 link. I may give this "stiffener" method a go. Thanks, I'll bet back to everyone.
 
I looked at the Me109 link. I may give this "stiffener" method a go. Thanks, I'll bet back to everyone.
Looked at fixing the warp structurally, per Wurger's advice, but I didn't have any materials suitable for that kind of repair, so I reverted to the Crimea River Donivanp hot water bath method after testing with sprues. With H2O at 185F, I dipped the outer half of the wing in the water for 30 sec at a time, then placing the wing on a flat kitchen countertop, and lightly pressing down on the wing tip and outboard of the nacelle until both edges contacted the countertop. It was done after about four cycles. The kitchen countertop kept the leading and trailing edges "planar" if you will, and it looked great. See attachment

Thanks to all for your help.
 

Attachments

  • 7 Warped upper port wing repaired.jpg
    7 Warped upper port wing repaired.jpg
    1.6 MB · Views: 20
  • 6 Warped upper port wing.jpg
    6 Warped upper port wing.jpg
    1.7 MB · Views: 22
Got some initial assembly and painting done. Wings, twin booms with wheel wells, and horizontal stabilizer cemented. Filling and sanding before further assembly and exterior priming. Assembled and painted/decaled crew seats and instruments. Also painted landing gear, tires and some interior panels. It's been a while since I worked in 1/72 scale, so my magnifying lamp is getting more use.

In looking at the propeller/spinner assemblies, I'm thinking of an aftermarket prop set. There are some by Quickboost described as fitting the ICM Fw 189 kit. My kit is Italeri. Any thoughts on that?
 

Attachments

  • 8 Airframe parts.JPG
    8 Airframe parts.JPG
    2 MB · Views: 25
  • 9 Cockpit parts.JPG
    9 Cockpit parts.JPG
    1.2 MB · Views: 30
I can't see too much trouble fitting the QB props on your kit. I would imaging that the only thing that might be wrong is the diameter of the hole for the shaft but that would be an easy fix.
 
I can't see too much trouble fitting the QB props on your kit. I would imaging that the only thing that might be wrong is the diameter of the hole for the shaft but that would be an easy fix.
I couldn't see there'd be much trouble using the QB props, but I wanted to check with the gallery of experts. If I'm not happy with the props that came with the kit, I'll order the QB set.
Thanks!!!
 
I couldn't see there'd be much trouble using the QB props, but I wanted to check with the gallery of experts. If I'm not happy with the props that came with the kit, I'll order the QB set.
Thanks!!!
Attempting assembly on props included with kit.
Built a propeller-assembly-jig to assist.
 

Attachments

  • 10 Propeller Assembly jig.jpg
    10 Propeller Assembly jig.jpg
    1.9 MB · Views: 22

Users who are viewing this thread

Back