- Thread starter
- #21
To Eduard: WHY?!
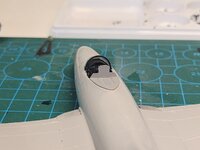
For some reason, AFTER I cut out the landing wheel door, I looked at photos of the F9Fs on the ground. Apparently the wheel door stays up, even after the aircraft is shut down! I found one photo with the doors down, but on an aircraft that had suffered battle damage. Why have those in the photoetch set but not the panel that swings out on the landing gear?
My reaction (artist's depiction):

 .
.