Navigation
Install the app
How to install the app on iOS
Follow along with the video below to see how to install our site as a web app on your home screen.
Note: This feature may not be available in some browsers.
More options
You are using an out of date browser. It may not display this or other websites correctly.
You should upgrade or use an alternative browser.
You should upgrade or use an alternative browser.
Fly! or else Post Your Models 2!
- Thread starter Pisis
- Start date
Ad: This forum contains affiliate links to products on Amazon and eBay. More information in Terms and rules
More options
Who Replied?- Thread starter
- #282
Pisis
2nd Lieutenant
Yeah, no problem, I'm quite busy too these days. Still found some time to work on samoloty. 
Thanks.
____________
I started with models when I was around 10-11 years old. It wasn't scale-building but rather a snap-together-drown-in-glue'n'color... I did many models, even dioramas, but all looked more like a Dalí sculpture then scale models... I started with modelling again some 2,5 years ago, but I didn't get on time so so far, there is around 5 finished models in my current mini-depot.
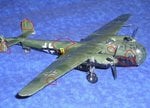
Remember the "Post Your models 1" thread here? I started that one with a few pictures of beslubber pieces. One of them was a Junker Ju 88 in 1/72 Scale - http://www.ww2aircraft.net/forum/off-topic-misc/post-your-models-1457.html


Junkers Ju 88 A-4, Revell 1/72
Maybe I'm a megalomaniac - I keep starting new and new models. Hmm, maybe it's just the natural progress of an avid builder.
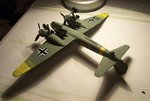
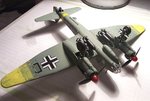
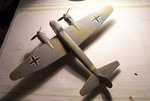
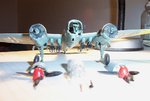
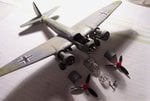
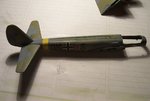
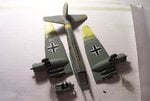
Today I took this model, sat down and like a robot, my hands started to refurbish this crap. I took of the props, engine cowlings, wheeldoor, cabin... Then also the wings and the parts of the front fuselage/nose.
There were some big moulds and **** that I had and still have to sand off. then I'll buy a new cabin and accessories (mybe new detailed engines?) and then I'll try to restore it into a winterized aircraft. Might be an interesting project. (Wow, this is the first time I gave myslef a "thumb-up" smiley!
Check out the pics:
Thanks.
____________
I started with models when I was around 10-11 years old. It wasn't scale-building but rather a snap-together-drown-in-glue'n'color... I did many models, even dioramas, but all looked more like a Dalí sculpture then scale models... I started with modelling again some 2,5 years ago, but I didn't get on time so so far, there is around 5 finished models in my current mini-depot.
Remember the "Post Your models 1" thread here? I started that one with a few pictures of beslubber pieces. One of them was a Junker Ju 88 in 1/72 Scale - http://www.ww2aircraft.net/forum/off-topic-misc/post-your-models-1457.html
Junkers Ju 88 A-4, Revell 1/72
Maybe I'm a megalomaniac - I keep starting new and new models. Hmm, maybe it's just the natural progress of an avid builder.

Today I took this model, sat down and like a robot, my hands started to refurbish this crap. I took of the props, engine cowlings, wheeldoor, cabin... Then also the wings and the parts of the front fuselage/nose.
There were some big moulds and **** that I had and still have to sand off. then I'll buy a new cabin and accessories (mybe new detailed engines?) and then I'll try to restore it into a winterized aircraft. Might be an interesting project.
Check out the pics:
Attachments
-
 junker ju88 refurbishment 001.jpg88.3 KB · Views: 134
 -
 junker ju88 refurbishment 002.jpg113 KB · Views: 138
 -
 junker ju88 refurbishment 003.jpg80.2 KB · Views: 130
 -
 junker ju88 refurbishment 004.jpg97 KB · Views: 117
 -
 junker ju88 refurbishment 006.jpg84.6 KB · Views: 133
 -
 junker ju88 refurbishment 008.jpg83.6 KB · Views: 105
 -
 junker ju88 refurbishment 007.jpg81.7 KB · Views: 127
- Thread starter
- #284
Pisis
2nd Lieutenant
i ALREADY BOUGHT THIS agama pURISOL - IT WORKS QUITE GOOD!


loomaluftwaffe
Tech Sergeant
- 1,840
- Dec 20, 2005
how do i strip a plane of it's tamiya acrylic coating?
The simpliest way is to use a remover for the acrylic paints ,personally I use the one of the WAMOD- a Polish company.You can use a remover of the other firm,certainly.Sometimes,I use a brake fluid R-3 (green colour).It is able to remove all acrylic paints and also Humbrol enamels.But, before you use the R-3 you should test a piece of plastic of that model was made and the fluid ,(it could be a piece of a frame if you have had it yet).I've verified it with plastic of the Italeri ,Academy,Revell and I haven't had any problem to wash up a model.Obviously,after that a model should be washed with soap and warm water.The best solution is also to remove all "glass" at first.
loomaluftwaffe
Tech Sergeant
- 1,840
- Dec 20, 2005
here, an Italeri Do-217K
It is hand painted and sucks ***, but I'm still a beginner, i got this kit for like $8

comments welcome, this is the 4th kit ive painted,
It is hand painted and sucks ***, but I'm still a beginner, i got this kit for like $8

comments welcome, this is the 4th kit ive painted,
- Thread starter
- #289
Pisis
2nd Lieutenant
Yes, you hjave to learn. Try to keep the patience, and as for the mixture of paint, try to mix as much as needed together, because that way you'll avoid the "maps" on your model.
Good luck!
Good luck!
loomaluftwaffe said:here, an Italeri Do-217K
It is hand painted and sucks ***, but I'm still a beginner, i got this kit for like $8
comments welcome, this is the 4th kit ive painted,
It is not easy to paint with acrylic enamels,especially if you use a brush.An airbrush is needed,really.However,making the paint more dilute with a thinner and painting two thin layers you could get a better effect.Besides,using the paper adhesive tape ( the one which is usually used for painting of windows), you could make easily the all straight lines of the colours of the camo.Secondly,using the paper tape to mask the "glass" you would make the cockpit conopy more clear.But,taking it into consideration that it's your 4th kit you've painted,it looks quite good.If you could see my first paper model .....
loomaluftwaffe
Tech Sergeant
- 1,840
- Dec 20, 2005
tnx for commenting, what do you mean by maps anyway?
well, if i got an additional 2 points in my report card i would have had an AB by now and would be in the process of refurbishing all four kits
I masked that using masking tape, cut many small squares and placed them till the window was full with only the panel lines, what would have happened?
well, if i got an additional 2 points in my report card i would have had an AB by now and would be in the process of refurbishing all four kits
I masked that using masking tape, cut many small squares and placed them till the window was full with only the panel lines, what would have happened?
- Thread starter
- #292
Pisis
2nd Lieutenant
Don't refurbish, make new ones and try to avoid former mistakes - that is the process of learning.loomaluftwaffe said:and would be in the process of refurbishing all four kits
loomaluftwaffe said:tnx for commenting, what do you mean by maps anyway?
Attachments
Pisis said:Don't refurbish, make new ones and try to avoid former mistakes - that is the process of learning.
Pisis is right, Looma.In many cases it is easy to make new ones than refurbishing.( the Murphy's rules)
loomaluftwaffe
Tech Sergeant
- 1,840
- Dec 20, 2005
oh, well pisis, those were fine until the maid tried to 'fix' my room
then he touched the model before it was cured
then i applied a gloss coat, and i tried to fix it, but the mixture was not right cause my sis was in the hospital
what could have caused them and how can they be prevented?
then he touched the model before it was cured
then i applied a gloss coat, and i tried to fix it, but the mixture was not right cause my sis was in the hospital
what could have caused them and how can they be prevented?
- Thread starter
- #296
Pisis
2nd Lieutenant
Patience, dude, patience... 
loomaluftwaffe
Tech Sergeant
- 1,840
- Dec 20, 2005
same type of paint, all the paint were tamiya acrylics, inc. the gloss coatWurger said:What was the gloss coat?
loomaluftwaffe
Tech Sergeant
- 1,840
- Dec 20, 2005
i suck at the painting, thats why it is the 4th kit i painted, out of 7 built
think i should just get on and hand paint them too? or get a freakin AB?
think i should just get on and hand paint them too? or get a freakin AB?
If you have enough money you can buy an AB and a compressor ( I recommend it).If not you have two ways,using a brush or making an easy AB with your own hand.However,you could think of changing acrylis paints into the Humbrol oil enamels that are easy to paint with a brushes.Here my old model of Hellcat painted with Humbrol enamels using a brush.I didn't use any tricks to make the model older and better.Simply,a model + paints + decals (silvering is clearly visible).Don't pay attention at its cockpit conopy.Unfortunately,It has had to be scratch-built by me and the material ,that I've used to make it,was not good quality.Therefore,it's become yellowish like conopies in early WW2 Russian fighters..he,he,he.
Attachments
Users who are viewing this thread
Total: 1 (members: 0, guests: 1)
Similar threads
- Replies
- 0
- Views
- 244
- Replies
- 8
- Views
- 1K

