- Thread starter
- #21
Totalize
Tech Sergeant
Terry,
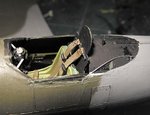
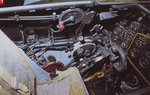
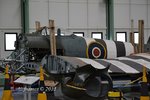
Interesting shots of the Duxford Typhoon. The two shots from the starboard side are of particular interest for me. The cockpit seat looks to be grey green and this colour can also can be seen on the framing to the lower left of the seat. Nice!!
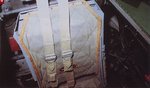
As to the means for anchoring the shoulder straps of the seat harness I will have to add a strip of evergreen rod to the armour plate and have the straps secured this way.
Dave.
Interesting shots of the Duxford Typhoon. The two shots from the starboard side are of particular interest for me. The cockpit seat looks to be grey green and this colour can also can be seen on the framing to the lower left of the seat. Nice!!
As to the means for anchoring the shoulder straps of the seat harness I will have to add a strip of evergreen rod to the armour plate and have the straps secured this way.
Dave.
Last edited: