Lancaster630
Airman 1st Class
- 282
- Feb 26, 2007
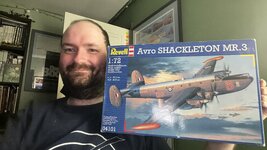
Hello all I hope this 1950's aircraft is O.K. I did spot a Mirage III thread so figured it should be,
I managed to get this started last night in the heat that the U.K. is currently getting and preventing me from painting the GB 55 Spitfire, my favorite of the Avro Heavies and the first one I am going to get done of the 6 I have in the stash!
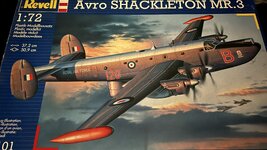
The kit was purchased second hand from Newark Air Museum and is a re-release from 1997 of the old 1967 Frog Shackleton and in a remarkable move Revell actually included a sheet of paper to tell us this!
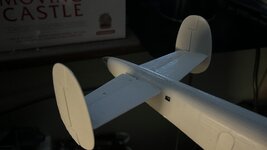
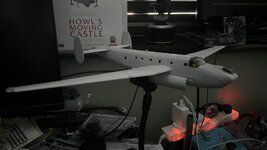
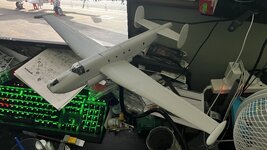
My plan is to display the model in flight with bomb doors open and have it on my desk at work to keep the Mosquito company and maybe me sane! (well in a work sense anyway)
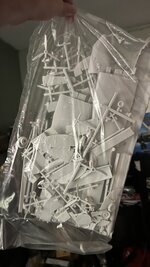
The Box sounded like a breakfast cereal packet to be perfectly honest, which worried me but despite a lot of parts going off the sprue I am glad to say that the bag containing them held and I think everything is there and mostly in one piece!
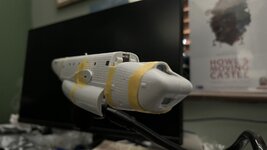
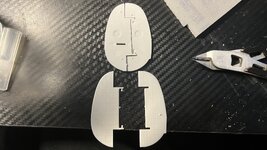
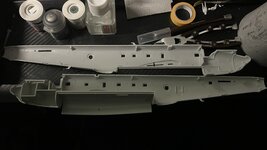
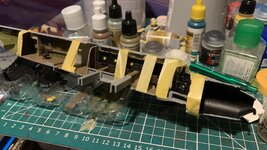
I began by working out what I could get into the fuselage halves and still be able to access afterwards to paint, before primer.
I then spent I kid you not, an hour cleaning up both fuselage halves properly, there are sink marks and so on but I like to keep warts and all on my builds so when as I can do with this I build the newer releases I can see how far we have come in the development of models (also because I can never get the blessed Humbrol filler to work! )
)
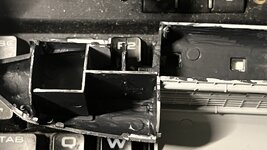
After that and some dry fitting I began building the interior and putting it into the aircraft, carefully cleaning each part and doing multiple test fits and so far have been rewarded.
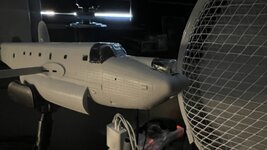
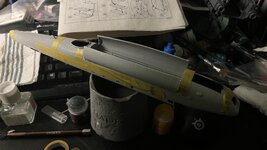
After taping the bomb door that I couldn't get away with not adding whilst adding the bombay area into position I then closed up the fuselage in a dry fit state and used tape to keep it together to encourage the interior parts a lot of which purely balance on an edge to dry in a fashion that allows the close up to be as perfect as I can get it to be.
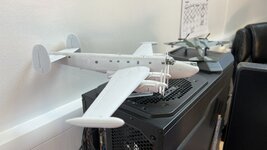
This brings us to where the project is now still sat at home (should have sent it to work rather than me (coffee break atm) lol) the slight gaps at the front visible in the picture do close with gentle pressure so I am not worrying about them.
I managed to get this started last night in the heat that the U.K. is currently getting and preventing me from painting the GB 55 Spitfire, my favorite of the Avro Heavies and the first one I am going to get done of the 6 I have in the stash!
The kit was purchased second hand from Newark Air Museum and is a re-release from 1997 of the old 1967 Frog Shackleton and in a remarkable move Revell actually included a sheet of paper to tell us this!
My plan is to display the model in flight with bomb doors open and have it on my desk at work to keep the Mosquito company and maybe me sane! (well in a work sense anyway)
The Box sounded like a breakfast cereal packet to be perfectly honest, which worried me but despite a lot of parts going off the sprue I am glad to say that the bag containing them held and I think everything is there and mostly in one piece!
I began by working out what I could get into the fuselage halves and still be able to access afterwards to paint, before primer.
I then spent I kid you not, an hour cleaning up both fuselage halves properly, there are sink marks and so on but I like to keep warts and all on my builds so when as I can do with this I build the newer releases I can see how far we have come in the development of models (also because I can never get the blessed Humbrol filler to work!
)After that and some dry fitting I began building the interior and putting it into the aircraft, carefully cleaning each part and doing multiple test fits and so far have been rewarded.
After taping the bomb door that I couldn't get away with not adding whilst adding the bombay area into position I then closed up the fuselage in a dry fit state and used tape to keep it together to encourage the interior parts a lot of which purely balance on an edge to dry in a fashion that allows the close up to be as perfect as I can get it to be.
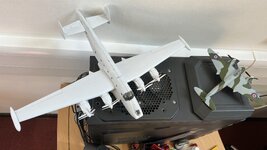
This brings us to where the project is now still sat at home (should have sent it to work rather than me (coffee break atm) lol)
the slight gaps at the front visible in the picture do close with gentle pressure so I am not worrying about them.