No 56 Squadron, RAF, 'The Firebirds', 1918 - 2008.

Ad: This forum contains affiliate links to products on Amazon and eBay. More information in Terms and rules

Current state of mine after a wee autopsy session this arvo... :)

STA51251.JPG
 
I can see the taking apart process has been finished successfully. Now put it into the brake fluid in order to remove the paint. Is that an enamel or acrylic one?
 
Brake fluid? Interesting idea my friend, never heard that one before.
The blue paint is acrylic (I was able to chip some off with a craftknife), but the silver appears to be enamel.

I'll post a seperate thread for the (re)build - don't want to hijack Terry's! :)
 
I understand. Enamels need to be soaked longer than these acrylic paints. Use the green brake fluid called R-3 or R-4 as memo serves. Today these can be named with DOT-3 or DOT-4 I think. For removing soaked remains of a paint (enamel) in holes or recessed panel lines use a toothbrush.
 
A bit more has been done, although not much to show after a number of hours of fiddly work. Some detail has been added to the rear fuselage, the lower cowling has been fitted, after removing some spurious detail and ejector pins. and the radiator has been fitted, with a new cap made from a small disc of plastic. Most of the time was spent drilling more holes for the rigging, before fitting the lower wing and tailplanes.
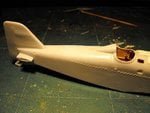
PIC 1. The rear fuselage as provided, lacking the prominent ribs.
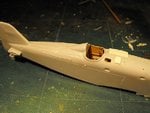
PIC 2. Ribs were added by cementing in place fine strands of stretched sprue, cut to the required lengths. The pic shows the work in progress, and each 'rib' has since been straightened, and the area lightly sanded.
PIC 3. Bottom cowling panel in place, with the rear joint yet to be attended to.
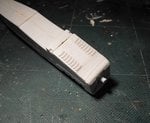
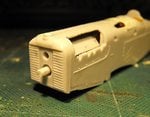
PIC 4. Before fitting the radiator, the prop shaft was shortened, and fitted into the hole for the air intake, leaving the hole for the shaft, at top, to represent the intake of the Wolsley 'Viper' engine. This was a 220hp engine, based on the Hispano-Suiza 200hp, but was direct drive, with the prop mounted lower than the geared HS engine, and the prop rotated in the opposite direction. Vic very kindly sent me both types of two-bladed prop and, after verifying which was which, the hole for the shaft was enlarged to accommodate the Smer part.
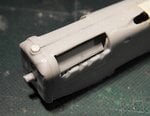
PIC 5. The kit radiator cap was a bit of a 'blob', so it was cut off, and a new cap made from a slice of plastic rod. The engine block can also be seen through the apertures for the cylinder heads and exhausts.
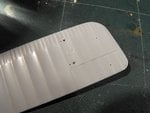
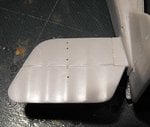
PICS 6 and 7. Holes have been drilled through the main planes and tailplanes, ready to accept the flying wires, bracing wires and control wires and horns, which will be fitted at a later stage. The joints have yet to be filled and blended into the fuselage.
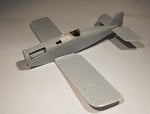
PIC 8. How the model looks to date.
Next step is to tackle the upper wing, inter-plane struts and cabane struts, before adding the small details to the top cowling, then starting the paint preparation.
Thanks again for your interest and kind comments, and I'll post more soon
 

Attachments

  • SE5 build 074.jpg
    SE5 build 074.jpg
    55.7 KB · Views: 73
  • SE5 build 077.jpg
    SE5 build 077.jpg
    54.9 KB · Views: 70
  • SE5 build 081.jpg
    SE5 build 081.jpg
    60 KB · Views: 86
  • SE5 build 083.jpg
    SE5 build 083.jpg
    50.8 KB · Views: 65
  • SE5 build 085.jpg
    SE5 build 085.jpg
    45.9 KB · Views: 88
  • SE5 build 087.jpg
    SE5 build 087.jpg
    49.2 KB · Views: 81
  • SE5 build 093.jpg
    SE5 build 093.jpg
    57.3 KB · Views: 91
  • SE5 build 097.jpg
    SE5 build 097.jpg
    33.3 KB · Views: 65
Last edited:
Coming along nicely Terry. Have you put the rigging drill holes all the way through the lower wing and tail?
 
Thanks chaps.
Vic, yes, the holes are all the way through. The intention is to use 'invisible' mending thread fro the rigging, passing it through the holes to the next one, and so on. Each point will be held by 'super glue', although some lines will only run from one point to the next.
 
Nice Terry! Take a lot of pictures when you're rigging it. Rigging biplanes has always scared me so I'm very interested in just how you go about it.
 

Users who are viewing this thread

Back