Radio Control P-40 Flown

Ad: This forum contains affiliate links to products on Amazon and eBay. More information in Terms and rules

Propman, if I understand your question correctly, you are looking for a camo scheme that would have been seen on a version of the Zero that had left and right exhausts. In that case the scheme on the Tamiya kit box qualifies, as the A6M3 has exactly that configuration. Here is a pic of that kit built by Roger Fabrocini at Hyperscale. He used a different scheme but you can see the placement of the exhuasts...

dscn5745.jpg


Another modeler built the kit using the mottled camo scheme but claims that the kit instructions differ from the box art. You can read his comments here...

http://www.hyperscale.com/features/2000/ZeroHampCB.htm
 
Last edited:
Thanks John Anthony, the dark green camo is perfect for what I'm looking for, with the exception of the blunt wing tips- I may run the fiberglass wing tips thru my band saw. This paint I'm using matches repairs so nice and easily it would not be to hard.

I will keep you guys posted on the build.

Propman, if I understand your question correctly, you are looking for a camo scheme that would have been seen on a version of the Zero that had left and right exhausts. In that case the scheme on the Tamiya kit box qualifies, as the A6M3 has exactly that configuration. Here is a pic of that kit built by Roger Fabrocini at Hyperscale. He used a different scheme but you can see the placement of the exhuasts...

dscn5745.jpg


Another modeler built the kit using the mottled camo scheme but claims that the kit instructions differ from the box art. You can read his comments here...

Tamiya 1/48 Mitsubishi A6M3 Zero Fighter (Hamp)
 
Last edited:
Thanks,

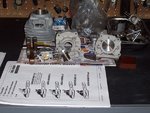
The prop is not true scale because you may not get the performance needed from a scale prop. The flying prop is 3 bladed 23" x 14 degrees pitch Bolly prop (carbon Fiber), the engine is a 5.8cu 98cc Sachs Dolmar chainsaw engine that I converted. I find a saw and huck all the casing off that is not needed, when I am done I have a crankcase etc, that is it. In it's day the Sachs is one of the leaders or use to be anyway with rc airplanes, a very high quality chainsaw manf. with high quality bearings, tolerances etc.

I ran out of time tonight and will hopefully shoot some photo's of the Zero build that I am now in the process of converting a Sachs 4.1cu.

see ya then---


That's outstanding.....

Is that a Scale prop?????
And, what kind of engine.
 
The individual exhaust stacks were on the A6M5 models and onwards, the earlier A6M2 Model 11 and 12 and A6M3 versions , Model 22 and 32 had the single exhausts on either side at the bottom of the cowlings...

Still want to see some pics...there are a couple of patterns that might interest you...mottle, cross hatch pattern....
 
No, not as complicated as the real gear, the r/c system is a pretty simple air system. This RC gear in the P40 do rotate 90' on a swivel assembly, were as the real gear rotated on a gear and pretty sure hydraulics, and sqaut switches, many vavles etc.
Again--the set-up is pretty simple--but
I will tell you this, retracts in a large scale rc airplane can be a royal pain in the a-s, especially finding air leaks or worse yet when they don't come down and lock, that can spell disaster, or a bad landing when you see your struts sticking out of the top of the wing-yes in a matter of seconds months of work--gone. But I luv it.
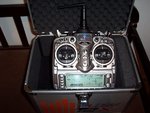
The real challenge I had was the gear doors, they must sequence or the gear will plow into the doors before they open or close. I did this by slowing the servo speed down or up at the air valves, there is 3 air valves and 6 air cylinders in this plane-that's were a good radio (JR) comes in that has many functions or channels.

Below is a link to Robart, one of a few who makes pretty quality r/c gear that may give you some insight.
The sky's the limit when it comes to gear-it can get very pricey-that depends on if it's a $500.00 airplane or a $20,000.00 airplane-your not going top put a cheap gear in a 20 grand jet--I hope not anyway .

20 - 55lbs | Robart Manufacturing

Amazing model!
A question- is the undercarriage retraction as complicated as on the orginal P-40?
 
Thanks Wayne,
Hopefully tonight after work I can shoot some pics, I ran out of time last night. Yes-- absolutely I would be interested in any photos you have.
Vinny,


The individual exhaust stacks were on the A6M5 models and onwards, the earlier A6M2 Model 11 and 12 and A6M3 versions , Model 22 and 32 had the single exhausts on either side at the bottom of the cowlings...

Still want to see some pics...there are a couple of patterns that might interest you...mottle, cross hatch pattern....
 
Wayne,
attached you will find my build in progress, unfortunately I am about 70% done, my next build I can start from the beginning. I tried to shrink these photo's and I'm on a different PC, if it is a problem I will try again.

I removed the photo's because I could not size them properly, Thanks to John Anthony they are now on page 3


The individual exhaust stacks were on the A6M5 models and onwards, the earlier A6M2 Model 11 and 12 and A6M3 versions , Model 22 and 32 had the single exhausts on either side at the bottom of the cowlings...

Still want to see some pics...there are a couple of patterns that might interest you...mottle, cross hatch pattern....
 
Last edited:
No, not as complicated as the real gear, the r/c system is a pretty simple air system. This RC gear in the P40 do rotate 90' on a swivel assembly, were as the real gear rotated on a gear and pretty sure hydraulics, and sqaut switches, many vavles etc.
Again--the set-up is pretty simple--but
I will tell you this, retracts in a large scale rc airplane can be a royal pain in the a-s, especially finding air leaks or worse yet when they don't come down and lock, that can spell disaster, or a bad landing when you see your struts sticking out of the top of the wing-yes in a matter of seconds months of work--gone. But I luv it.
The real challenge I had was the gear doors, they must sequence or the gear will plow into the doors before they open or close. I did this by slowing the servo speed down or up at the air valves, there is 3 air valves and 6 air cylinders in this plane-that's were a good radio (JR) comes in that has many functions or channels.

Below is a link to Robart, one of a few who makes pretty quality r/c gear that may give you some insight.
The sky's the limit when it comes to gear-it can get very pricey-that depends on if it's a $500.00 airplane or a $20,000.00 airplane-your not going top put a cheap gear in a 20 grand jet--I hope not anyway .

20 - 55lbs | Robart Manufacturing

Thx!
 
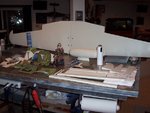
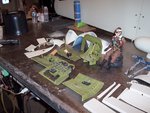
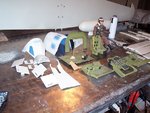
Here are your pics in forum format, 600x450 pixel jpegs. That's quite a workshop you've got - most impressive!
 

Attachments

  • zz1.jpg
    zz1.jpg
    57 KB · Views: 112
  • zz2.jpg
    zz2.jpg
    35.8 KB · Views: 136
  • zz3.jpg
    zz3.jpg
    36.2 KB · Views: 111
  • zz4.jpg
    zz4.jpg
    61.5 KB · Views: 109
  • zz5.jpg
    zz5.jpg
    50.3 KB · Views: 116
  • zz9a.jpg
    zz9a.jpg
    66.7 KB · Views: 112
  • zz9.jpg
    zz9.jpg
    67.4 KB · Views: 114
  • zz8.jpg
    zz8.jpg
    60.2 KB · Views: 115
  • zz7.jpg
    zz7.jpg
    71 KB · Views: 128
  • zz6.jpg
    zz6.jpg
    52.9 KB · Views: 133
  • zz9b.jpg
    zz9b.jpg
    58.3 KB · Views: 111
  • zz9d.jpg
    zz9d.jpg
    44.4 KB · Views: 116
  • zz9e.jpg
    zz9e.jpg
    53.8 KB · Views: 128
The P-40 was a total bare bones kit with fuse and a box of wood for the wings and allot of imaginantion.

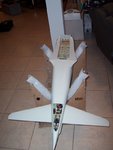
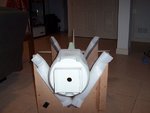
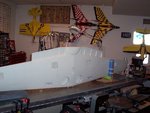
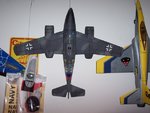
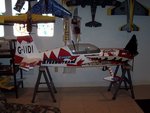
The Zero is what they call a ARF kit (All Ready to Fly) that I traded from a guy who needed a job done bad- I really didn't want this palne at first. This plane was in bad shape when I got it, the previous owner butcher it up and sat in my shop for about 1.5 years before I decided to build or re-do, and I almost threw it in the dumspter because I didn't have time. I've done this before (kit bashing we call it) and really can be more work and take more skill than starting from a wood scratch build because you must re-design and strengthen to an existing structure--and the most important thing is keep it light- every oz counts.

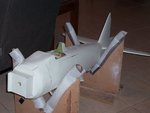
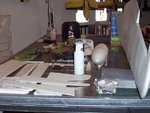
The wings were covered with film, the fiberglass fuselage was some kind crap paint un-known. I totally gutted the plane stripping off covering paint, etc. I then added 6" to each wing tip made new ailerons flaps, built new flap gear wells, re- balsa sheeted, glassed and painted the wings including all panel lines etc. The wing tank I purchased from a supplier that will drop in flight via servo control. I had to modify the wing tank to fit the wing camber with the release mechanism I made.

The fuselage vertical horizontal stabs were separate pieces, They were striped of covering and glassed to fit fairings to a one piece empennage, re-built all control surfaces and re-configured the servo controls to operate the elevator and rudders inside the fusealage. The canopy was one piece, I gingerly cut that to fit the sliding rails so it slides open by hand.

The engine you can see in work--I could go on on--yes very time consuming but fun.


Amazing! You bought this plane as a kit?
 
Hey Seesul,
I just remembered something very interesting---- and what a small world it is, I see your from the Czech Republic? I have 40% almost 1/2 scale Murdy Cap 232 kit that came from the Czech Republic. A very nice airplane kit I purchased here from a US importer.This is one of the best quality kits I have seen.

Is this factory close to you? I have only made contact with the factory once and think there maybe a language translation problem. This is my next build in line when I finish the Zero.


ZEDEK - MODEL , Bohdíkovská 11, 787 01 Šumperk, Czech Republic

Google Translate


The P-40 was a total bare bones kit with fuse and a box of wood for the wings and allot of imaginantion.

The Zero is what they call a ARF kit (All Ready to Fly) that I traded from a guy who needed a job done bad- I really didn't want this palne at first. This plane was in bad shape when I got it, the previous owner butcher it up and sat in my shop for about 1.5 years before I decided to build or re-do, and I almost threw it in the dumspter because I didn't have time. I've done this before (kit bashing we call it) and really can be more work and take more skill than starting from a wood scratch build because you must re-design and strengthen to an existing structure--and the most important thing is keep it light- every oz counts.

The wings were covered with film, the fiberglass fuselage was some kind crap paint un-known. I totally gutted the plane stripping off covering paint, etc. I then added 6" to each wing tip made new ailerons flaps, built new flap gear wells, re- balsa sheeted, glassed and painted the wings including all panel lines etc. The wing tank I purchased from a supplier that will drop in flight via servo control. I had to modify the wing tank to fit the wing camber with the release mechanism I made.

The fuselage vertical horizontal stabs were separate pieces, They were striped of covering and glassed to fit fairings to a one piece empennage, re-built all control surfaces and re-configured the servo controls to operate the elevator and rudders inside the fusealage. The canopy was one piece, I gingerly cut that to fit the sliding rails so it slides open by hand.

The engine you can see in work--I could go on on--yes very time consuming but fun.
 
here is one of those cross hatch patterns on an A6M2 Zero look closely at the fuselage for the 'X' type pattern.

Source : IIRC...from the Internet via j-aircraft.com and Jim Lansdale.
 

Attachments

  • A6M sakieofwewak zero_a.jpg
    A6M sakieofwewak zero_a.jpg
    26.9 KB · Views: 106

Users who are viewing this thread

Back