- Thread starter
- #61
Matt308
Glock Perfection
Nice Work!
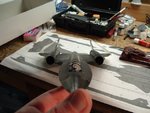
Man thats small!
You mean this one? It's just the camera angle causing a distorted vanishing point. She's actually fairly large. Keep in mind we're talking about a 100ft long 170,000lb airplane here. The model is almost 17 inches long.