Revell 1/72nd SR-71 w/D-21 Drone

Ad: This forum contains affiliate links to products on Amazon and eBay. More information in Terms and rules

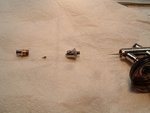
I finally got the gun to not blow bubbles in the paint/medium, but I could not get it to stop surging (spray, spit, spray, spit, etc.). I did everything I could think of; poking, cleaning, reverse pressure, hot water, cold water, window cleaner, soaking, paint thinner. I was about to give up.
 

Attachments

  • DSCF1693.JPG
    DSCF1693.JPG
    62.3 KB · Views: 69
But I remembered I had an ole gal on the shelves. Thought, "what would it hurt to switch nozzles out" and see what happens. Voila. :occasion9: and suddently it works. Not just the new nozzle and gun, but both! WTF is going on? Beats me.
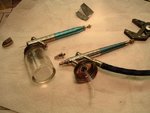
Anywho, at least I'm back in business.
 

Attachments

  • DSCF1694.JPG
    DSCF1694.JPG
    53.8 KB · Views: 62
I've had EXACTLY the same problem after using Tamiya acrylics Matt. I eventually changed the whole spray head, as I have a spare Badger 'Fine' tip from a worn-out airbrush. Meanwhile, I left the 'Medium' tip soaking in enamel thinners for 48 hours, then dried it, and gave the needle a VERY LIGHT rub with fine wet and dry, and cleaned out the tip nozzle with fuse wire and a paint brush, then washed the lot in enamel thinners. It seems O.K. now, and I think it was just 'dust' from dried paint interfering with the flow of paint/air.
It doesn't take much to make things b****y awkward!
I can just see in your photo that the needle seems a little coated, but it might be the lighting; all I can suggest is try what I did, then blow through a LOT of enamel thinners. If that starts to work, but doesn't fully cure it, try soaking the whole assembly, stripped down, in some cigarette lighter fluid (petrol type), the kind you'd use on a Zippo lighter. A bit radical, but that stuff cleans anything! Make sure you let it air dry, then blow a bit of thinners through it, before trying to use it again. Obviously, no naked lights!!!
Terry.
 
Just posted the above, then I saw your second post. Snap!
We both had the same problem, and same outcome!
 
I can just see in your photo that the needle seems a little coated, but it might be the lighting;

Yeah Airframes, its just the lighting and the fact that I'm using a crummy camera. My needles are spotless. As I noted earlier, what won't come off with thinner, glass cleaner or water comes off with wet 1500gr sandpaper. The needle is smooth as glass.

Depending upon my mood tomorrow, I may move up. But not likely. You can bet I'll come home with another build though. Like guns, a man can never have enough.
 
Okay, got the second round updated and some Future spat upon the her uglies. Only thing that kept me sane this night was... well its obvious. Next will be clear parts and canopies. Gonna take some minor putty work before I begin the fuselage paint. If I cave-in the windows I will kill myself.
 

Attachments

  • DSCF1695.JPG
    DSCF1695.JPG
    41.8 KB · Views: 84
  • DSCF1696.JPG
    DSCF1696.JPG
    42.5 KB · Views: 84
  • DSCF1697.JPG
    DSCF1697.JPG
    45 KB · Views: 98
Yeah. I made the work bench. It's 24" deep and about 16ft long. Typical of me I completely over engineered it. Made out of 4x4 stock with 2x4 supports and top. As if that wasn't enough, I put 1/2" ACX on top so that I could replace the surface as I doinked it up. I remind the family that since we reside in the Pacific Northwest prone to earthquakes, there are only two safe places in the house. Under the stairs and under the over engineered workbench. :lol:
 
Have the windows glued in the canopies now. Just need to clean up the glue residue.

First pic is the final clean up of the cockpit area that includes scraping of the areas where the glue needs plastic-to-plastic adhesion. I'm still an old school polystyrene glue fan for strength.

Second pic is the final dry fitting of the canopies. I'm still unsure what is the best method for gluing clear parts prior to masking. Perhaps others can weigh in. I have two goals, first a strong bond between window and canopy frame and second ability to cut and mask the windows without pushing them inside the model once the canopies are properly glued.

So thoughts on the following are appreciated:

1) Polystyrene plastic glue (e.g., Testors) that is prone to fogging, but results in a really strong bond.

2) White glue (e.g., Elmers) that dries clear and minimizes damage to the clear parts, but is notoriously weak in bond.

3) Superglue (e.g., Loctite Gel) that dries relatively clear, is somewhat susceptible to damaging clear parts with fogging, but has a near-term strong bond. [note that I have found that superglue bonds weaken over time]

4) Other?
 

Attachments

  • DSCF1708.JPG
    DSCF1708.JPG
    60 KB · Views: 70
  • DSCF1709.JPG
    DSCF1709.JPG
    69.6 KB · Views: 73

Users who are viewing this thread

Back