Scratch build Boeing F4B-4

Ad: This forum contains affiliate links to products on Amazon and eBay. More information in Terms and rules

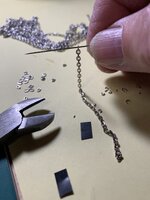
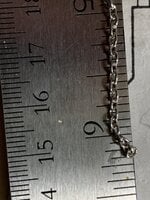
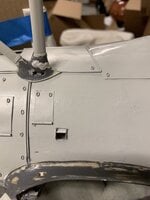
The answer was from ladies' ankle chains found at a local arts & crafts store. I was lucky that these small links also were of approximately the right size, if not scale.

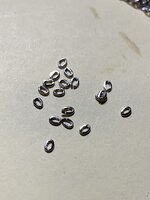
For about $2.00, I got access to hundreds of small " latches." I only needed to cut off the individual links.
 

Attachments

  • IMG_0381.jpeg
    IMG_0381.jpeg
    1.2 MB · Views: 3
  • IMG_0389.jpeg
    IMG_0389.jpeg
    1.4 MB · Views: 4
  • IMG_0382.jpeg
    IMG_0382.jpeg
    914.7 KB · Views: 3
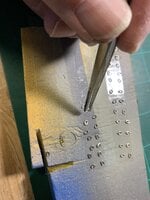
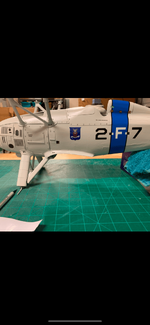
Using a pair of tweezers & CA glue, I carefully placed them all over various locations on the fuselage. I used Westburg's drawings & photos for my reference. I figured they lent themselves to very good effect.
 

Attachments

  • IMG_0403.jpeg
    IMG_0403.jpeg
    1.7 MB · Views: 5
  • IMG_0417.jpeg
    IMG_0417.jpeg
    953.8 KB · Views: 5
  • IMG_0419.jpeg
    IMG_0419.jpeg
    842.5 KB · Views: 4
  • IMG_0427.jpeg
    IMG_0427.jpeg
    1.3 MB · Views: 4
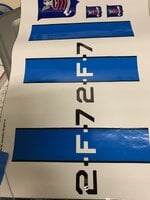
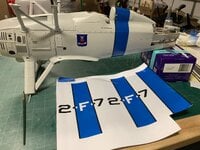
I ordered a set of custom graphics from a gentleman named Geoff Gill of U.K. ([email protected]) at very reasonable prices. He even took the time to carefully match the exact tone of blue from my rattle can.
 

Attachments

  • IMG_0488.jpeg
    IMG_0488.jpeg
    627.5 KB · Views: 2
  • IMG_0486.jpeg
    IMG_0486.jpeg
    1.3 MB · Views: 2
  • IMG_5765.png
    IMG_5765.png
    362.7 KB · Views: 3
  • IMG_5762.png
    IMG_5762.png
    304.4 KB · Views: 3
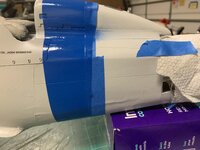
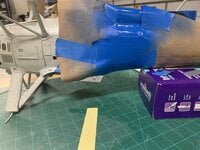
Unfortunately I could not use the graphics over compound curves, paneling & latch details. So I had to resort to painting the blue band using plenty of masking tape & rattle can of blue.
 

Attachments

  • IMG_0515.jpeg
    IMG_0515.jpeg
    819.8 KB · Views: 4
  • IMG_0510.jpeg
    IMG_0510.jpeg
    1.1 MB · Views: 4
Despite all of that masking tape & paper backing, that darn blue STILL managed to sneak under the protective layer & mess up different parts of the fuselage.

Sometimes I feel like I'm taking two steps forward & one step back….
 

Attachments

  • IMG_0502.jpeg
    IMG_0502.jpeg
    1.1 MB · Views: 3
  • IMG_0500.jpeg
    IMG_0500.jpeg
    970.2 KB · Views: 3
  • IMG_0497.jpeg
    IMG_0497.jpeg
    1.4 MB · Views: 3
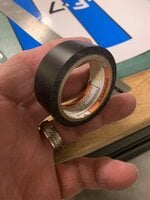
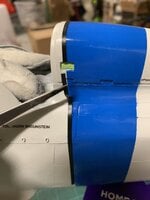
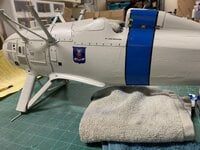
After correcting the blue mess, black electrical tape was cut into thin strips & used to act as a borderline on the blue band.

Notice how I cut the tape to allow for various spaces such as hinges & panels of different depths.
 

Attachments

  • IMG_0499.jpeg
    IMG_0499.jpeg
    979.5 KB · Views: 3
  • IMG_0513.jpeg
    IMG_0513.jpeg
    924.1 KB · Views: 3
I managed to use the letters & numbers from the graphic sheets.

This is where I am as of today.

Thank you for watching. I'll be posting more as I progress forward.
 

Attachments

  • IMG_0518.jpeg
    IMG_0518.jpeg
    1.1 MB · Views: 5
  • IMG_0522.png
    IMG_0522.png
    224.7 KB · Views: 4
Got a question:

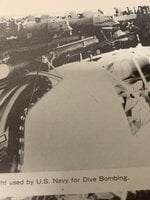
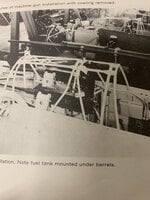
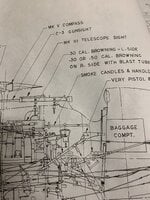
Does anyone know or have detailed photos of the gun sight itself? I've got Westburg's drawings & photos of the telescope sight. As you can see, I made a black telescope out of plastic tubing & brass strips.

The photos & drawings show a small tube mounted next to the telescope & it extends beyond the telescope towards the nose. But for the life of me, I have no idea as to what exactly does this thin narrow tube that's supposed to be the gun sight looks like.

Any help would be appreciated.
 

Attachments

  • IMG_0428.jpeg
    IMG_0428.jpeg
    1 MB · Views: 3
  • IMG_0429.jpeg
    IMG_0429.jpeg
    1.3 MB · Views: 3
  • IMG_0431.jpeg
    IMG_0431.jpeg
    1.3 MB · Views: 3
  • IMG_0430.jpeg
    IMG_0430.jpeg
    1.5 MB · Views: 3
  • IMG_0434.jpeg
    IMG_0434.jpeg
    1.1 MB · Views: 3
It implies more then one so your object may be a gunsight on its own.
 

Users who are viewing this thread

Back