Nicely done so far!
Navigation
Install the app
How to install the app on iOS
Follow along with the video below to see how to install our site as a web app on your home screen.
Note: This feature may not be available in some browsers.
More options
You are using an out of date browser. It may not display this or other websites correctly.
You should upgrade or use an alternative browser.
You should upgrade or use an alternative browser.
Scratch build Boeing F4B-4
- Thread starter Skyediamonds
- Start date
Ad: This forum contains affiliate links to products on Amazon and eBay. More information in Terms and rules
More options
Who Replied?- Thread starter
- #302
Skyediamonds
Staff Sergeant
- 1,362
- May 26, 2018
Thank you. It's appreciated.Really excellent work !
- Thread starter
- #303
Skyediamonds
Staff Sergeant
- 1,362
- May 26, 2018
Airframes, thank you.Really excellent work !
- Thread starter
- #304
Skyediamonds
Staff Sergeant
- 1,362
- May 26, 2018
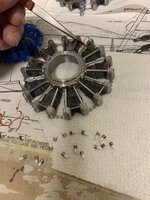
Just a quick update as the Boeing project gets closer to being complete.
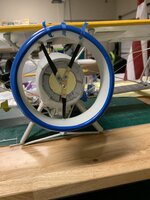
I added spark plugs & electrical harness.
Brass wire was used as harness. I cut up a prototype brass wire & fitted it to one of the cylinders & made drivers adjustments until I got it just right. From there, it was just a matter of making duplicates for all 9 cylinders.
Small plastic tubing wrapped with thin strips of black electrical tape painted brass as spark plugs.
Because of all the fine detail on the cylinder cooling fins, combined with the engine being partially buried behind a faceplate & cowl ring, I wanted the electrical portion of the engine to really stand out & make a statement. I think I achieved that goal.
Attachments
SaparotRob
Unter Gemeine Geschwader Murmeltier XIII
Just (expletive) amazing.
- Thread starter
- #306
Skyediamonds
Staff Sergeant
- 1,362
- May 26, 2018
- Thread starter
- #307
Skyediamonds
Staff Sergeant
- 1,362
- May 26, 2018
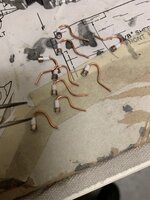
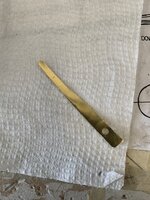
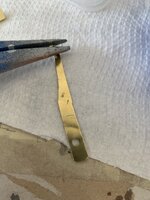
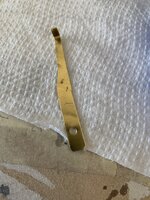
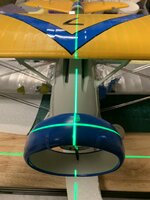
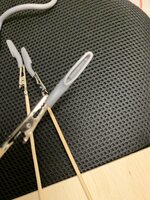
The brass strips were painted black to help hide them behind the engine.
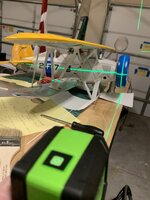
They were attached to the "firewall." I also used a laser light to help get the cowl ring lined up to the fuselage datum line.
I knew that this model is for display only so I felt no need for heavy reinforcement on the brackets.
They were attached to the "firewall." I also used a laser light to help get the cowl ring lined up to the fuselage datum line.
I knew that this model is for display only so I felt no need for heavy reinforcement on the brackets.
Attachments

- Thread starter
- #308
Skyediamonds
Staff Sergeant
- 1,362
- May 26, 2018
- Thread starter
- #309
Skyediamonds
Staff Sergeant
- 1,362
- May 26, 2018
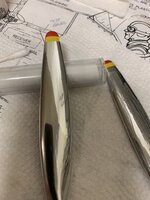
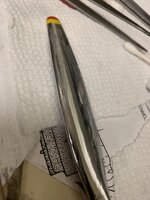
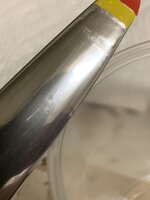
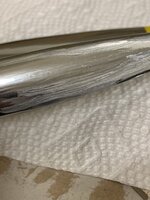
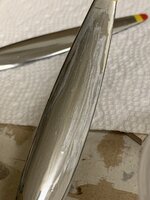
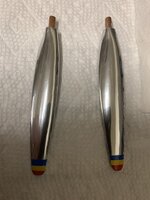
Regarding the chrome painted blades, this was an area that caused me a lot of grief.
I decided the Molotow chrome paint would peel off if I used masking tape to paint the propeller tips.
Using a scrap piece of plastic, I applied the chrome paint & waited at least 48 hours to completely cure. I then applied masking tape to see if the chrome would hold or peel off.
I was right. The chrome peeled off.
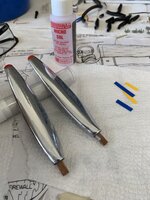
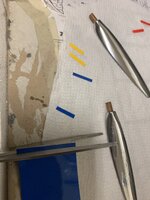
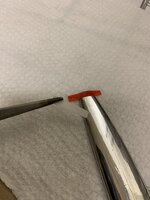
So the next best thing was to make my own decals from strips of colors.
Unfortunately, I found out this chrome is also sensitive to decal setting solutions.
I decided the Molotow chrome paint would peel off if I used masking tape to paint the propeller tips.
Using a scrap piece of plastic, I applied the chrome paint & waited at least 48 hours to completely cure. I then applied masking tape to see if the chrome would hold or peel off.
I was right. The chrome peeled off.
So the next best thing was to make my own decals from strips of colors.
Unfortunately, I found out this chrome is also sensitive to decal setting solutions.
Attachments
- Thread starter
- #310
Skyediamonds
Staff Sergeant
- 1,362
- May 26, 2018
- Thread starter
- #311
Skyediamonds
Staff Sergeant
- 1,362
- May 26, 2018

- Thread starter
- #312
Skyediamonds
Staff Sergeant
- 1,362
- May 26, 2018
- Thread starter
- #313
Skyediamonds
Staff Sergeant
- 1,362
- May 26, 2018
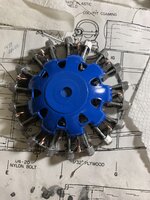
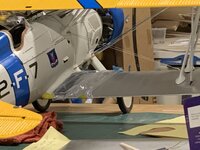
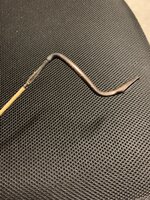
I received custom 3-D printed exhaust manifolds from: I Fly Tallies ( IFlyTallies.com ). They're great source for providing custom 3-D one-off's prints.
I painted a layer of flat black followed by a thin dusting of copper go give that heat & slightly rusted look.
I painted a layer of flat black followed by a thin dusting of copper go give that heat & slightly rusted look.
Attachments
- Thread starter
- #314
Skyediamonds
Staff Sergeant
- 1,362
- May 26, 2018
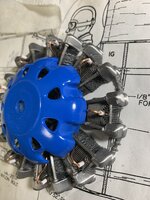
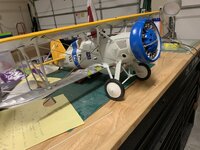
Tonight, I'll be combining all the engine details together & mounting it inside the cowl.
- Thread starter
- #315
Skyediamonds
Staff Sergeant
- 1,362
- May 26, 2018
Thank you very much. It's greatly appreciated.Just (expletive) amazing.

special ed
1st Lieutenant
- 6,587
- May 13, 2018
More learning - Thanks
Snautzer01
Marshal
- 46,292
- Mar 26, 2007
Silly skills.
Lovely work so far!
- Thread starter
- #320
Skyediamonds
Staff Sergeant
- 1,362
- May 26, 2018
Spl:More learning - Thanks
Glad it helps. Thank you
Users who are viewing this thread
Total: 1 (members: 0, guests: 1)