Testors 1/48 P-47D-5 Thunderbolt

Ad: This forum contains affiliate links to products on Amazon and eBay. More information in Terms and rules

WHOA! STOP! That pic is of a converted P47 with a passenger seat in the rear, that's why the spine sides are set further to the rear.
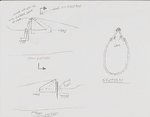
But the description by Glenn is what I was meaning, where the card is inside the fuselage spine, and will be set back slightly from the outer skin, like the real thing. The filler I mentioned is just to make the joints smooth.
The 'triangles' of card should come all the way forward to where the top of the spine ends at the front, and where the bulkhead/headrest joins vertically. Look at the photo and close up painting Wojtek posted, and you'll see what i mean.
 
Terry I didn't realize it was a 2 seater as all the pictures I have of it have no seats at all (removed for restoration) :oops: I would agree with you that the forward edge of the card should line up with the top point of the razorback. Sorry for the mix-up corrected pic below
 

Attachments

  • ScannedImage.jpg
    ScannedImage.jpg
    47.6 KB · Views: 135
Looks like you're going great guns here Harrison and what fantastic support from the team. Good going my man and good on'ya guys.
 
Last edited:
Okay no worries I didn't start. So I'll do that later today if I have time.

I agree with you Vic, thanks a ton guys! :wave:
 
No problem Glenn. When I saw it, I thought "Eh? That's odd looking!". Then I realised I'd seen a pic of the same aircraft, looking into the rear of the cockpit, with the seats in place.
The new drawing is more or less correct, but the bulkhead with the head rest on it is not a separate part - it forms the bulkhead blanking-off the razorback. The resin kit part needs to fit into the inverted 'V' of the razor, flush with the front edge, forming the 'wall'.
I'll post some pics later, showing what it looks like.
 
the bulkhead with the head rest on it is not a separate part - it forms the bulkhead blanking-off the razorback. The resin kit part needs to fit into the inverted 'V' of the razor, flush with the front edge, forming the 'wall'.

That would make things simpler, Just place the cockpit tub so the armor closes everything off. As long as the alignment between the panel and the front of the cockpit opening still works out. The resin is probably correct but I don't know if I'd trust Testors, of should I say Hawk, because I think that is the kits origin.

Harrison, Make sure you take a picture of the cockpit tub test fitted before you glue anything when you get to that point. This is getting complicated!

Terry, I think we're going to give Harrison premature gray hair before this thing is over!:lol:
 
Hi guys,

All my Academic classes finals are over... I have Spanish next but since I'm switching to German it wont be the biggest deal.

I understand what you guys want me to do. Shouldn't be very difficult.

Terry, Aeromaster sells decals for the 2 seater, once I get better at building models etc. etc. I would really like to try and make one!
 
Das ist gut Senor!
The two seater in Glenn's pic is a current preserved aircraft, keeping the outward appearance, but allowing a passenger seat, like a lot of today's preserved, airworthy Mustangs.
First things first; I can only find one landing gear leg, both wheels, and the windscreen and canopy. Do you want me to send what I've got? Spent hours today searching, and missed the mail!
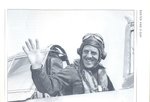
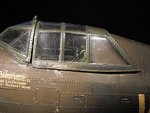
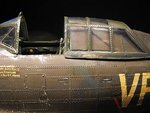
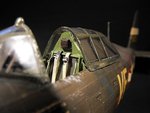
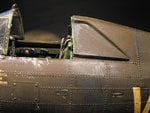
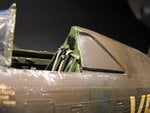
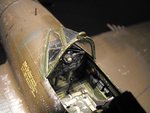
Anyway, here's some pics showing what the bulkhead and razorback should look like. The B&W pic is from the Osprey book '56th Fighter Group' by Roger Freeman, the rest are pics of my crappy old model. They show how the area looks with the canopy closed, open and removed.
Hope this helps.
The last pic shows the area of the instrument panel, without the shroud, but with the frames for the gun sight mount.
 

Attachments

  • Can Jan 318.jpg
    Can Jan 318.jpg
    68.3 KB · Views: 120
  • Can Jan 319.jpg
    Can Jan 319.jpg
    70.5 KB · Views: 124
  • Can Jan 326.jpg
    Can Jan 326.jpg
    70.6 KB · Views: 118
  • Can Jan 329.jpg
    Can Jan 329.jpg
    44.2 KB · Views: 121
  • Can Jan 321.jpg
    Can Jan 321.jpg
    59.7 KB · Views: 115
  • Can Jan 322.jpg
    Can Jan 322.jpg
    51.1 KB · Views: 128
  • Can Jan 325.jpg
    Can Jan 325.jpg
    51.8 KB · Views: 118
How do P-51 legs compare to the Thuds? If they are very different you can send the one leg and see what I can do. If not The other stuff is fine. Thanks once again for sending me this stuff!!

I did the bulkhead, glued it, will let it cure, sand it, and pictures later tonight or tomorrow. Started on the scratch gear bays today.
 
Lot of difference between the P51 and P47 legs H. The P47 is longer, wider and a different angle. Use the one I send as a pattern for altering the kit's legs. As long as you can keep the axle, it should be fairly simple to remove the hub and fit the resin wheels.
 
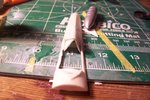
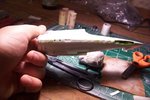
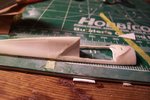
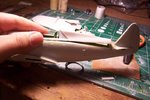
Ok some sanding filling and what have you but I don't think they're too bad.
 

Attachments

  • 102_6921.JPG
    102_6921.JPG
    66 KB · Views: 110
  • 102_6920.JPG
    102_6920.JPG
    81.8 KB · Views: 138
  • 102_6919.JPG
    102_6919.JPG
    77.1 KB · Views: 123
Not bad H, but the 'triangles' in the razorback don't look vertical in the pics. You'll need to line them up with the cockpit rear bulkhead, by dry fitting the whole cockpit and, fuselage and razorback spine, otherwise there'll be a big, triangular gap. The spine sgould stiffen-up once fitted.
The wheels bays look good so far.
 
Grrrrr this build is testing my patience.

Add the card again, and looks perfect. They didnt meet at the right point but I think It can be sanded, the armor fits fine against it.

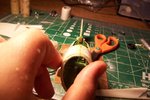
Then I tried with the combing to the instrument panel, got it, but it isn't long enough...and finished the bays, and closed it one wing up. The testors way was to attatch the gear inside the wing before closing but I'm trying to make this one right.

I've been on the bench 5 hours and did those thing, pics later.
 
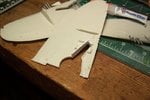
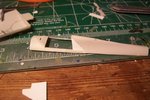
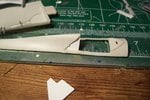
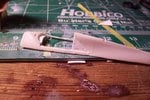
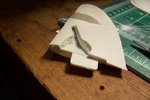
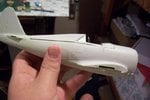
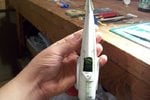
Ok so the fuselage wouldnt close up, so I used a wrench and tightened it to MAKE it close. Finally closed. Then to ensure I ran superglue over the seams to keep it that way. I sanded and then added putty.

NOW, the spine is a bad fit and the armor doesnt reach where it should.....what do i do?
 

Attachments

  • 102_6928.JPG
    102_6928.JPG
    78.7 KB · Views: 134
  • 102_6927.JPG
    102_6927.JPG
    85.6 KB · Views: 122
  • 102_6926.JPG
    102_6926.JPG
    65.9 KB · Views: 132
  • 102_6925.JPG
    102_6925.JPG
    66.7 KB · Views: 127
  • 102_6923.JPG
    102_6923.JPG
    61.6 KB · Views: 126
  • 102_6929.JPG
    102_6929.JPG
    71.5 KB · Views: 146
  • 102_6930.JPG
    102_6930.JPG
    73 KB · Views: 128
  • 102_6931.JPG
    102_6931.JPG
    46.8 KB · Views: 142
  • 102_6932.JPG
    102_6932.JPG
    60.6 KB · Views: 132
All is not lost Harrison!!! That spine joint is going to be ugly, but nothing that can't be fixed with a lot of filler and fileing and sanding. Do you have a needle file set? That is going to be a necessity here. The first thing to do is get that fuselage joint cleaned up right away because the superglue you used in it is going to be like a rock by tomorrow and 10 times harder to file down and sand! I'm home tonight and will check the forum 15 or 20 minutes and maybe we can save this jug!!
 

Users who are viewing this thread

Back