Navigation
Install the app
How to install the app on iOS
Follow along with the video below to see how to install our site as a web app on your home screen.
Note: This feature may not be available in some browsers.
More options
You are using an out of date browser. It may not display this or other websites correctly.
You should upgrade or use an alternative browser.
You should upgrade or use an alternative browser.
Trumeter 1/32 Scale 2 Big and Too Heavy(Zotz Decals)
- Thread starter STRYKER
- Start date
Ad: This forum contains affiliate links to products on Amazon and eBay. More information in Terms and rules
More options
Who Replied?Nicely done!
Airframes
Benevolens Magister
Nice one. Perhaps what appear to be weathering, is maybe finger marks, or the effects of lighting? Getting a good photo of bare metal in models, however well it's finished,can be a difficult task - more so with digital photography.
B-17engineer
Colonel
Looks Great!
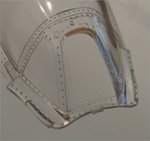
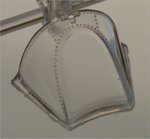
I like it looks like a tired ole workhorse to me.How was the kit?I have this in the stash and upon looking at yours the front windscreen does not look that far off.I have seen reviews while the kit was pretty much favorable the front windscreen is abit off compared to the Hasegawa's.
From LSP Trumpeter 02263: 1/32 Republic P-47D Thunderbolt | Large Scale Planes Hase up top Trump bottom..One solution came to mind was to use tape strips,rivet tooll,dip in future and proceed to paint.
From LSP Trumpeter 02263: 1/32 Republic P-47D Thunderbolt | Large Scale Planes Hase up top Trump bottom..One solution came to mind was to use tape strips,rivet tooll,dip in future and proceed to paint.
Attachments
vikingBerserker
Lieutenant General
BEAUTIFUL!
Night Fighter Nut
Master Sergeant
Nice job. 
- Thread starter
- #9
STRYKER
Airman
Looking great. However the weathering should have been more subtle in my humble opinion.
Nice one. Perhaps what appear to be weathering, is maybe finger marks, or the effects of lighting? Getting a good photo of bare metal in models, however well it's finished,can be a difficult task - more so with digital photography.
Thanks to everybody for the comments. In addressing the decision on weathering, I opted to go with a heavy weathering on "2 Big and Too Heavy" . I am sure most are aware that the P-47N was used exclusively in the pacific and this particular aircraft arrived for use in 1945. It was originally painted with the top half of the tail yellow, halved by a black stripe and the planes serial number below the line. The anti-glare strip on top of the fuselage originally went all the way back to the tail. With the addition of the full yellow striped tail, the anti-glare was removed from the rear of the plane. Some say that it was shortened but in my opinion, judging from the above photo, it was removed leaving just a touch of faded strip right under the canopy forward of the antenna. In making my decision on the amount of weathering, I also looked at the port side Star insignia which seems to my eye, extremely faded. If the top side of the wing is that weathered and faded, common sense tells me it would be evenly worn across the entire top of the aircraft. This plane was based on Saipan which only had a dirt airfield causing the planes to be layered in dust. Add that to the salty air and unrelenting sun, I personally feel these aircraft did weather very prematurely and that is what I tried to capture. I hope that there are no fingerprints in my work, but I am not perfect, nor do I really try to be. (It just comes naturally. LOL Just kidding) Seriously I respect all opinions but this is mine concerning this aircraft. I love a nicely weathered aircraft as it just gives it character from a mundane, die cast look you sometimes see when trying to represent what's portrayed on the box. Thanks again guys!
I like it looks like a tired ole workhorse to me.How was the kit?I have this in the stash and upon looking at yours the front windscreen does not look that far off.I have seen reviews while the kit was pretty much favorable the front windscreen is a bit off compared to the Hasegawa's.
Three complaints about this kit:
1. It has a beautifully detailed engine and recreates the entire Supercharger system magnificently. WHY? Unless you are going to cut away the side or utilize the clear cowling, this is a useless waste of time and effort.
2. The design of the tail assembly marriage to the fuselage is horrific! Be prepared to replace lines and rivets and use of filler will be required. I believe it could have been engineered much better.
3. The front windscreen is nice but I did have trouble with the fit. As you know since you have the kit, the screen is recessed into the fuselage instead of sitting on top like in some kits. I felt like my screen was not quite wide enough to fill the recess which left a slight gap. Pushing down on the top of the screen would spread it into place but it would then pop back out. Too much tension caused me to worry about cracking the screen so I opted to leave it as is. Maybe I was a millimeter off somewhere in my fit. But I think it was more of a kit issue. I will have to find out when I do my next one.
Thanks everyone,
Ray
Westfield Charlie
Airman 1st Class
Nicely done.
Hotntot
Senior Airman
Nice one. Certainly looks like it's been in use. Prehaps looking at the craft from a distance (instead of standing over it) it doesn't look as heavy so getting a good effect with scale in mind but I like the effect you were after.
What paint did you use and was there any particular way you set about it?
What paint did you use and was there any particular way you set about it?
otftch
Staff Sergeant
NIce job.
Ed
Ed
love it !
did that in 1/48 using the Revell kit
did that in 1/48 using the Revell kit
Not bad at all.
Crimea_River
Marshal
Looks good!
Users who are viewing this thread
Total: 1 (members: 0, guests: 1)


