Navigation
Install the app
How to install the app on iOS
Follow along with the video below to see how to install our site as a web app on your home screen.
Note: This feature may not be available in some browsers.
More options
You are using an out of date browser. It may not display this or other websites correctly.
You should upgrade or use an alternative browser.
You should upgrade or use an alternative browser.
1/48 Special Hobby Reggiane Re.2005 Sagittario (1 Viewer)
- Thread starter Grant Barr
- Start date
-
- Tags
- 1/48 re.2005 special hobby
Ad: This forum contains affiliate links to products on Amazon and eBay. More information in Terms and rules
More options
Who Replied?Nicely done so far!
- Thread starter
- #83
Grant Barr
Senior Airman
Next update. I've applied an enamel based gloss clear coat; it turned out OK but like polyurethane I seem to get a slightly grainy finish. Probably something wrong with my technique rather than any issue with the paint.
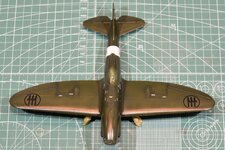
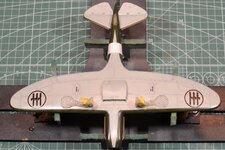
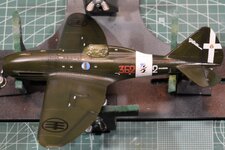
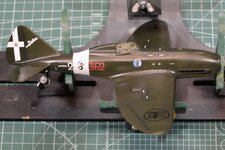
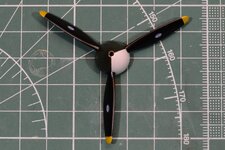
I've also been busy applying the decals. Having never done a Special Hobby kit before I've also not had any experience with their decals. They do seem to have quite a bit of carrier film at the edges which needs to be trimmed, but the film itself is very thin and beds down quite nicely with an application of MicroSol. The only tearing issues I had were with the two lower wing decals - they are the largest and were therefore the hardest to move once applied. They're not perfect but it will have to do - they aren't going anywhere now without being completely destroyed! The only other thing I noticed is that the colours tend to wash out a little once applied - this is not necessarily a bad thing given I'll be weathering them to tone them down a bit anyway. Shots below.
Planning on doing another clear coat tomorrow weather permitting. Then it will be onto the weathering stage.
Thanks for looking in.
I've also been busy applying the decals. Having never done a Special Hobby kit before I've also not had any experience with their decals. They do seem to have quite a bit of carrier film at the edges which needs to be trimmed, but the film itself is very thin and beds down quite nicely with an application of MicroSol. The only tearing issues I had were with the two lower wing decals - they are the largest and were therefore the hardest to move once applied. They're not perfect but it will have to do - they aren't going anywhere now without being completely destroyed! The only other thing I noticed is that the colours tend to wash out a little once applied - this is not necessarily a bad thing given I'll be weathering them to tone them down a bit anyway. Shots below.


Planning on doing another clear coat tomorrow weather permitting. Then it will be onto the weathering stage.
Thanks for looking in.
Vic Balshaw
Major General
My this is looking so good. 
Berny5664
Senior Airman
The Bogeyman (Spauracchio) is the symbol of one of the most important fighter groups of the Italian Air Force...
Great work Grant
Great work Grant
fubar57
General
Love it 
- Thread starter
- #88
Grant Barr
Senior Airman
So that's what he was. I was trying to tell my wife it was a fighter unit emblem - just got a blank look and a shrug (sighs....)The Bogeyman (Spauracchio) is the symbol of one of the most important fighter groups of the Italian Air Force...
Thanks Berny - a bit of local knowledge is very much appreciated.

Looks good so far!
- Thread starter
- #90
Grant Barr
Senior Airman
Update time - back training for the next Triathlon now so spare time for models has been a bit scarce.
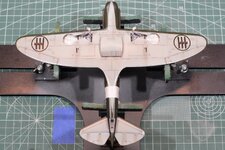
Since the last post I've managed to put down a clear coat over the decals. I've decided to stay with a satin finish as the photos and text from a couple of reference books indicate that the factory finish was indeed almost glossy. The hosts below are following some weathering - the usual stuff like dark wash in the panel lines and some chipping and oil/dirt staining.
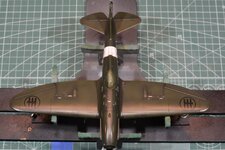
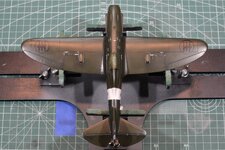
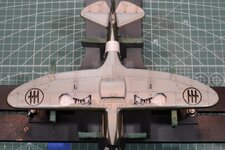
It might seem that the top side has very little weathering, although this is not the case. With the green being so dark and the pre-shading still quite strong the additional staining does not seem very obvious. I did also try my hand at doing some dot filtering but I was not at all happy with the result so I wiped it all off and just stayed with what you can see here. Not sure what I am doing wrong technique-wise with dot filters but I'll keep practicing and one day I might even get it right!!
Finally, with all the handling I managed to rub off quite a bit of the aluminium paint on the undercarriage. It was a bit of a marathon masking effort but I managed to get the underside fully covered, resprayed and then masking removed. I am pleased with the result - time now to get on with doing all the small external bits to be painted and fitted to the aircraft.
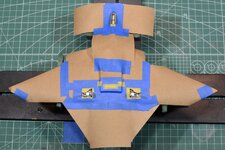
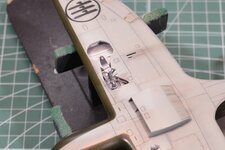
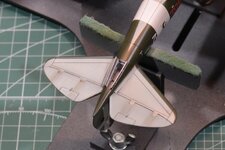
One note I would make is that I usually use Post-It notes for wider coverage, but I saw a plain old roll of brown paper in the supermarket the other day for a couple of dollars and realised this would be much more cost effective to use, even if it does take a bit more tape (I use the blue masking tape as its way cheaper then the Tamiya specialty tape).
Anyway - I'm looking forward to getting this one finished soon (might even be in record time still). I already have the next kit picked out and started making notes on what I want to do with it.
Thanks for looking in!
Since the last post I've managed to put down a clear coat over the decals. I've decided to stay with a satin finish as the photos and text from a couple of reference books indicate that the factory finish was indeed almost glossy. The hosts below are following some weathering - the usual stuff like dark wash in the panel lines and some chipping and oil/dirt staining.


It might seem that the top side has very little weathering, although this is not the case. With the green being so dark and the pre-shading still quite strong the additional staining does not seem very obvious. I did also try my hand at doing some dot filtering but I was not at all happy with the result so I wiped it all off and just stayed with what you can see here. Not sure what I am doing wrong technique-wise with dot filters but I'll keep practicing and one day I might even get it right!!
Finally, with all the handling I managed to rub off quite a bit of the aluminium paint on the undercarriage. It was a bit of a marathon masking effort but I managed to get the underside fully covered, resprayed and then masking removed. I am pleased with the result - time now to get on with doing all the small external bits to be painted and fitted to the aircraft.


One note I would make is that I usually use Post-It notes for wider coverage, but I saw a plain old roll of brown paper in the supermarket the other day for a couple of dollars and realised this would be much more cost effective to use, even if it does take a bit more tape (I use the blue masking tape as its way cheaper then the Tamiya specialty tape).
Anyway - I'm looking forward to getting this one finished soon (might even be in record time still). I already have the next kit picked out and started making notes on what I want to do with it.
Thanks for looking in!
Berny5664
Senior Airman
Good work so far Grant... I like it to much
Vic Balshaw
Major General
Beautifully done. 
Crimea_River
Marshal
Looking very good Grant. There's no shortage of scrap paper around my house so that's what I use to mask large areas rather than buying yet more paper.
Nice work so far!
fubar57
General
Looks very nice
- Thread starter
- #97
Grant Barr
Senior Airman
So...... it's been a while since my last post. Spring means a new triathlon season with a new coach & training regime. Back to training 6 days a week with 2 or 3 days doing double sets, which means that, outside work hours, any spare time I had has pretty much disappeared. Not complaining, it does feel good to get fit again, but it has severely limited time at the workbench. I actually miss being able to work on a kit - I think it is almost therapeutic for me!
Over the past week I have made a concerted effort to spend 10 minutes here and there just getting the final touches done to this kit. To securely fit the air intake I added some small polystyrene rod pegs which allowed a more positive fit to the fuselage.
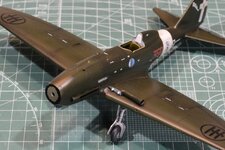
After taking the shot above I did a whole bunch of other work finalising the little bits and pieces to add. Unfortunately I did not take the time to photograph any of this work. Below are shots of the finished kit.
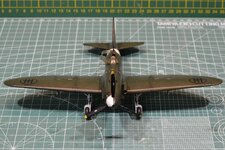
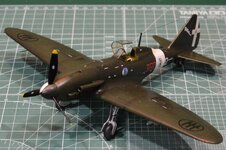
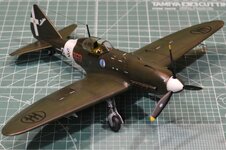
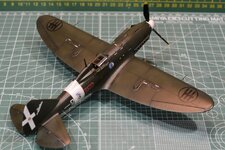
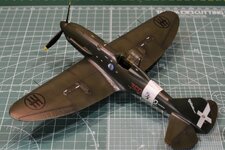
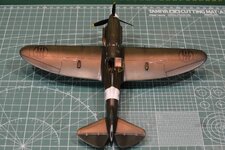
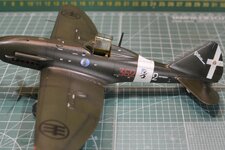
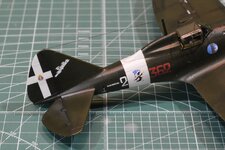
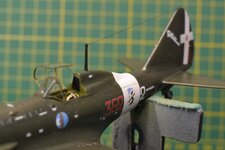
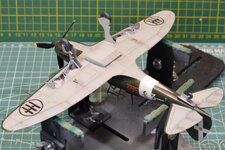
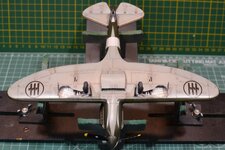
Overall I ended up being a little disappointed with how it turned out. Those of you with great attention to detail will note that the vac-formed canopy pieces seem to be just that little bit too large, almost like they are bigger than 1/48 scale. Certainly when viewed side-by-side with the kit part they are at least 10% larger. This resulted in a whole bunch of issues trying to get them placed correctly on the fuselage - they are in place but they don't fit snugly to the fuselage in quite a few places.
The other thing that I was let down by was the final clear coat. I think that because I thinned the final satin coat and blended in a bit more gloss to make it almost shiny it ended up being almost soft and sticky. Certainly any dust that had settled on it whilst still on the workbench is pretty much impossible to remove now.
Finally, the undercarriage is a missed opportunity. The kit parts are poorly designed and result in a huge joint down the front of the oleo (above the wheel) that is not there on the real thing. If I had realised this would not be a great fit once finished I would have gone about the assembly of the undercarriage very differently and allowed some work to remove this joint earlier in the process.
I still ended up finishing this kit in record time - a touch over 4 1/2 months. I am keen to get started on the next kit that I have already picked out and I suspect it will be even more challenging than I found this kit. With any luck I hope to get a new thread started this coming weekend.
As always, my thanks to everyone for their kind words, advice and encouragement. In doing this kit I learned quite a lot, picked up some new skills and got to research a lot of other techniques that people use in building their models (irrespective of whether I used them or not).
Cheers!
Over the past week I have made a concerted effort to spend 10 minutes here and there just getting the final touches done to this kit. To securely fit the air intake I added some small polystyrene rod pegs which allowed a more positive fit to the fuselage.

After taking the shot above I did a whole bunch of other work finalising the little bits and pieces to add. Unfortunately I did not take the time to photograph any of this work. Below are shots of the finished kit.


Overall I ended up being a little disappointed with how it turned out. Those of you with great attention to detail will note that the vac-formed canopy pieces seem to be just that little bit too large, almost like they are bigger than 1/48 scale. Certainly when viewed side-by-side with the kit part they are at least 10% larger. This resulted in a whole bunch of issues trying to get them placed correctly on the fuselage - they are in place but they don't fit snugly to the fuselage in quite a few places.
The other thing that I was let down by was the final clear coat. I think that because I thinned the final satin coat and blended in a bit more gloss to make it almost shiny it ended up being almost soft and sticky. Certainly any dust that had settled on it whilst still on the workbench is pretty much impossible to remove now.
Finally, the undercarriage is a missed opportunity. The kit parts are poorly designed and result in a huge joint down the front of the oleo (above the wheel) that is not there on the real thing. If I had realised this would not be a great fit once finished I would have gone about the assembly of the undercarriage very differently and allowed some work to remove this joint earlier in the process.
I still ended up finishing this kit in record time - a touch over 4 1/2 months. I am keen to get started on the next kit that I have already picked out and I suspect it will be even more challenging than I found this kit. With any luck I hope to get a new thread started this coming weekend.
As always, my thanks to everyone for their kind words, advice and encouragement. In doing this kit I learned quite a lot, picked up some new skills and got to research a lot of other techniques that people use in building their models (irrespective of whether I used them or not).
Cheers!
Vic Balshaw
Major General
Regardless of what you have written above about the little niggles, it's still a fine looking machine and I think the way the overall colour has turned out enhances the look of the machine. Well done. 
Users who are viewing this thread
Total: 2 (members: 0, guests: 2)
