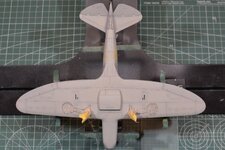
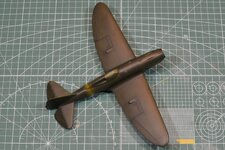
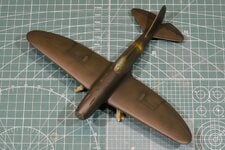
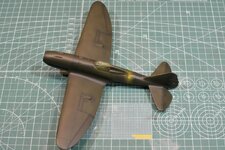
1/48 Special Hobby Reggiane Re.2005 Sagittario (1 Viewer)

Ad: This forum contains affiliate links to products on Amazon and eBay. More information in Terms and rules

Some good work there Grant. On my recent Ki-61 build I found that applying a flat aluminum paint on the fabric surfaces made for a slightly coarser surface that produced a decent effect.
 
Thanks guys.
On my recent Ki-61 build I found that applying a flat aluminum paint on the fabric surfaces made for a slightly coarser surface that produced a decent effect.
Funnily enough Andy I did have a thought that aluminium might give that effect seeing it always seems to spray really grainy. I was not game to try it, fearing if I stuffed it up then fixing it would be a lot more work. Think I might try this on another kit I have in the build list though.

Cold and wet again here this morning. Looking at the radar it seems it might clear off a bit later in the day - really hoping to get some primer on today!
 
Nice work Grant and I agree about the wet and cold with spraying. Cloudy and wet days, frosty mornings and not much sun about these days that's why I stick mostly to enamel paints, they are more durable than acylics with our extremes of daily weather. :D
 
Well that was an interesting experiment!

So - I tried laying down some primer on Sunday and have to say it was a massive FAIL. I had three things go against me:
  1. It was just too cold and too wet - about 11 degrees [C] and over 90% humidity does not work well for Vallejo acrylics.
  2. It also seems that acrylics really need a slight roughness to give them something to stick to - the mirror finish was just too shiny, it was like watching water bouncing off clean polished glass. Even holding the brush way off and trying to mist on a coat would leave paint that I could just wipe off with a finger when dry.
  3. My H&S airbrush was not cooperating - subsequent strip down and examination revealed my PTFE seals for the spray nozzle have tiny little pitting areas around the outside edges. Result was lots of spitting and blowing bubbles back up through the cup. Should have called it as soon as that started happening, but because I am stubborn I kept trying and ended up just wasting time and effort...
So - just now in the process of applying a very light sand/polish with about 3200 grade micro mesh - just to give the primer something to key to.
I stick mostly to enamel paints
I'd like to go back to enamels Vic; back in the day I was exclusively using Humbrol enamels. The big issue now is that the boss doesn't like the smell from enamels, leaving me with acrylics as my only option if I want to keep working in the garage - where its at least warmer than outside.... 🥶❄️
 
So - I tried laying down some primer on Sunday and have to say it was a massive FAIL.
🥶❄️
Did you use an acrylic primer? Why don't you try some lacquer primer and then use the acrylic paints - this is what I've done and will do in the future.
1. Primer by Model Master (AFAIK not in production any more) or primer from a can (from the art-store, very fine and fast drying too. There are some more expensive odorless variations as well).
2. Gunze (Mr. Hobby) or Tamiya acrylics (the paints you can dilute with distilled water+ alcohol).
Water based primers do not work for me, no matter what's the environment.
Cheers!
 
I would say that lacquer primers won't get past the boss's smell objection. I have used Tamiya acrylics for years now mostly without priming. I recall only one time having an adhesion issue and that was most likely due to an oily residue on the model surface that I failed to clean. I would expect roughing the surface up will help adhesion but fixing that seal would seem important too. I'll need to check mine now that you've noticed this Grant.
 
I would say that lacquer primers won't get past the boss's smell objection. I have used Tamiya acrylics for years now mostly without priming.
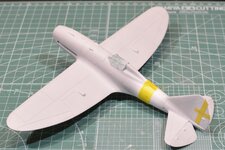
One of the products I was referring to is this primer (from my "favourite" store ;) Michael's):
dm-primer.jpg

It's not odorless per se, but is low odor for sure. I usually use the spray cans in the garage and the acrylic paints in my "modelling room" (in the basement) without any (big) problems. ;)
 
Last edited:
Alrighty then.... I have progress to report.

I finally finished giving the whole aircraft a light sand - just enough to roughen the surface without losing any of the nice smooth finish. I really wanted to keep the smooth finish because a lot of pics of the real thing show it was a very smooth and quite shiny aircraft out of the factory. I didn't take any photos of the sanding - bit too boring really.

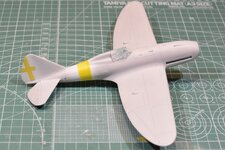
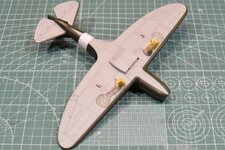
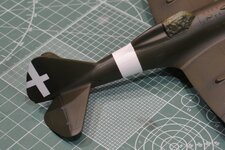
Then, once I worked out a good way to heat the garage (just go for a drive in the car - get it hot and put it back in place and voila - instant garage heating) I finally got to lay down a coat of primer. In these two shots I've also gone onto painting out where the white band and tail cross are and masking them to protect them from the final colours.
066_RE.2005 LHS Primed & White Stripes Masked.jpg 067_RE.2005 RHS Primed & White Stripes Masked.jpg
Weirdly, the primer is supposed to be grey (Vallejo Grey Primer) but it looks more white than grey to me, even more so in full sunlight. Not to worry!

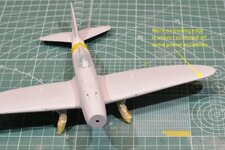
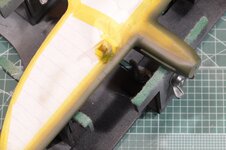
One of the problems I have repeatedly faced with this kit is the leading edge seams kept splitting open. You may recall I mentioned spending a lot of time reducing down the height of the wheel well inserts, clearly it was not quite enough as this seam issue indicates. None-the-less I eventually got it fixed, the leading edges re-primed and ready to go, as the next shot shows.
068_RE.2005 Wing Leading Edge Seams.jpg
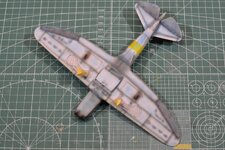
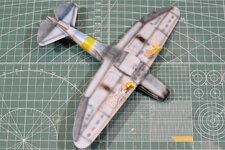
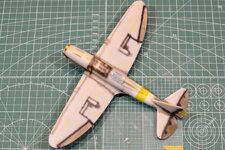
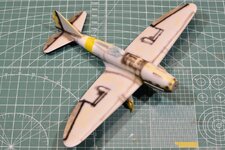
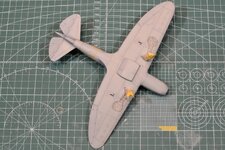
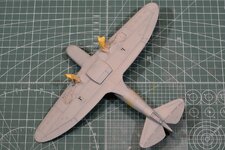
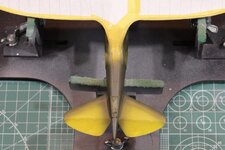
Once the primer was down I could then move onto the pre-shading. I have dabbled with pre-shading on my three previous kits but this is the first time I have gone to town with pre-shade colours. I just want to see if I can make a subtle difference to the final colours. With the underside being a very pale grey/blue I expect the pre-shading to work nicely. The top side, being a dark olive green (Verde Oliva Scuro 2? - gotta love the way Italians name their colours!!!), might not show the pre-shade too well. I've tried to darken the areas that are either dirty or shadowed and lighten other areas. You probably think - why the hell use yellow? I have a mad plan and am hoping that the yellow will make the green look a bit more of a faded/dirty colour. This only works on the assumption that I don't get too heavy handed with the final coats (like I usually do...).
069_RE.2005 RH Underside Pre-Shade.jpg 070_RE.2005 LH Underside Pre-Shade.jpg 071_RE.2005 LHR Topside Pre-Shade.jpg 072_RE.2005 LHF Topside Pre-Shade.jpg
The other thing you'll likely notice is that I didn't pre-shade under the white. It was tempting but I don't have great success with pre-shade under white. I plan on just post-shading and possibly dot-filtering on the white to keep it a bit more subtle. The plan is to do this at the same time as toning down the decals.

That basically sums up my progress to the minute. Just waiting now for the pre-shade colours to dry/harden a bit more and then I'll make a start on the Grigio Azzurro Chiaro underside.

I hope you're enjoying this build as much as I have been. The kit is not "great" but it has been challenging to get it to look right.

Thanks for looking in, cheers! :wave:
 
You've worked hard on the pre-shade, it looks good and it will be interesting to see how it turns out. :D
 
Thanks Vic Balshaw Vic Balshaw , I'm on a bit of a roll today. The lower blue grey is now on. I think it might be a fraction to heavy; at least it looks that way through the camera. By the naked eye the effects are quite a bit more pronounced - maybe I need to take some shots in natural light and see how it looks.
073_RE.2005 LHF Underside Colour.jpg 074_RE.2005 RHR Underside Colour.jpg 075_RE.2005 Underside Colour.jpg
The colour has proven to be quite the challenge. The mix that Vallejo colour charts would have you use is just way too grey - very little hint of blue at all. I ended up adding a bit of RLM65 Hellblau to the mix and a bit more white to keep it pale. It's probably still a bit more grey than I'd like but IRL you definitely get a blue tinge from the colour. I'll run with this for now and see how it looks once I get the green laid down.

Hope to get some more progress tomorrow - fingers crossed that the boss doesn't have too many ideas on filling up my free time - :lol:
 
Made a bit more progress today - managed to get a coat of the Black/Olive Green laid down. I am reasonably pleased with the results.
076_RE.2005 RHR Top Colour.jpg 077_RE.2005 LHF Top Colour.jpg 078_RE.2005 LH Side Top Colour.jpg
For the top coat I was much more careful with the coverage given by the final colour. I was thinking about the underside colour last night and it dawned on me that I was not thinning the paint enough. I usually run a 1:1 paint to thinner ratio, but to allow pre-shading to show through it should be closer to 1:2 or even 1:3. So when I mixed up the colour to match Verde Oliva Scura 2 I made sure that my ratio had a much higher thinner count - it ended up being 1:2.3. Weirdly enough this caused the paint to dry much quicker on the needle, meaning I had to stop often to clean the tip. I think this is a candidate for adding some Flow Improver next time around.

Anyhoo... I am pleased that the pre-shade readily shows through (I know Geo - I still added the shots as thumbnails, but you can zoom in on them by double clicking on them ;)). When I mixed this colour I was doubtful it would be dark enough, but looking at the shots I think its actually pretty close. My next conundrum is whether to do another very light coat - just to pickup on some areas that didn't quite get the coverage seen in other parts - see wing and horizontal stabiliser underside shots below.
079_RE.2005 Undertail Top Colour.jpg 080_RE.2005 Under Front Top Colour.jpg
The colour here is just that little bit less than the topside. I did this side first when painting so I might have been a bit more cautious here when first starting when you compare it to the finish once I got going on the upper surfaces. I'm confident I can get a good paint match, just worried I might end up obscuring the pre-shade a bit more than I want. Might sleep on that thought tonight before doing any more to the kit.

I've started masking the canopy and spinner which will also need some Black/Olive Green, so this may help swing the decision to put another fine coat down. I will definitely need to retouch all the landing gear components, along with painting the inside of the gear doors. Source photos tend to indicate these will be unpainted aluminium, but they could equally be the underside colour as well - its really hard to distinguish this from B&W photos. If anyone has a definitive answer to this I would appreciate the advice.

Once the green has been finalised and I've allowed the paint to dry and harden a bit I'll put down a gloss clear coat in preparation for the decals. Based on my experience with the IP decals I don't expect any problems with these - just need to be patient and make sure they are neatly trimmed before application.

Probably enough rambling for tonight. Thanks to everyone again for comments and feedback and also to those who just pop in for a look.
 
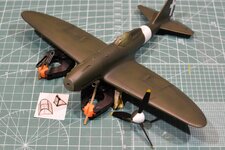
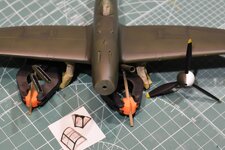
Made a bit more progress last night - managed to get the final coat of green onto the aircraft and some associated bits.
081_RE.2005 LHF No Masking.jpg 082_RE.2005 Front & Components No Masking.jpg 083_RE.2005 LHF Underside No Masking.jpg 084_RE.2005 RH White Band & Cross.jpg
If you zoom in on the photos it is clear that I will need to do a fair bit of touch up work, especially on the exhaust surrounds and the canopy frames. Even though the edges of the canopy frames are a bit rough I am really pleased with how they turned out. I was concerned that the really tiny centre frames on the access canopy would not turn out well, but I am chuffed they appeared without being lifted off when I took the masking off.

Next steps will be to clean up some of the edges where lifted by the masking removal, then to give the whole thing a strong gloss clear coat on which I can lay down the decals. Ideally I'd like to use a mineral based clear coat, so I might need to wait for a nice clear sunny day so I can do this outside; and not p*ss off SWMBO...

Also need to start thinking about the final touches with the sticky-outy bits like pitot tubes, guns and the whole landing gear bit. Mental note - must remember to fabricate some brake lines as these were quite prominent in photos of the real thing.

Cheers for now.
 

Users who are viewing this thread

Back