1:72 Complete Iowa Battleship 16"-50 cal Turret with interior down to the magazine (1 Viewer)

Ad: This forum contains affiliate links to products on Amazon and eBay. More information in Terms and rules

Remember when I said that the fun part was starting now that I'm painting and assembling? Well... perhaps I spoke too soon "Premature adulation". Before I get into this, I did a punchlist item: I installed the periscope mount that spans the open area of the gun house. I tacked it in place with solvent cement and then pulled out the big guns... J-B Weld 50-Minute Epoxy. This little strip was part of the scrap that I removed when cutting open the gun house roof, and is essential to hold the kit exterior periscope part and my detailed interior periscope part. I was champing at the bitt to take the gun house out and paint the inside white using the Rustoleum since I was effectively out of Tamiya primer (again!). Then I realized that this important piece needed to be in place before any painting.

ITP-Periscope-Mounting.jpg


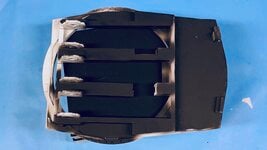
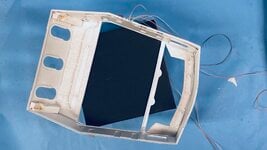
I finished masking the projectile flats and then did another punch list item: I had to make the penetrations into the powder flat to mount the exterior powder scuttle parts and the access hatches to go from the turret proper to the magazine. To make the holes correspond to their interior bulkhead counterparts, I put masking tape over the powder flat walls and traced the openings, then transferred the tape to the outer shells. I scribed a datum line corresponding to the correct height and put the tape down. I had to guesstimate where the holes would go since the shell is in the open position. Furthermore; while I'm modeling turret #1, the scuttle placement seems to be of turret #2 or 3. There are not port and starboard access points on turret#1 since this is truncated due to interference of the ship's framing.

Additional complication stems from the junction bracket holding the two shells apart which DOES NOT exist on the real ship.

Here's the tape applied to the shells.

ITP-Penetration-Layouts.jpg


The radius for the door opening's round corners is just about 1/8" and I have a nice 1/4" drill with a point for drilling plastics. A plastic bit has a sharper included angle than a normal twist drill. I used a small drill to find the center that would give the right curvature, and then drilled the four corners.

After opening up the corners, I removed the rest of the stock with the carbide router.

ITP-Penetrations-WIP.jpg


I used the actual 3D printed parts to shape the final openings and did so with the power micro-sander and some jewelers files. Could use a smidgeon of filler...Notice how the junction bracket inpinges on the place where the scuttle door.

ITP-Outer-Shell-penetrations.jpg


Then the nightmare ensued... When I was doing the primer painting outside last week, I ran out of the Tamiya primer and turned to Rust-oleum white 2 in 1 primer. This was a TERRIBLE MISTAKE!!!

While I'm sure that this paint does have good adhesion to plastic which is noted on the label, it appears to have ABSOLUTELY NO ADHESION over Tamiya white primer. I airbrushed the linoleum brown (which looked good, I might add) and then pulled the tape off and with it came 50% of the Rust-oleum with it. Disaster!

ITP-Rustoleum-Nightmare.jpg


I went aroud with more tape and pulled off as much of it as I could. After this I repainted it with a mix of Tamiya Flat and Gloss White.

I needed to remask this whole deal covering up the newly painted linoleum. I used the wide Tamiya tape trimmed to the perimeter and then cut a custom mask for the buik.

ITP-Fancy-Masking.jpg


I resprayed the white and then pulled the tape... which was the last thing I did before dinner. This is what happened: Rust-oleum nightmare Part Deux!

ITP-Rustoleum-Nightmare-Part-2.jpg


I'm not going to remask, I'm just going to brush paint the linoleum brown. What I'm fearing is what's going to happen when I pull the tape off the projectile flats... ugh! I still have to mask and paint the decking on the electric and pan decks, and they too have been sprayed with the Rust-oleum. So instead of breezing through this part of the project, I'm in crisis mode with a lot of redos. Really a big, unexpected, pain in the butt!

The model will get built... it's just not a straight line.
 
Thanks! Yes! It's two steps forward and one backwards. I think I got myself out of the woods today. Read on...

Painting really began today. I repaired the powder flat floor by simply brush painting up to the edge. Any error were overcoated with Dullcoat to seal the Tamiya dark color from the white that will repair the error. Otherwise, the white would leech the dark color and require many more coats. It required two coats of the linoleum brown to give and even look. I had already repaired the peeled paint on the outside of this piece.

ITP-Powder-Flat-Paint-Fixed.jpg


To prevent any more paint lifting since I had used the Rust-oleum on many of the parts, I just attacked the rest of the flooring with the brush. It's actually much faster since the masking of these complex surfaces takes a long time. And again, I overcoated with Dullcoat to fix any errors.

This is the Electric Deck. The floor areas not painted are where additional things are going in especially that large center section which I also have to paint the flooring.

ITP_E-Deck_Floor.jpg


And here's the pan deck's floor. Again, there's a lot of stuff that gets put down here on the unpainted areas.

ITP_Pan_Deck_Floor.jpg


And I started painting the officer's booth floor and rangefinder. It's all being brush painted since, besides the potential paint lifting problem, it's a very complicated topography. I found a nice light gray Tamiya paint (IJN Light Gray) that seems to be the right shade for the range finder and the breach block for the guns. The rest of the mechanism I'm going to do in a darker gray shade to give some definition to the model.

ITP-RF-Paint-Begin.jpg


Painting will continue tomorrow. If the weather cooperates, I will paint the inside of the gun house white.
 
Thanks Chaps!

Did a bit more painting on the complicated officer's booth floor. This time I added the Tamiya Neutral gray for the range finder's support system. All the little bits that are white are going to be brass. Like the rest of the turret, any surface that could create a spark is brass.

ITP-Officer-s-Booth-Paint-Cont.jpg


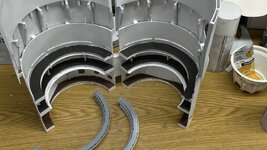
Then I went to work on detailing the outer shells. I realized this morning that I better put the brackets in now before going further with more detail painting. I drew all these brackets and suppors based on the drawings of the whole turret, which in turn was the basis for creating the shells out of styrene. Afterall, those patterns were created directly from the same drawings. Due to some misalignment (my bad) of the annular decks, the first projectile flat's brackets needed to be hand trimmed and/or extended to fit the space. I used gel CA for all the gluing.

This picture shows all the brackets in their final positions and painted. The ones in questions are supporting the annular decks for projectile flats 1 and 2.

ITP-Shell-Brackets-Done.jpg


Then it was time to install the big boys... the brackets that support the ring gear/roller bearing system. For some reason, I got completely off track on this one. I started believing that the ring gear rested on top of the lower, tapered shell's top edge. When I went to fit the big brackets into this space, they really didn't fit at all. I had extras and started to modify one of them to fit, but then the ring gear didn't set on them correctly either. Something was amiss!

I decided it was time to check my drawings. Sure enough I was putting them one deck too low. The ring gear doesn't sit on the tapered shell's top. It sits up much higher and is support by these massive brackets that are welded to the barbette lower shell. When I moved them to the new position, they fit really nicely.

I glued these in attempting to get them equidistant around the perimeter taking in consideration that there are other structural bits that I added to hold it all togeher.

ITP-Bracket-Slight-Fix.jpg


When I did a trial fit, the ring gear didn't nestle against the brackets. There was a big space. I corrected this by adding an 1/8" filler piece to pack out the bracket so it would contact the entire ring gear assembly. The ring gear is a single part 3D print, so there's no adjustment there.

With the filler in place, I now have nice contact for gluing this critical part in place.

ITP-Bracket-Fix-Result.jpg


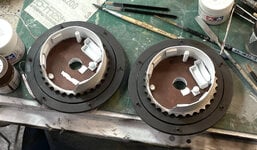
I then test fit both ring gears in their positions and took this image. Looks just like my drawings.

ITP-Ring-Gear-Placement.jpg


With these parts installed (and in the right places) I can now continue with the deck painting, and installing all the detail items like hatches, scuttles and air bottles.

Tomorrow should be a productive session since it's not going to be interrupted with either a haircut (yesterday) and a PT appointment today. I should be getting into painting a lot of the other detail stuff like all those pumps on the electric deck.

Meanwhile, my dear old friend Bryant, is making good progress on the wooden base for the display. He's going to finish in a teak finish to emulate the new teak decking being installed on the Big J.
 
Thanks!

Today was 100% painting and little tiny print job.

I was unhappy with the oil reservoirs on the ramming machine and one of them was missing, forcing me to do something. So I quickly drew a corrected shape and printed them. I removed the wrong ones from the two that were in place and added all three so they're more correct... not perfect... just better.

ITP_Replaced_ram_reservoirs.jpg


I had painted the rear parts of the rammers, but didn't paint the foreward parts until I had these little bits attached. I used Gel CA to do the job. The one of the right was completely missing... Don't know when it disappeared so I printed it with the stem. I cut the resevoirs off the printed stems for the other two and just glued the to the cut off stumps.

I then went back to finishing all the other details. I found that a terrific gold is the Rust-oleum gold paint pen. Unfortunately, mine hadn't been used in months and the tip was dried solid. i pulled it out and pumped some of the paint into a clear egg carton space and used it with a brush. It's enamel-based so it doesn't leach into the Tamiya alcohol-based paint. So all that's supposed to be brass is now "brass". This is the forward facing area.

ITP-Officer-s-Booth-Done-Frt.jpg


This is the rearward facing area with all the interesting stuff. As you can see the Rust-oleum has a nice metallic gloss. I may use some panel accent, but it would require gloss coating the whole deal before I use it. If you use Tamiya panel accent on flat paints, the stuff spreads all over and makes a mess. The optical ends are not glued in. They won't be permanently glued until the gun house top is in place. Otherwise, you can't get the entire thing in.

ITP-Officer-s-Booth-Done-rear.jpg


I don't know about you, but this massive assembly really looks pretty good.

I also finish painted the two powder trunk lower units. There's controls and circuit boxes lining the walls, but the viewing angle won't permit seeing any of it. Therefore; I didn't spend the time timing to pick out the detais.

ITP-Lower-Powder-Trunks-Done.jpg


Lastly, the piece de resistance... the alcove piece. Looks pretty spiffy too. This painting is a direct result of the detail shots I took onboard the ship.

ITP-Middle-Alcove-Done.jpg


I also painted the dark iron parts of the projectile flats (the rotating decks) and ran out of it. I was just at the hobby shop two days ago, but didn't realize that it was just about done. Now I have to go back. It's only 6 miles away and I can get there in 12 minutes, but I can't just go in an buy a bottle of paint. I get to bs'ing with the staff (who I really enjoy interacting with) so it's usually 45 minutes to an hour before I get out of there.

Tomorrow, more things will be painted.
 
Short session... did some more annular deck painting, 2nd coat on P-decks inner ring, primed the inside of the gun houses (outiside), painted the gun girder, and a tiny added color to the officer's booth.

Here's the first coat of the upper annular decks. I have to back paint around the wall/deck junction to even out my shaky hand painting. I chose not to attempt masking and airbrushing based on the horrible paint lift experience from the other parts.

ITP-More-Decks-painted.jpg


I'm using Tamiya Dark Iron for the projectile deck surfaces. They are actually bare steel covered with grease so the projectiles can slide easily. Their color is a dark rusty brown, just like this one. I may do a surface treatment to give it some wear and shine... or not. I'm going to paint all the inner deck structure a medium gray, and only leave the white for the exposed surfaces. All the cutaway edges are going to be trimmed in red. That's going to be a finicky operation to not screw up the rest of the painting.

Here are both projectile decks with their interior linoleum color. All the boxes on the walls will be light gray, and all the machinery neutral gray. The inside of the cutaway powder trunks will be galvanized steel color. The areas of the floor that are white are masked areas waiting for installation of the machinery.

ITP-P-decks-Floors-Done.jpg


I wanted to add the yellow caution striping on the steps and did that yesterday. Ryan Scyzmanski informed me today that all the tanks are white so I'll fix that.

ITP-Yellow-Warning-Stripes.jpg


The weather was just about right for outdoor painting yesterday so I took advantage of it an primed the gun house interior with Tamiya white surface primer. It was breezy so I just made sure I was spraying downwind. The exterior will be WW2 haze gray.

I have two more pictures but Post-image is suddenly suffering from an "internal server failure" and they're not loading. When they get back on line I'll edit this post.

I'm back... it wasn't Post-image's problem, it was Spectrem Internet's. They claim no outage in the area, but we're having high winds and that can cause problems. I was getting 70 mbs download and 0.19 mbs upload, i.e., nothing. It just came back on so the pictures loaded properly.

Here's the inside primed. The LEDs are liquid masked. I may leave it as is and not do any more interior paint.

ITP-Gun-House-Interior-Primed.jpg


And here's the gun girder. The sides of the girders should be white, and tops raw metal. I have to put in the partitions down the sides, and these could cover the dark iron overspray. Otherwise, I may put on dullcoat to seal, mask the top surfaces and airbrush the white. The gun lugs are going to be machinery gray. The forward cross member will be out of sight I believe.

ITP-Gun-Girder-2md-Coat.jpg
 

Attachments

  • ITP Gun Girder 2md Coat.jpg
    ITP Gun Girder 2md Coat.jpg
    836.9 KB · Views: 20
  • ITP Gun House Interior Primed.jpg
    ITP Gun House Interior Primed.jpg
    789.1 KB · Views: 20
  • ITP-More-Decks-painted.jpg
    ITP-More-Decks-painted.jpg
    163.6 KB · Views: 21
  • ITP-P-decks-Floors-Done.jpg
    ITP-P-decks-Floors-Done.jpg
    187.7 KB · Views: 23
  • ITP-Yellow-Warning-Stripes.jpg
    ITP-Yellow-Warning-Stripes.jpg
    145.4 KB · Views: 24
Last edited:
Getting there...

Hand painting takes a lot of time! Had a pretty long session today, but output doesn't reflect the input effort. I spent time doing more painting of the projectile decks, more work on the outer shells, and finally adding the edging on the cutaways on the Pan Deck.

I worked on cleaning up the floor/wall demarcartion line, painting the already-printed details, painting the projetile stowage ring and adding the cutaway edges.

I mixed a blend of Nato Black and Molotow Chrome to create a dark steel color and painted the stowage ring to contrast a bit from the deck dark iron surface. I painted the circuit boxes, hatch and gypsy head drive motor the light gray with a black base. The cutaway powder trunks got their interior walls painted a galvanized steel mix I use and the bottom flat black to appear as a hole going down, and also its edges painted.

Note the difference the edge painting adds. I still want to dry brush some bright metal highlights on the inner deck's ring gear that runs about the base of the interior bulkhead.

ITP-P-Decks-Paint.jpg


With the major painting done, I will paint the gypsy heads and then add the remaining parts to these and call them done.

I painted the interiors of the deck structures with the neutral gray. My least favorite kind of brush painting; interior of awkward shapes. I went back and forth a few times trying to get a clean deck/wall line. It's sort of an exercise in futility because the edge itself is so ragged due to all the adhesive I had to add to close all the gaps and hold it all together. Even masking wouldn't have worked due to these inconsistencies. It's almost finished. I have to also do the red edging on this large assembly. Any slop you see will be fixed by the edging.

ITP-Shells-Almost-Done.jpg


Lastly, I finished up the pan deck's floor/wall joint and then painted the red edging.

I'm not 100% happy with the way the white paint looks, and white is very unforgiving.

ITP-Pan-Deck-Edges.jpg


The edging tells you that this missing space is intentional. There are a lot of vision blocks that will be going in to this space including non-cutaway powder trunks, the elevation and training B-ends, the projectile trunks and the ladders up to the gun compartments, and finally the primerman's platform which I'm thinking to build with a soldered brass frame. The prototype's bases is a spindly metal affair that would lend itself to a soldered piece.
 

Users who are viewing this thread

Back