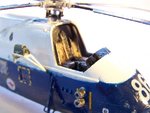
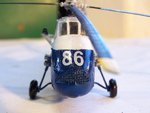
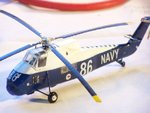
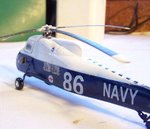
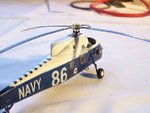
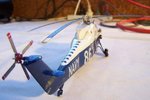
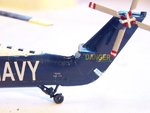
1/72 Westland Wessex HAS 31

Ad: This forum contains affiliate links to products on Amazon and eBay. More information in Terms and rules

Sorry to hear! She was looking good, I've always liked the old blue/white Navy scheme. Anyway here are some pics that will hopefully provide some motivation :D
 

Attachments

  • 2582.JPG
    2582.JPG
    78.5 KB · Views: 117
  • 2583.JPG
    2583.JPG
    55.6 KB · Views: 99
  • 4069.JPG
    4069.JPG
    62.3 KB · Views: 98
  • 4070.JPG
    4070.JPG
    62.4 KB · Views: 92
  • 4071.JPG
    4071.JPG
    58.5 KB · Views: 104
well, its official, after nearly a years delay I quietly restarted work on this model, but have abandoned it now......its officially a write off.....

Guys, please dont laugh, but this has proven to be just a litany of errors and stuff ups, but I am more determined than ever to achieve a better outcome.

Subsequent to my el stupido mistake, I purchased a new double action airbrush, high quality but cheap as well (high quality, because my modelling mate has had great success with a copy that is gun that is exactly the same as mine). Next I purchased a replacement kit, and decided to transfer the cockpit (which I was very happy with) and some other bits that were undamaged.....I thought "how hard can this be...should be a snap!!!" yeah right....

Did all the usual pre-assembly checks, and thought the thing was okay. Base coat of white went on okay, followed by the Navy Blue lower half. Some small runs along the paint joint, but i thought no biggy can deal with that....removed the cockpit assembly from the old model, and fitted it to the new model....seemed to go in okay....glued everthing together, and applied the decals ....did all of this in a little over 24 hours.

prepared the glass cockpit canopy...again had some issues getting keeping the clear panes clear, but generally okay. Some of the cockpit struts were a bit wobbly in the paintwork...concerns starting to mount by this stage, but still believed the situation was under control...went to fit the cockpit glazing to the main assembly....disaster, in a number of areas. The canopy and the main cockpit cannot be aligned properly, not sure why....thought I could rectify this by using putty along the joins, which I managed to achieve, but the join was attrocious. Whilst handling the model, I put paw prints allover the paint work, mashed up the decals, broke one of the landing gear struts, got so Pi**ed off the thing is now in the trash . well, not exactly, but Im not going to waste any more time on this, until i work out what it is I am doing wrong

This is what I think, but advice is appreciated....in between your fits of laughter....

The starting issue is with the paint work.....the airbrush is applying the paint as I want, with no runs, but I am having trouble stopping the white and the blue bits running togeter. My operating conditions for the airbrush are paint, two parts paint to one part thinner (i am using tamiya acylic paints incidentally), operating pressure is about 15-20psi, and application distance is 12inches or so. I try not to apply paint too thickly...maybe two coats and only one run...comes up okay.....dont lose the panel details at that consistency, and no runs. I try not to handle the model for at least an hour, which may still not be long enough.

The paintwork is okay at the time of application, but I thinik I might be too impatient in handling the model after painting. I generally wait for about 12 hours, but the paintwork inevitably gets marked....how long should I be waiting??? If I dont get the section right the first time, going back to try and apply more paint to rectify the problem is a disaster, as is attempting to correct oversprays with the brush. If I try to sand that bright white finish, its a disaster....its either right the first time, or forget it. The bright blue ia also not amenable to rectification...it tends to show up every error and imperfection


The acrylics I am using are soft and porous...when I handle them twelve hours afterward.....not immediately so, but efter I have handled them, I can see stains and marks on the white paintwork....for this scheme to work, i have to work out a way to get the paint scheme right the first time, or I can forget it....so how do i prevent blurring and smudging along the paint lines. This dark blue and bright brilliant white paint scheme is much harder than i had imagined


Dont laugh, but I have purchased another copy of this model.......I dont give up easy. this is a cheaper version than the Italeri....its a ZTS 1/72 scale model. Hasnt arrived yet...will have less detail than my current versions, but i just want a model that looks even remotely okay at this stage...... This is how i propose to re-attempt this build.


I am going to have to keep everything super clean. I propose to apply the paint using the same portions, pressures and application distances as before. But how can I seal up the masking better to prevent runs. I am applying the white first, then the blue?

I am going to increase the waiting interval to 48 hours minimum and use 500w heat drying lamps to try and harden the paint work before handling. I am going to apply acrylic gloss finishes to each coat at that 48 hour point, to protect each coat, and then also again after the decals are applied. I like the brilliance of the acrylics i am achieving, in this case the shinier the better, but the paint is just so soft and susceptible to staining, oversprays and runs.

The misfit is relatively easy to fix....make sure everything fits before glueing, but it is sympotmatic of my impatiuence I guess
 
I think the first thing to look at is the painting sequence. Although some shapes can be awkward, it is generally much better to paint the bulk of the model after assembly. That is, get the main construction done first, which, in this case, would be the interior and the fuselage assembled, including any parts which may have to be 'trapped' between the two halves, such as the rotor mast for example.
Additional parts such as landing gear, antennae, rotor head etc can be added after the main painting.
This will allow any and all filling, sanding, correction to be carried out without damaging and / or ruining the paint finish, which will have been a waste of time applying in the first place!
I'm not 100% clear on what you mean by the white and blue running together, but it sounds like two colours are being applied before one is totally cured.
Firstly, with acrylic paints, it is advisable to apply a primer overall first, probably enamel based, to provide a key for the finishing coats. This will minimise paint damage, flaking and lifting, to which acrylics can be prone, as they are often not as resilient as enamel paints.
Once the primer has set, for at least 12 hours, then the first paint can be applied. This is generally the lightest colour first. Do not try to get an even, level coat with the first application, especially with light colours. Apply the first coat as evenly as possible, not worrying if some areas look 'thin', and let this fully harden. With acrylics, allow at least 1 to 2 hours. Then repeat, following the same procedure, until the desired effect is achieved, by building-up the coats.
Then mask the division between colours, using a low-tack tape, such as Tamiya masking tape. Even this should be pulled between finger and thumb (after washing hands) to remove some of the tack, especially with acrylics. Ensure the edge of the tape is burnished down flat and tight, using the back of a finger nail or the blunt end of a craft knife etc.
The second colour can then be applied following a similar procedure.
When painting, try to ensure your hands are as clean as possible and grease free, minimising handling as much as possible, and then holding by small areas, with a soft cloth if necessary.
Hope this helps a bit.
 
yes thanks it does airframes.

The problem with the two toned colour is with the masking. Around the tail assembly, there is a slight kink, just aft the main fuselage, it sort of kinks around. On both times I sprayed, the second colour got past the masking and bled into the second clour, ruining the whole paint job as a result.

How much time do you think I need to give the thing to cure between differnt colours
 
Well, I don't often use acrylics, so my advice might be a bit on the cautious side. However, as we agree that acrylics are not as resilient as enamels, and can 'lift' fairly easily when tape is removed, I would wait at least six hours, preferably 12, before masking. Ensure the tape is burnished down, and, a little trick to follow: before applying the next colour, give a quick, thin coat of the first colour, along the edge of the tape, and let this dry as above. This will seal the tape, and should prevent the second colour 'bleeding'.
It might be that you may need to apply a clear coat, to prevent the paint(s) lifting when the tape is removed, but those with more experience of acrylics can possibly advise on this.
It's always worth taking as long as needed when painting a model, as this is the stage which makes or breaks - ruin the paintwork, and everything which has gone before is wasted.
 
Thanks, I needed that

I had another look at the model last night. Have taken some pics....it might not necessarily be the total write off I thought it was. Will post the pics when I get home and let you guys be the judge
 
The helicopter looks ok to me from the pictures I've seen. Your doing fine... Just don't give up. Learning new skills takes time and lots of practice. Take your time and think each part through. As we say, measure twice, cut once. :)
 
Sometimes you just gotta walk away from it for a time. Sometimes a few hours, sometimes a few days. It's never as bad as it seems.

And Never as bad as having your prostate ripped from your gut! Not Ever as bad! Trust me, I now know!
 
thanks guys, I think it is saveable, but it is never going to be a pride of place model. I will take a break for a week and try to fix the problems after that.
 
It may not be the pride of place model you wanted but its still your creation and something to be glad of if nothing more than a reminder of patience and determination, even if its to show your childern that you should never give up on yourself. :)
 
Update


I finished up buying a cheaper model, stripping this one down to salvage as many parts as i could, and creating a new model with the body of the new kit and most of the accessories of the old kit.

Here are the pics of the nearly finished kit.

Its taken a while and its not prtfrct, but came together fairly well IMO
 

Attachments

  • Underside.jpg
    Underside.jpg
    43.3 KB · Views: 81
  • Canopy Interior.jpg
    Canopy Interior.jpg
    35.5 KB · Views: 71
  • cockpit starboard forequarter.jpg
    cockpit starboard forequarter.jpg
    42.5 KB · Views: 65
  • Front.jpg
    Front.jpg
    37.3 KB · Views: 75
  • Image1.jpg
    Image1.jpg
    131.7 KB · Views: 70
  • Overhead.jpg
    Overhead.jpg
    64.8 KB · Views: 68
  • Port fore quarter.jpg
    Port fore quarter.jpg
    43.8 KB · Views: 66
  • Port fore quarter II.jpg
    Port fore quarter II.jpg
    34.8 KB · Views: 69
  • Port rear quarter.jpg
    Port rear quarter.jpg
    45.7 KB · Views: 67
  • Port Side.jpg
    Port Side.jpg
    35 KB · Views: 66
  • starboard fore quarter.jpg
    starboard fore quarter.jpg
    36.1 KB · Views: 59
  • starboard mid rear quarter.jpg
    starboard mid rear quarter.jpg
    33.5 KB · Views: 57
  • starboard rear quarter.jpg
    starboard rear quarter.jpg
    46.5 KB · Views: 62
  • starboard tail.jpg
    starboard tail.jpg
    37.3 KB · Views: 62
  • Tail.jpg
    Tail.jpg
    36 KB · Views: 78
Thanks Wurger. I wish i could have done better, but this was a definite improvement over the last 4 models. I learnt a lot from this build.

All that is left to do is a final clear coat to protect the decals and the canopy to be buttoned up.

The photos show a lot of imperfections that cant be seen with normal visual viewing.
 
that looks pretty good to me especialy as it cant be that big, being 1/72 !!!!
and your right these close up shots are very unforgiving when viewed back, i dread looking at mine once i've uploaded them to my PC
 
Thanks guys. the model (excluding the rotors) is justy under 6 inches long.

It was an improvement and im happy with it, but i know it can still be improved. It was good training for the group build.

One thing i learned in spades. I have to go slow, and carefully. Every time i tried to rush, without exception, something went wrong. Everything good that happened, happened beciuse I proceeded carefully and according to a plan. Somethime I went carefully, but still went wrong, mostly because the plan was not right, but whatever successes i enjoyed, it was because of patience and a good plan
 

Users who are viewing this thread

Back