Navigation
Install the app
How to install the app on iOS
Follow along with the video below to see how to install our site as a web app on your home screen.
Note: This feature may not be available in some browsers.
More options
You are using an out of date browser. It may not display this or other websites correctly.
You should upgrade or use an alternative browser.
You should upgrade or use an alternative browser.
352nd Fighter Group "Blue Nosed Bastards of Bodney" Build
- Thread starter B-17engineer
- Start date
Ad: This forum contains affiliate links to products on Amazon and eBay. More information in Terms and rules
More options
Who Replied?Airframes
Benevolens Magister
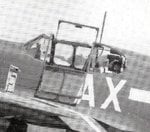
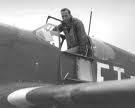
Glenn's right, and yes, the Revell kit is the Monogram kit. Don't know what it's like now, but originally it came with a framed canopy and a 'Malcom' hood canopy, and the rear windows were thinner at the joint on the framed canopy, to make separation easier. That part shouldn't be a problem, just be careful as you cut off the windows. Separating the framed canopy panel isn't difficult, especially if you have a razor saw. Just take it steady and slow, and to avoid scratches if the blade slips, place masking tape either side of the cut lines. Do these one at a time, starting with the cut from the rear of the top panel to the windscreen, then from the windscreen frame, doen the port side panel. Separate the top panel from the port side panel once the part is on the bench.
For masking the blue, there won't be enough precise control with liquid mask, even if it's 'over' masked and cut to shape. It's better to use pieces of tape, cut to shapem and trimmed when in place if neccessary. A number of pieces will be easier, normally, than one or two large pieces, due to the curves.
As Glenn stated, there isn't so much of a problem for the white with OD and NG, but it can be easier to do the white first. It's a case of what ever is easier to mask and handle, but try to do the white first, as it is he lightest colour, and won't then be affected by the darker shades; the blue isn't so bad, as that will take well to the OD.
- Thread starter
- #283
B-17engineer
Colonel
Thanks guys! I have a sort of razor saw pretty thin...really appreciate your help Terry and Glenn!
Airframes
Benevolens Magister
You're welcome H.
- Thread starter
- #285
B-17engineer
Colonel
Ok we'll just say I had to borrow pieces from the other kits canopy...
The next P-51B HAS to be a Malcolm Hood one because thats what I have left. I'll probably begin work tonight on one while the canopy is being futured.
Also, need some Neutral Grey.......
But the end of this month I'll have a bit more money. Enough for more kits, decals and whatever else!!
The next P-51B HAS to be a Malcolm Hood one because thats what I have left. I'll probably begin work tonight on one while the canopy is being futured.
Also, need some Neutral Grey.......
But the end of this month I'll have a bit more money. Enough for more kits, decals and whatever else!!
- Thread starter
- #286
B-17engineer
Colonel
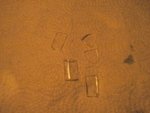
I went to go dip my newly butchered canopy yesterday and when I left them to dry on tape it just ruined the future on the back side.....? I can't stick them vertically
How do I fix the messed up future and how do I dip them so it doesn't happen again?
Thanks
How do I fix the messed up future and how do I dip them so it doesn't happen again?
Thanks
T Bolt
Colonel
Harrison, I'm not really following how the canopy got messed up. The future can be easily removed my wiping the canopy in a windex soaked paper towel. It it's really stubborn, soak it a wile. When I dip a canopy in Future, I set it in a piece of paper towel so the excess Future wickes off. Maybe if you post a pic it will help to understand the problem
- Thread starter
- #288
B-17engineer
Colonel
Sorry Glenn was out today but that seems to work!!Thanks!
- Thread starter
- #289
B-17engineer
Colonel
Ok suppose to have an update but laptop is slow...
All my aunts and uncles want to adopt me and my little brother for the nights my parents sleep in the hospital...so I'm off...
All my aunts and uncles want to adopt me and my little brother for the nights my parents sleep in the hospital...so I'm off...
- Thread starter
- #290
B-17engineer
Colonel
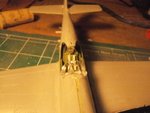
Painted the propeller assembly pieces blue, and pictures in 20 minutes of the canopy..need to restart the laptop
- Thread starter
- #291
B-17engineer
Colonel
T Bolt
Colonel
Glad it worked out Harrison. It's always scary when you start to chop up clear parts!
- Thread starter
- #293
B-17engineer
Colonel
- Thread starter
- #294
B-17engineer
Colonel
Pictures tonight,
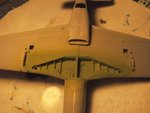
I began work on J.C. Meyer's Petie 2nd because I had the airbrush out spraying Interior Green for the P-51B's wheel wells so I began to spray the P-51D
His should be easier, no invasion stripes.....
I began work on J.C. Meyer's Petie 2nd because I had the airbrush out spraying Interior Green for the P-51B's wheel wells so I began to spray the P-51D
His should be easier, no invasion stripes.....

Airframes
Benevolens Magister
Good work H.
- Thread starter
- #296
B-17engineer
Colonel
Cheers T!
Pictures later tonight depending on how I 'feel'
Pictures later tonight depending on how I 'feel'
vikingBerserker
Lieutenant General
I have to agree, nice job on the canopy.
- Thread starter
- #298
B-17engineer
Colonel
Thanks guys!
- Thread starter
- #299
B-17engineer
Colonel
- Thread starter
- #300
B-17engineer
Colonel
Will attempt the white tomeorrow
Users who are viewing this thread
Total: 1 (members: 0, guests: 1)

