looking good mate!
Navigation
Install the app
How to install the app on iOS
Follow along with the video below to see how to install our site as a web app on your home screen.
Note: This feature may not be available in some browsers.
More options
You are using an out of date browser. It may not display this or other websites correctly.
You should upgrade or use an alternative browser.
You should upgrade or use an alternative browser.
B5N2,, KATE 1/33 scale
- Thread starter deckape
- Start date
Ad: This forum contains affiliate links to products on Amazon and eBay. More information in Terms and rules
More options
Who Replied?Airframes
Benevolens Magister
Great stuff.
- Thread starter
- #23
deckape
Staff Sergeant
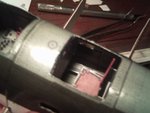
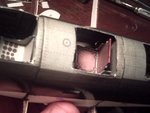
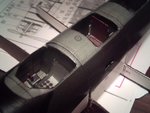
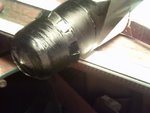
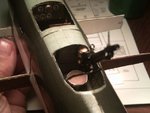
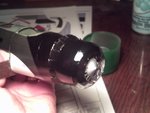
cockpit details and touch up
Ahoy
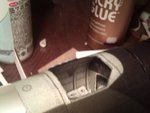
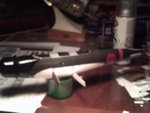
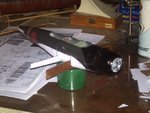
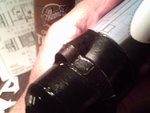
Thanks fellas for all your replies, for the update of the day got a lot of work ahead should have the fuselage completed by Sunday. for no i have completed the pilot and torpedo bomber compartment finished tomoorow i will have the gunners compartment done. The build is going smooth been checking here and there and doin some touch ups After starting on the last compartmen where the gunners is located at I installed the intereir wealls and the floor. as for touch up i opened up the cowling flaps and i burnished the intire fisel;age with m,y burnishing tool. got all seams smoothed out gave the intire fuselage unit 3 coats of areo gloos clear dope thinned down with laquuer thinner. the areo gloss dope brought out the black luster to the front of the fuselage and cowling. Much more work tomoorow.
Boats
Ahoy
Thanks fellas for all your replies, for the update of the day got a lot of work ahead should have the fuselage completed by Sunday. for no i have completed the pilot and torpedo bomber compartment finished tomoorow i will have the gunners compartment done. The build is going smooth been checking here and there and doin some touch ups After starting on the last compartmen where the gunners is located at I installed the intereir wealls and the floor. as for touch up i opened up the cowling flaps and i burnished the intire fisel;age with m,y burnishing tool. got all seams smoothed out gave the intire fuselage unit 3 coats of areo gloos clear dope thinned down with laquuer thinner. the areo gloss dope brought out the black luster to the front of the fuselage and cowling. Much more work tomoorow.
Boats
Attachments
-
 PICT0001.JPG38 KB · Views: 91
 -
 PICT0002.JPG33.5 KB · Views: 117
 -
 PICT0003.JPG37.7 KB · Views: 102
 -
 PICT0004.JPG41.8 KB · Views: 98
 -
 PICT0005.JPG39.3 KB · Views: 105
 -
 PICT0006.JPG43.7 KB · Views: 102
 -
 PICT0007.JPG45.5 KB · Views: 99
 -
 PICT0008.JPG45.2 KB · Views: 102
 -
 PICT0009.JPG36.7 KB · Views: 109
 -
 PICT0010.JPG61.6 KB · Views: 107
 -
 PICT0011.JPG65.3 KB · Views: 103
 -
 PICT0012.JPG67.8 KB · Views: 105
 -
 PICT0013.JPG55.4 KB · Views: 99
Lucky13
Forum Mascot
wear a good job, all we see is that the way they tend to end these models is that they are flat, no relief as the interior panels or clocks do not stop taking the hit, I try to do a while ago Dornier Do17 GMP Z 3 to 1 / 33 but gave up because it is very difficult to do without practice before a job that you're doing
nice job

nice job
Not always these cockpit interiors are as flat as you think. It usually depends on an author of a model or just simply on us and knowledge about aircraft structures.
BTW... a good job on the model Boats. Keep working.")
BTW... a good job on the model Boats. Keep working.
Last edited:
Crimea_River
Marshal
Great stuff Boats. Nice to see work in a different medium. The engineering that goes into the paper kits is pretty impressive.
Airframes
Benevolens Magister
It certainly is! Good stuff Boats.
vikingBerserker
Lieutenant General
You guys are so impressive in doing these. Well done!
- Thread starter
- #30
deckape
Staff Sergeant
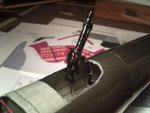
Gunners compartment completed
Ahoy
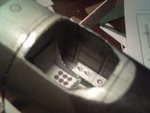
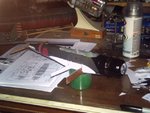
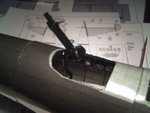
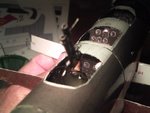
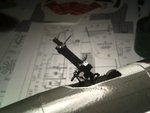
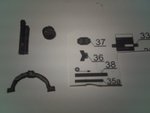
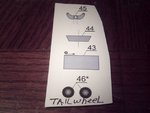
thanks guys again for your most honered replies as for the update for the day takeing my time as we all know model building is a time consumeing hobby it requires lots of time for me at 72 years young Ouchhhhhhhhhhh all I have left is time and makeing certain its spent well. akay just rambling now back to the build. As for the intire cockpit detail its all done just finished the gunners compartment as you look at the exploded views of the 30 cal rear gun it shows all the parts in makeing the tailgun unit 3 hours on this assembly after the tail gun has dreid well i installed same. done some more touch up here and there some how some reason every time i review and check things out i find hollidays that need touching up all in the game of modeling. tommorow the fune has just begun the construction and assembly of the tail feathers. here are the updates.
Boats
Here is the exploded view of the tailgunners 30.cal didn,t know why it didn,t load up with other pictures but here it is.
Boats
Ahoy
thanks guys again for your most honered replies as for the update for the day takeing my time as we all know model building is a time consumeing hobby it requires lots of time for me at 72 years young Ouchhhhhhhhhhh all I have left is time and makeing certain its spent well. akay just rambling now back to the build. As for the intire cockpit detail its all done just finished the gunners compartment as you look at the exploded views of the 30 cal rear gun it shows all the parts in makeing the tailgun unit 3 hours on this assembly after the tail gun has dreid well i installed same. done some more touch up here and there some how some reason every time i review and check things out i find hollidays that need touching up all in the game of modeling. tommorow the fune has just begun the construction and assembly of the tail feathers. here are the updates.
Boats
Here is the exploded view of the tailgunners 30.cal didn,t know why it didn,t load up with other pictures but here it is.
Boats
Attachments
Last edited:
vikingBerserker
Lieutenant General
Sweet!
- Thread starter
- #32
deckape
Staff Sergeant
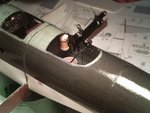
Tail assembly
Ahoy
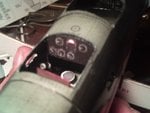
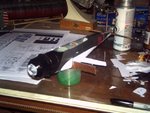
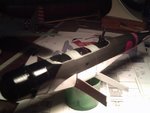
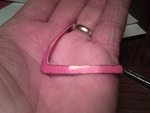
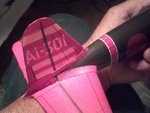
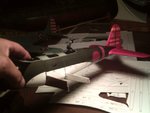
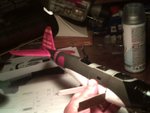
Here is the update for the day been to busy doing a honey do list for my first mate, now its time to turn two on the KATE. The assembly of the rudder assembly consist of 5 pieces the inner structure is no more then the profile of the rudder with a spar and two ribs and a fairing fillet. These wwere constructed and installed I have the Horizonal stabilizer cutted out and formed to shape along with the inner spars and ribs. these will shown tomorrow. so far starting to look like a KATE here are the pixs for today tommorow hopefull i will have the fuselage completed.
Boats
Ahoy
Here is the update for the day been to busy doing a honey do list for my first mate, now its time to turn two on the KATE. The assembly of the rudder assembly consist of 5 pieces the inner structure is no more then the profile of the rudder with a spar and two ribs and a fairing fillet. These wwere constructed and installed I have the Horizonal stabilizer cutted out and formed to shape along with the inner spars and ribs. these will shown tomorrow. so far starting to look like a KATE here are the pixs for today tommorow hopefull i will have the fuselage completed.
Boats
Attachments
Airframes
Benevolens Magister
Sure is !
- Thread starter
- #35
deckape
Staff Sergeant
Ahoy WurgerLooking good.
Many thanks again for your wonderfull replies on the KATE, Starting to shape up now hopefully by this Tuesday or Wednsday I should have the intire fuselage assembly done. Thanks wurger.
Boats
- Thread starter
- #36
deckape
Staff Sergeant
Ahoy
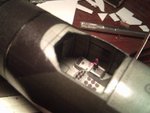
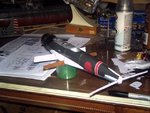
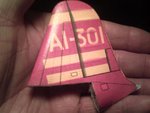
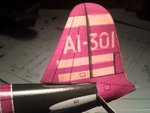
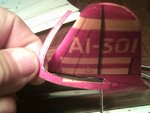
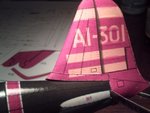
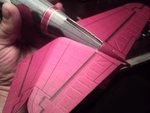
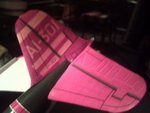
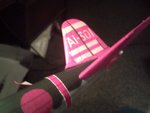
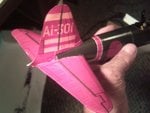
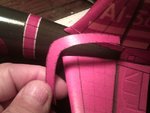
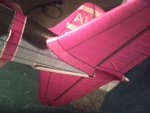
Here is an update for the now I,ll squeez in a couple more pix before the nights over. for now here is the assembly of the Stabilizer unit. as you can see on the photos below the outer skins for the stabilizer and the spar and ribs. there are 5 pieces for the ribs and spar and the filler platform they fit against the previeous installed stabilizer spar and cemented in to position. When dry Starting from the bottom of the stabilizer platform and spar glue into position then fold over and glue, When working with these card models its a good practice to color in the leading and trailing edges so that the white will disappear. After the stabilizers have been installed its time for the two fillets that are glued to fill in the stabilizer root same as the real machine. Here are the update for now
Boats
Attachments
-
 PICT0006.JPG45.1 KB · Views: 92
 -
 PICT0007.JPG37.6 KB · Views: 102
 -
 PICT0008.JPG44 KB · Views: 91
 -
 PICT0009.JPG39.9 KB · Views: 97
 -
 PICT0010.JPG39.4 KB · Views: 96
 -
 PICT0011.JPG47 KB · Views: 102
 -
 PICT0012.JPG46 KB · Views: 90
 -
 PICT0013.JPG47 KB · Views: 100
 -
 PICT0014.JPG51.2 KB · Views: 90
 -
 PICT0015.JPG47.5 KB · Views: 99
 -
 PICT0016.JPG52.7 KB · Views: 90
 -
 PICT0017.JPG49.5 KB · Views: 112
 -
 PICT0018.JPG38.9 KB · Views: 103
 -
 PICT0019.JPG42 KB · Views: 99
Airframes
Benevolens Magister
Great stuff Boats. The assembly looks pretty close to the real thing !
vikingBerserker
Lieutenant General
What a beaut!
- Thread starter
- #39
deckape
Staff Sergeant
Tail wheel and airscoop
Ahoy
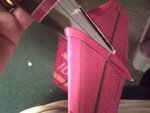
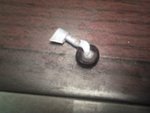
Thank you Wurger and Terry for your wonderful reply on my KATE. Okay Gents we move on to the next step, Here on this step on the following photos you will see the paper parts of the tail wheel construction. Next will be the completed tail wheel the tail wheel is made up from 5 cardboard disc assembled together and touched up with flat black paint when dry the tail wheel unit is glued to the back of the fuselage as indicated. Next step is the bottom airscoop there are 3 parts to this assembly treated as the same was as the tailwheel. when dry installed to the bottom of the cowling.
boats
Ahoy
Thank you Wurger and Terry for your wonderful reply on my KATE. Okay Gents we move on to the next step, Here on this step on the following photos you will see the paper parts of the tail wheel construction. Next will be the completed tail wheel the tail wheel is made up from 5 cardboard disc assembled together and touched up with flat black paint when dry the tail wheel unit is glued to the back of the fuselage as indicated. Next step is the bottom airscoop there are 3 parts to this assembly treated as the same was as the tailwheel. when dry installed to the bottom of the cowling.
boats
Attachments

Users who are viewing this thread
Total: 1 (members: 0, guests: 1)