Navigation
Install the app
How to install the app on iOS
Follow along with the video below to see how to install our site as a web app on your home screen.
Note: This feature may not be available in some browsers.
More options
You are using an out of date browser. It may not display this or other websites correctly.
You should upgrade or use an alternative browser.
You should upgrade or use an alternative browser.
**** DONE: 1/48 Messerschmitt Bf 110 G-2 - Me/ Fw Group Build.
- Thread starter Gerry
- Start date
Ad: This forum contains affiliate links to products on Amazon and eBay. More information in Terms and rules
More options
Who Replied?Coming along very nicely!
Airframes
Benevolens Magister
That's looking very good Gerry.
Gerry it looks fantastic
Crimea_River
Marshal
Looking very good Gerry and glad the rumpfband turned out well.
Vic Balshaw
Major General
I'm kind of glad this one didn't go on a test flight, we wouldn't have seen hoe brilliant it has turned out. Top job Gerry.
Progress looks great Gerry, keep up the good work!
- Thread starter
- #249
Gerry
Staff Sergeant
Wurger, Gnomey, Terry, Karl, Andy, Vic, Wayne Jerry - thanks to all for showing a continued interest in this build. And, yes I'm also glad no test flight occurred - it was just down to a moment of frustration. Working away on the underside and will post some shots when I make some more progress. 
- Thread starter
- #251
Gerry
Staff Sergeant
Thanks Kevin. I sympathise entirely. Well, here's the latest progress I've made to date.
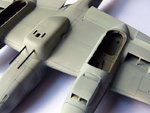
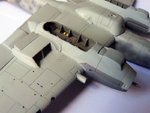
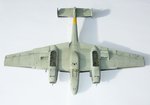
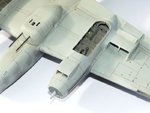
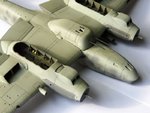
Photos 1, 2 3. the cannon gondola and underwing rads and covers have been added. The rads went on without too much problem. There was a little filling required on the fit to the nacelles, but nothing too bad. They had already been test fitted to allow for the dropped flaps. The gondola was more of a problem. First the instructions aren't too clear as to where the cannons attach. There are two possible locations, but one makes the barrels protrude too far and in the other they are too short. So, based on photos, I adjusted the position (sanding and testing) to show the length of the visible barrels to match the photo refs I have. The gondola itself didn't fit as neatly as most of the other kit parts. There was quite a sizable gap in places that had to be filled and sanded, then localised spraying was done. On some of the ref photos I have seen, the gondolas seem to be 'caulked' into position, so I didn't feel to bad.
I then started to enhance the panel lines with the pencil method - the first time I tried this. After a couple of errors that were erased, I got this finished to my satisfaction. The two close-ups just show it in a little more detail.
Pictures 4, 5 6. After a spray of matt varnish to protect the paint and panel lines, I gave the panel lines and underside a wash of very dilute black/brown enamel, wiping off any excess with white spirit, before it dried too hard. I'll have another look at the extent of the weathering when I come to add gun smoke staining, etc.
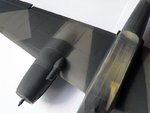
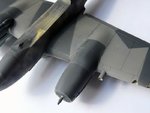
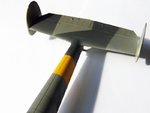
Pictures 7, 8 9. I started the same paneling process on the topside, but haven't finished yet, so more photos of the overall look anon.
Attachments
-
 Full Underside.jpg48.5 KB · Views: 185
 -
 u.jpg74.6 KB · Views: 194
 -
 u.jpg71.6 KB · Views: 215
 -
 Underside weathered.jpg45.6 KB · Views: 200
 -
 Gondola weathered.jpg70.2 KB · Views: 184
 -
 Nacelles weathered.jpg84.7 KB · Views: 185
 -
 Top starboard nacelle.jpg62.2 KB · Views: 184
 -
 Top nacelle.jpg62.5 KB · Views: 178
 -
 u.jpg50.3 KB · Views: 192
Great stuff Gerry!
Airframes
Benevolens Magister
That's really looking the biz Gerry, well done !
looks great
- Thread starter
- #255
Gerry
Staff Sergeant
Thanks Gnomey, Terry and Karl. It's back to trying to get a bit more done today.
Vic Balshaw
Major General
Lovely bit of panel lining Gerry.
Like your progress Gerry!
Crimea_River
Marshal
Looking excellent Gerry!
- Thread starter
- #260
Gerry
Staff Sergeant
Thanks Jerry, Vic and Wayne, but I've been forced to take a few steps backwards. 
A brief update: I've run into some trouble with my varnishing. I had successfully completed the panel lining on the top surface (or so I thought). I then sprayed the top surfaces with Klear, through my airbrush, and left it to dry. I cleaned the airbrush, and then started painting some of the sub-assemblies, the drop tanks and mortar tubes etc. When I had finished these, I decided to give the top surfaces another coat of varnish. It was quite late by this time, so rather than clean the airbrush again I decided I'd spray a coat of Humbrol Acrylic Satin Coat Varnish from an aerosol. I don't know whether the first coat of Klear wasn't properly dry, but when I came back to it this morning, the Humbrol had reacted with the Klear, resulting in cracking and crazing of the varnish on some parts of the wings, with some of the affected parts becoming a 'milky' opaque and in a couple of areas, completely hiding the difference between the RLM 74 and 75 pattern. I tried sanding these areas back but that just made it look worse. I masked off one of the affected areas and resprayed with RLM 75, but because of the varnish, there was a definite difference in tone from the new paint (it was also a fresh mix, so could have been slightly different) so I felt I had no other option that to sand the complete surface of the wings back as far as I could and do a complete respray. Fortunately, the undersurfaces have been totally unaffected by any of this and remain as you've seen them.
I'm not going to make a big thing of this, as both Vic and Karl have overcome more serious problems on their builds, as indeed has Andy on his wheelwells. Rather, I decided to just get on with it and at this point have sanded back and resprayed the RLM 75. Assuming this now takes OK, I will re-mask and spray the RLM 74 tomorrow. This has all delayed progress on other aspects of the build but, all going well I should get back on track before too long. I'll post photos of the resprayed parts as soon as they're finished.
Users who are viewing this thread
Total: 1 (members: 0, guests: 1)
