Navigation
Install the app
How to install the app on iOS
Follow along with the video below to see how to install our site as a web app on your home screen.
Note: This feature may not be available in some browsers.
More options
You are using an out of date browser. It may not display this or other websites correctly.
You should upgrade or use an alternative browser.
You should upgrade or use an alternative browser.
**** DONE: 1/72 Sea Fury FB11 RAN 21 CAG - Your Favorite Aircraft of All Time GB
- Thread starter parsifal
- Start date
Ad: This forum contains affiliate links to products on Amazon and eBay. More information in Terms and rules
More options
Who Replied?Airframes
Benevolens Magister
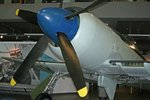
Looking good Michael. Agree about the props tips - they were 4 inc yellow tips, about 1.4mm in 1/72nd scale.
Check the angle of the main gear legs and doors too - they look a touch too vertical.
Check the angle of the main gear legs and doors too - they look a touch too vertical.
- Thread starter
- #123
parsifal
Colonel
Props can be fixed pretty easily. Will also have a second look at the gear. I hope its "near enough" as getting the gear attached was a nightmare. Couldnt use the aligning lugs because id left insufficient clearance for the fairings. Basically the angle was a guess....arrived at in between standing on one leg whilst trying to get the oleos to set in place. It was one of those annoying episodes that you come out of thinking "phew!!! im glad thats over!!!"
Catch22
Major
Nice work!
- Thread starter
- #126
parsifal
Colonel
Looking good Michael. Agree about the props tips - they were 4 inc yellow tips, about 1.4mm in 1/72nd scale.
Check the angle of the main gear legs and doors too - they look a touch too vertical.
Reluctantly i have to agree...the gear is about 2mm too far back. its a buger to fix though. ill have to use debonder very carefully and sparingly to detach the gear, then reshape by careful filing of the fairings to shift the rest point forward by the 2-3mm needed. both gear assemblies have to be set at the same angle, which has to be done purely by eye, and with damage to the paintwork minimised.....talk about no pressure!!!!!
will attempt tonite. wish me luck.
brucejscott
Staff Sergeant
Good luck. Looking good though Michael.
- Thread starter
- #128
parsifal
Colonel
The attached image is from the FAA database , and shows the front half 9or so of the main gear to be forward of the leading edge of the wing. My gear is fully behind the leading edge, so i have definately made an error in the positioning of the gear. Also the joint of the upper and lower fairings (there is a small bit of the fairing close to the wing) is not joined as is shown in the kit instructions. I will need to investigate this further.
Attachments
- Thread starter
- #129
parsifal
Colonel
Well, according to the photos posted by crimea earlier, the small upper fairing is not connected to the main fairing end on. Its connected in a rather disjointed and unusual way way actually. This explains why I was having so much difficulty in fitting these pieces. the kit instructions were wrong!. thats thrown the positioning of the gear in relation to the wing completely out of wack.
Ive got some fixin to do.......
Ive got some fixin to do.......
Not bad so far though....learning along the way!
brucejscott
Staff Sergeant
Live and learn, still looks good.
Vic Balshaw
Major General
Think you're doing very well Michael and it is looking good.
- Thread starter
- #134
parsifal
Colonel
Ive modified the gear now, and have also repainted the props. Am ready now to apply the decals and then, finally the canopy. One more decision to make....do i have an open cockpit or keep it sealed....
woljags
Staff Sergeant
keep going your doing a great job
Crimea_River
Marshal
Great stuff. Looking forward to piccies.
yep, me too!
ccheese
Member In Perpetuity
Me three... Pic's, pic's, pic's !
Charles
Charles
- Thread starter
- #140
parsifal
Colonel
Im still battling through guys. ive had some difficulties, but im getting there. The decal set failed to provide any of the wing mounted UN stripes, so i had to paint the white backgrounds on the wings. I had a product failure here....the white paint reacted for some reason, forcing me to sand it off without damaging the rest of the paint work. I also got some white leakages along the very deep panel lines on the wing. anyway, have spent the last three nights cleaning it all up . i have re-applied the white bands and have black stripes on one wing. Will do the other wing tonite and hopefully be able to post pics soon.
Surprisingly the rear fuselage striping that i thouyght would be a real pain actually went on relatively easy....its the wing mounted stripes that are causing me the grief.
The decalling process has not gone as well as i had hoped, but its okay and "good enough" It has easily been the most difficult part of the build to date. It degenerated into a salvage and rescue job really but still okay I guess
Users who are viewing this thread
Total: 1 (members: 0, guests: 1)


![Seafury_TF934_102_RCN_preserved[1].jpg](/forum/data/attachments/174/174439-eb5c7ebc4500a9a3d7b3fca73d3aa46c.jpg)