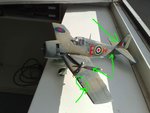
F6F-3 RAF - Hasegawa Kit.No. S015:2300 (1 Viewer)

Ad: This forum contains affiliate links to products on Amazon and eBay. More information in Terms and rules

Many thanks for your help.

Next week i´ll go and get the colours.

I do not think the colours changed bec of pic processing. Checking all the other colours like yellow, red, dark blue, white and skin-tone i do not think the colour frequency changed. I also asked a friend who is working in a printig house as designer on adobe-professional products says so. He also makes picture improvement and is the last person to final check and improve before the order is being printed.

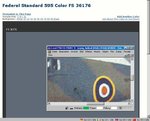
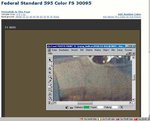
I checked these colours (for my feeling) and add some pics for pic #11

Grey – FS 36176
Brown – FS 30095

Wish you a nice sunday afternoon
 

Attachments

  • F6F - FS 36176.jpg
    F6F - FS 36176.jpg
    42 KB · Views: 121
  • F6F - FS 30095.jpg
    F6F - FS 30095.jpg
    41.6 KB · Views: 97
The problem with colour images of WW2 is that too many people believe these shots are as accurate as these taken nowadays. But it is not true and for the reason I prefer B&W pictures. We have to understand that the colour photography was still in nappies at that time. Many manufactures just started tests or experiments with photosensitive material for colour images.
Also Dupont paints were known of its easy and quick fadding because of the weather conditions. If you have a look at AVG early P-40s ( Hawk 81) you will grassp what I'm talking about. There is the same problem with a recogization of their correct colours. These ones used for their camouflages were of the Dupont as well.

Also please check the thread ...... the Spitfire floatplane is made with the FAA camo scheme. I think it might help too.

http://www.ww2aircraft.net/forum/14...odern-aircraft-spitfire-marks-gb-32637-9.html

Regarding the picture I had posted... it can't be excluded the Hellcat was tested by RAF/FAA but was sent for it to the Great Britain with the factory-made camo that was used by the Figter Command for day fighter machines at that time. It might have been the RAF Dark Green/ the Earth-Brown and Duck Egg Blue (Sky S-type) scheme. Unless the picture has been B&W initailly and then it was coloured digitally.
 
Last edited:
The colour picture of the Hellcat in flight is from one of three possible original sources.
1) An original reversal film image (transparency/slide film) possibly Kodachrome.
2) Printed from an original contone colour negative.
3) A B&W print coloured with Kodak colour tints, which were applied carefully by brush, onto a B&W 'Bromide' print by very skilled photo retouchers.
(In addition, although I doubt it, it could be a digitally coloured original B&W print.)
None of the above three can be accurately compared to today's photo-imaging, and the colour tones and colour temperature values can not be accurately assessed, either by eye or by computer assistance, without access to the original image - there are too many variables and unknowns to make an accurate assessment.
Any and all of the above three described originals can be, and would be, affected by age, storage, printing and, of course, the original exposure and processing of the film image and subsequent printing or duplication. The image is typical of a colour image of the period which has been duplicated many times, at each stage losing original density and contrast, and with a progressive shift of colour values, and therefore can not, and should not, be accepted as a true rendition of the colours. This is particularly true if the original was a transparency, which was then duplicated as 'insurance' (normal practice), with the duplication(s) used for subsequent reproduction. If this image is then printed in, say, a magazine, and then copied for further duplication, and then perhaps scanned for display on a computer, then it is easy to see and understand the many stages which eventually lead to the image being far from it's original contrast, brightness and colour values.
There is also another factor known in traditional, silver-imaging photography as 'anomalous reflection', where certain man-made dyes, pigments and paints will be recorded by film at a different colour temperature to that perceived by the human eye, a good example being in wedding photography, where the groom's black suit may look blue in a traditional colour print, or where brown-painted objects may have a red tinge, and so on.
This is not to say that all such images should be disregarded, as it depends on the quality and source of the image, and there are often indications within such images which can help to assess the true colour values displayed. For example, an item of a known and measured neutral colour which is reproducing as it would be expected in the image, showing the correct colour and tones.
The interpretation of photographic images, both monochrome and colour, is a complex and complicated art and science, and often, even very experienced experts can only reach a 'best guess' conclusion.
After quite a number of years working as a technical specialist for a very large photographic manufacturer, both in the Professional Photography and Graphic Reproduction fields,I would base the colour choices for the model on the known, published paint references, as described by Wurger, rather than a personal 'guess' as to the actual colour tones in a 70 year old, multiple reproduction, computer- displayed colour image.
 
may i say - i am stunned ...
your knowledge not only around the originals but also the colours and imaging and history of photography

WOW !!!

Some of the problems concerning silver on bromide-paper are well known - i was an engaged b/w-photographer in my youth also developping positiv+negativ. Colouring i never practised - but always wanted to.

If it was not too curious - :shock: but what is your profession?

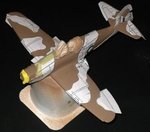
I followed your recommendation of #20 and mixed it a bit up. Having Rev 79 and Rev 45 avlbl. brings me roughly to the result of the pic - not intentionally!


"The Extra Dark Sea Grey - FS36118 .... Humbrol27 - Revell 79
The Dark Slate Grey - FS34096 ..... Humbrol102 - Revell 364
The Sky S-type - FS34583 .... Humbrol90 - Revell 59 or Humbrol23 - Revell, no equivalent.

Additionally.... many years ago the Humbrol offered Authentic Colours set. These paints were numbered EDSG - HB7, the DSG - HB8, the Sky S-type - HB5
Because these colours aren't offered by them any longer it is suggested to use

the EDSG HB7 - Humbrol 123 - Revell , no equivalent.
the DSG HB8 - Humbrol 224 - Revell 45
The Sky HB5 - Humbrol 90 - Revell 59"
[/I]

The modell saw a first superficial brushing for me to get an impression. I had to interrupt due to marital peace :cry: (Why don´t women understand us men...)

I will add first results - but the brighter colours do hard to cover the darker ones before. Propably 2-3 layers should be enough.

By the way - i wanted to say to ccheese that the model looks great and i feel very sorry for the 2 mishapps.

What is going on with the P-47-cockpit? The last post was from 2010. Did TBolt stop to build it ?
 

Attachments

  • F6F painted-5.jpg
    F6F painted-5.jpg
    70.7 KB · Views: 102
  • F6F painted-3.jpg
    F6F painted-3.jpg
    101.4 KB · Views: 90
  • F6F painted-4.jpg
    F6F painted-4.jpg
    86.5 KB · Views: 104
I do not come along - my wife can´t understand me with my modelplanes. So there is only little time left for my Kitty ... Hopefully that phase doesn´t last too long.

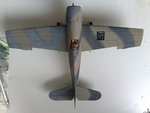
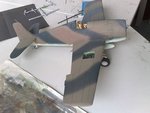
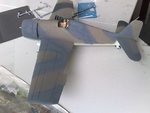
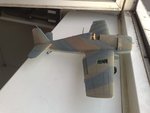
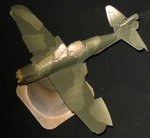
At least one more layer of EDSG is brushed - but the result is not very nice. It doesn´t really become better. I fear it´s bec the layer beneath was so dark (Rev 69). Maybe with the 3rd or 4th layer of EDSG the spots and lines will be covered. I am so unhappy now. If this was one of those flying around in my bedroom i wouldn´t mind. But this one has gear extracted - so it will be on a shelf or so. And i will see that all the time :(

The first time the result is like that.
 

Attachments

  • F6F-3 7.jpg
    F6F-3 7.jpg
    76.3 KB · Views: 91
  • F6F-3 8.jpg
    F6F-3 8.jpg
    127 KB · Views: 89
Just call it weathering! :)

Can't offer any advice on how to improve it sorry, I'm still just learning how to use the airbrush. (When I screw up a paintscheme I wash it off with nail polish remover and a rag, and do it again)
Wojtek or Terry should have a better idea though!
 
... my wife can´t understand me ...

Don't worry about that. It's quite typical for the human kind. :lol:


As far as the paint is concerned.... these white smudges have been coaused by the thinner you used. Just too much of this. Give the model a week for getting paints "dry" fully. Then airbrush a new layer of the EDSG colour. Don't use too much of the thinner. It should help.
 
Thanks for the hints. Washing all the surface with thinner - well - doesn´t sound so good. I found out that the several layers of colour left a kind of dust. I started to brush it off and result looked better.

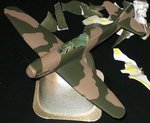
Now the model got a new layer (don´t tell her - otherwise discussion would start again)(fortunately she is sleeping now) of brown. Looks better now. Also the idea of using less thinner will be checked.

Unfortunately the pilot, the cockpit instruments and the gun hatch had to suffer from these colouring paintig festivals :( But i will not start to disassemble it. Shall remind me in furure first to check colours and than to brush.

I start to hate that particular model. Never before had such problems with brushing. Not even with the first one.

Found a great work on "Sky S"-colours. Reason to check out was that i wanted to buy Humbrol 90 Sky S for the next in the pipe - P40 RAF. I stunned when i saw it - nearly the same than Humbrol 23 DEB.
The Sky (Type "S") is the Limit - Britmodeller.com

Which actual Humbrol/Revell colour do you use for Sky S?
 
Last edited:
Looking for an P39 RAF 1/32 i only found SPECIAL HOBBY SH 32025 (?) (Special Hobby 1/32 Airacobra Mk.I/P-39F). Does anybody know another producer of that model?
 
Are you using the air brush too close?
Are you spraying a real wet coat?
Spray edges first, center of the panel last.
Use light coats.
Just enough thinner to get the paint to spray evenly in a nice even spray and not too wet.
Try using paper to mask the color areas.
 

Attachments

  • 27 r-p1.jpg
    27 r-p1.jpg
    17.1 KB · Views: 71
  • 27 r-p2.jpg
    27 r-p2.jpg
    19.1 KB · Views: 70
  • 27 r-p3.jpg
    27 r-p3.jpg
    17.9 KB · Views: 74
  • 27 r-p4.jpg
    27 r-p4.jpg
    24.5 KB · Views: 74
sorry - i didn´t report for long time. Things were going on soso. Especially this F6F really must hate me. It got personal. I really was quiet close to show the F6F how it is when she is flying out of the 2nd floor.

I didn´t want to invest more time after brushing some more layers and decided to finish and apply the decals. The model will end up on ebay or in the very back of a hidden shelf.

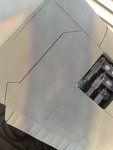
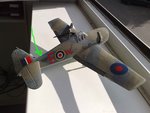
After application i lost the 3rd dec on the prop blade. When the remaining decs were dry i wanted to brush in clear gloss to make the decs invisible. What happened was that the dec blew off the wing, broke into pieces and partially stick to the already applied gloss (you can see some left on the wing leading edge). I reduced the pressure on my double-action to very low and continued carefully on the vertical tail. Wush - even then the same result - not only the mark has gone but also the indication "Royal Navy JV105" on the port side. Wanted to add pics but for some reason doesn´t work :cry:

Has anyone an idea where to get those decals from? Hasegawa itself? Do the offer a support like Revell?
 
here the pics ...

Does anyone know whether Hasegawa supports service or mayb have a solution for my lost and damaged decals?
 

Attachments

  • 10.07.12 Decals-1a.jpg
    10.07.12 Decals-1a.jpg
    97.2 KB · Views: 108
  • 10.07.12 Decals-2a.jpg
    10.07.12 Decals-2a.jpg
    99.3 KB · Views: 72
ahhh - sorry wurger - i didn´t see your reply. Unfortunately this is 1/32
 

Users who are viewing this thread

Back