F6F-5 Color? (1 Viewer)

Ad: This forum contains affiliate links to products on Amazon and eBay. More information in Terms and rules

SpicyJuan11

Senior Airman
328
31
May 29, 2015
Luxemburg
What color was the F6F-5 Hellcat exactly? I'm building the 1:72 Hobbyboss kit (USS Princeton, White 7) and would like to use Vallejo "Model Air" colors. However I'm finding lots of different answers
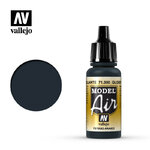
The 1:72 Hobbyboss kit calls for "Glossy Sea Blue" which matches Vallejo's 71.300 "Glossy Sea Blue" (FS15042, ANA623)
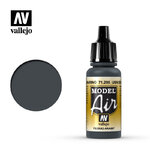
Eduard recommends Gunze H54/14 "Navy Blue" which matches Vallejo's 71.295 "USN Sea Blue" (FS35042; ANA607)
Airfix's 1:24 monster calls for Humbrol 15 "Gloss Midnight Blue" which matches 71.090 " Deep Sky" (FS35056)

Which to choose?
 
From my understanding, which color depends on which camo scheme. The "USN Sea Blue" (FS35042) is a better match to the non-specular sea blue (ANA 607) used as the upper most blue in the tri-color camoflauge of the mid-war period. "Glossy Sea Blue" (FS15042) would be a better match to the overall darker blue camo used later in the war. But that's just my useless 2 cents...

Take care

Pete
 
ANA 623 - FS 15042 - Humbrol 181, Gunze 54, Vallejo 71.300.

The ANA 623 and ANA 607 were coats of the same tone but of different finish. The ANA 623 was the gloss paint while the ANA 607 was the Matt ( Flat or non-specular ) one. Therefore the Vallejo labeled them with two different numbers and names. As memo serves the White 7 is an example of Hellcat used in 1944 so the Vallejo 71.300 "Glossy Sea Blue" colour should be used overall.
 
From my understanding, which color depends on which camo scheme. The "USN Sea Blue" (FS35042) is a better match to the non-specular sea blue (ANA 607) used as the upper most blue in the tri-color camoflauge of the mid-war period. "Glossy Sea Blue" (FS15042) would be a better match to the overall darker blue camo used later in the war. But that's just my useless 2 cents...

Take care

Pete

Thanks, I'm doing the following scheme
Hellcat.PNG
 
Last edited by a moderator:
ANA 623 - FS 15042 - Humbrol 181, Gunze 54, Vallejo 71.300.

The ANA 623 and ANA 607 were coats of the same tone but of different finish. The ANA 623 was the gloss paint while the ANA 607 was the Matt ( Flat or non-specular ) one. Therefore the Vallejo labeled them with two different numbers and names. As memo serves the White 7 is an example of Hellcat used in 1944 so the Vallejo 71.300 "Glossy Sea Blue" colour should be used overall.

Also FS35042 and 15042 are the same hue. The difference is that the latter is gloss and the former is matte.

Thank you. Vallejo's own color sampling are pretty confusing since they appear to be different hues:
model-air-vallejo-glossy-sea-blue-71300.jpg
model-air-vallejo-usn-sea-blue-71295.jpg
 
As I have said in the post #3.

Thankfully, I had bought and painted the model with the right one (71.300, Glossy Sea Blue). Since then I have hand-brushed Future the entire model to prepare for the Decals (not sure if this is the right call, I'm a beginner). I bought Vallejo Matt Varnish to seal up the paint and decals in preparation for weathering. Was that the right call in terms of historical accuracy, or should I buy Vallejo Glossy or Satin Varnish (does another coat of Future work instead?)? I'm not sure how clean the Hellcats were kept or if the glossy paint will "gloss" through the Matt Varnish and weathering.
 
Thank you. Vallejo's own color sampling are pretty confusing since they appear to be different hues:

Unfortunately it is matter of scanning of the pics very often. The colours can look really different in reality. Here you are the Gunze/Mr.Hobby paints scanned from two catologues IMHO.. the bottom pics present the same hue of the two paints while the tops images show some difference.

Mr Colour14.jpg
Mr Colour54.jpg

Mr ColourH14.jpg
...
Mr ColourH54.jpg
 
Thankfully, I had bought and painted the model with the right one (71.300, Glossy Sea Blue). Since then I have hand-brushed Future the entire model to prepare for the Decals (not sure if this is the right call, I'm a beginner). I bought Vallejo Matt Varnish to seal up the paint and decals in preparation for weathering. Was that the right call in terms of historical accuracy, or should I buy Vallejo Glossy or Satin Varnish (does another coat of Future work instead?)? I'm not sure how clean the Hellcats were kept or if the glossy paint will "gloss" through the Matt Varnish and weathering.


To be honest you haven't needed to use the Future for the entire model . Unless the Vallejo 71.300 isn't enough gloss coat. But if it is it was enough to apply the decals and then sealed them with the Vallejo Glossy clear varnish. Then you may apply the waethering. The final touch should be done with the Satin clear varnish. Unless the kite had the uniform very worn and tarnished ( dull) so the Matt one should be used. But the ANA 623 was a good colour and didn't fade too quickly as memo serves. The White 7 is dated on the 1944 and that's the year the Glossy Blue was introduced in assembling lines. And I don't think it managed to get faded too much yet.
 
To be honest you haven't needed to use the Future for the entire model . Unless the Vallejo 71.300 isn't enough gloss coat. But if it is it was enough to apply the decals and then sealed them with the Vallejo Glossy clear varnish. Then you may apply the waethering. The final touch should be done with the Satin clear varnish. Unless the kite had the uniform very worn and tarnished ( dull) so the Matt one should be used. But the ANA 623 was a good colour and didn't fade too quickly as memo serves. The White 7 is dated on the 1944 and that's the year the Glossy Blue was introduced in assembling lines. And I don't think it managed to get faded too much yet.

I read on another forum that it was good to coat the whole model in Future to ensure a unified color. I applied it because I wasn't sure if the "glossy" was just in the name of the paint or was actually a glossy finish.

Are you supposed to seal the model with a varnish after weathering. This is my first time messing around with future/varnishes and I'm kinda confused by it all.

After applying to the future to the whole model, there are lots of tiny bubbles (I they're visible in the photo). Is this a mistake in my application of the Future, or is it highlighting small bits of dust, etc, that was on the model (under the layer of paint) already?

Thank you for your help.

720692-62039-42.jpg


720693-62039-83.jpg
 
I read on another forum that it was good to coat the whole model in Future to ensure a unified color. I applied it because I wasn't sure if the "glossy" was just in the name of the paint or was actually a glossy finish.

The applying of the gloss varinish is usually done when the colours of the camouflage are of the matt ( flat ) type. Hovewer if you weren't sure about the paint type it was fine to do that. So OK. Also you are right about the unifying of the colour. Sometimes it happens that after applying of a clear varnish, the colour gets a darker tone or just starts to look as being wet. Anyway you should remember that it is the next coat applied on the model and some of details may start vanishing under that.

Are you supposed to seal the model with a varnish after weathering. This is my first time messing around with future/varnishes and I'm kinda confused by it all.

All depends on the kind of the weathering. Eg.. it happens often that the matal/silver chips, scratches may get the matt grey dark tone because the thinner of the varnish can affect the metalic colours. Contrary to that the exhaust stains and dust can be overpainted with the clear coat and all should be fine with them. But I would suggest checking on that applying the coats on a plastic scrap.. additionally please keep in mind that some of such exploatation traces can give the matt finish to the area these affected. So overpainting them with the clear gloss varnish will result in loosing of the finish. Also it works in the same way if you apply matt coat on the gloss one.. eg. oil spots are usually more glossy and make the surface more shiny than the rest of the matt surface around.

After applying to the future to the whole model, there are lots of tiny bubbles (I they're visible in the photo). Is this a mistake in my application of the Future, or is it highlighting small bits of dust, etc, that was on the model (under the layer of paint) already?

Have you brushed the Future clear? Did you thin it ? It seems that the problem was caused by the brush, and the varinsh that evaporated too quick. Of course the dust can be the reason for that too. But don't worry it happens to all quite often I would say. You may try to remove that by using of a rag for slightly wiping and polishing of the surface of the model.
Personally , before I start painting I spray some water in the air and then I clean the around area with a wet rag. Also I keep the freshly painted model in a clean closed box at any stage of applying of colours.
 
The applying of the gloss varinish is usually done when the colours of the camouflage are of the matt ( flat ) type. Hovewer if you weren't sure about the paint type it was fine to do that. So OK. Also you are right about the unifying of the colour. Sometimes it happens that after applying of a clear varnish, the colour gets a darker tone or just starts to look as being wet. Anyway you should remember that it is the next coat applied on the model and some of details may start vanishing under that.

All depends on the kind of the weathering. Eg.. it happens often that the matal/silver chips, scratches may get the matt grey dark tone because the thinner of the varnish can affect the metalic colours. Contrary to that the exhaust stains and dust can be overpainted with the clear coat and all should be fine with them. But I would suggest checking on that applying the coats on a plastic scrap.. additionally please keep in mind that some of such exploatation traces can give the matt finish to the area these affected. So overpainting them with the clear gloss varnish will result in loosing of the finish. Also it works in the same way if you apply matt coat on the gloss one.. eg. oil spots are usually more glossy and make the surface more shiny than the rest of the matt surface around.

Have you brushed the Future clear? Did you thin it ? It seems that the problem was caused by the brush, and the varinsh that evaporated too quick. Of course the dust can be the reason for that too. But don't worry it happens to all quite often I would say. You may try to remove that by using of a rag for slightly wiping and polishing of the surface of the model.
Personally , before I start painting I spray some water in the air and then I clean the around area with a wet rag. Also I keep the freshly painted model in a clean closed box at any stage of applying of colours.

Thank you. I brushed the Future but I didn't thin it. Is there a brushable alternative to Future that you recommend? Those bubbles and Future's reaction to microset/sol is annoying. Can you recommend Vallejo's Gloss Varnish? I have their Matt Varnish (which works wonderfully) but heard bad things about their gloss and it doesn't seem that Tamiya X-22 is brushable as it supposedly doesn't have the same self-leveling properties as Future.
 
I always tend to get some bubbles when brush painting Future. For my last few models I've started using a softer brush and it does help some. Brushing slower helps as well but if you go too slow you risk brushing through Future that has started to dry which causes a rough surface.

How do you remove the bubbles?
 
Thank you. I brushed the Future but I didn't thin it. Is there a brushable alternative to Future that you recommend? Those bubbles and Future's reaction to microset/sol is annoying. Can you recommend Vallejo's Gloss Varnish? I have their Matt Varnish (which works wonderfully) but heard bad things about their gloss and it doesn't seem that Tamiya X-22 is brushable as it supposedly doesn't have the same self-leveling properties as Future.


I use the oil enamels like Humbrols/Revell etc... so my clear gloss varnish is the Humbrol not yellowish oil Clear Coat. Also I use an airbrush for applying so the bubbles don't happen rather. However the Humbrol offers the acrylic series of the clear varnishes named Clear Varnish... see pic below. My mates here use them quite often and don't complain themself.

Humbrol Clear Gloss, Satin and Mat.jpg


The Vallejo Gloss Varnish is OK too however it should be kept in mind that the varnish should be applied with an airbrush than with a brush. A note though .. most of the acrylic varnishes and colours aren't for brushing rather. Of course it is possible to apply them with the tool but it is enough to check a couple of pics via the internet that painting of details and ofthen the entire model is nothing easy.

Additionallt the price of such dedicated liquids is higher than the one for a bottle of the Future that is nothing more but the clear acrylic varnish for using at home with wooden surfaces. Therefore the issues with it may happen. Just the composition of the varnish isn't suitable for many other liquids used for modelling.

If you want you may stay with the Future but just try to change the brush with more soft bristle and flat large painting ending. Personally I use one of the brushes for woman's makeup. An example below...

pedzel.jpg
 
If brushing any clear coat, or paint for that matter, it's important to 'lay off' the coating. That is, apply a reasonable coat, not too heavy, but also not too thin, and ensure that it is spread across the surface so that it covers evenly, until it just starts to thin out at the rear edge of the brush stroke, having made the final strokes in one direction only, preferably, for example, towards the trailing edge of a wing or fuselage.
Any streaks or gaps in this coat can be covered by the next 'line' of varnish / paint, until the entire selected surface is covered. A very light smoothing 'brush over' the still wet coat should eliminate, or at least reduce, the possibility, of bubbles and / or streaks.
It is also important to allow the first overall coat to dry sufficiently (around 15 minutes for acrylic varnish), before applying a second, brushed, coat.
Many acrylic gloss varnishes require a number of coats in order to achieve a good, hard, gloss finish, and the Humbrol product shown by Wojtek certainly needs at least three coats to achieve this.
If, when applying the second clear coat, the surface shows 'bloom' ( a cloudy patch or patches), do not be concerned with this - it is just the first coat being 're-activated' by the second, wet, coat on top and, allowed to settle and dry, should clear.
Whatever product is used, including 'Future', it is best to leave the surface to fully harden for between 12 and 24 hours, if applying by brush, before applying successive coats - that is 3 or more coats - after the first 1 to 2 coats, allowing each coat a few hours to fully harden. This will allow the surface to harden to the extent where successive coats have a better surface 'key', where the underlying surface has smoothed enough to allow a gloss coat to be built up evenly and smoothly, without reacting with the surface of the previous coats.
With all that said, it is still possible for tiny bubbles to be visible, some of which are caused by very tiny dust particles trapped as the varnish is applied.
If you have an airbrush, then a final, thin coat of the gloss varnish tends to hide most of this and, once the final finish coat is applied, particularly a clear matt or satin / semi gloss coat, most, if not all, of the bubbles should disappear, at least to the naked eye (brutal macro photos might reveal some !).
Whichever methods you use, once the gloss coats have fully hardened (at least 24 hours), polishing the surface with a dedicated polishing cloth, or a paper tissue, should provide a better surface appearance.
Finally, always remember that, as with any surface coating, two or more light coats are always better than one heavy coat.

Hope this helps.
 
I agree with the post above. Here is an example of applied two thin coats on a cardboard fuselage of B-24.. just used the large brush... no bubbles , white deposit etc ...

the general view ...
clear1.jpg


and the enarged shot ...
clear1a.jpg
 
I use the oil enamels like Humbrols/Revell etc... so my clear gloss varnish is the Humbrol not yellowish oil Clear Coat. Also I use an airbrush for applying so the bubbles don't happen rather. However the Humbrol offers the acrylic series of the clear varnishes named Clear Varnish... see pic below. My mates here use them quite often and don't complain themself.

View attachment 574008

The Vallejo Gloss Varnish is OK too however it should be kept in mind that the varnish should be applied with an airbrush than with a brush. A note though .. most of the acrylic varnishes and colours aren't for brushing rather. Of course it is possible to apply them with the tool but it is enough to check a couple of pics via the internet that painting of details and ofthen the entire model is nothing easy.

Additionallt the price of such dedicated liquids is higher than the one for a bottle of the Future that is nothing more but the clear acrylic varnish for using at home with wooden surfaces. Therefore the issues with it may happen. Just the composition of the varnish isn't suitable for many other liquids used for modelling.

If you want you may stay with the Future but just try to change the brush with more soft bristle and flat large painting ending. Personally I use one of the brushes for woman's makeup. An example below...

View attachment 574036
If brushing any clear coat, or paint for that matter, it's important to 'lay off' the coating. That is, apply a reasonable coat, not too heavy, but also not too thin, and ensure that it is spread across the surface so that it covers evenly, until it just starts to thin out at the rear edge of the brush stroke, having made the final strokes in one direction only, preferably, for example, towards the trailing edge of a wing or fuselage.
Any streaks or gaps in this coat can be covered by the next 'line' of varnish / paint, until the entire selected surface is covered. A very light smoothing 'brush over' the still wet coat should eliminate, or at least reduce, the possibility, of bubbles and / or streaks.
It is also important to allow the first overall coat to dry sufficiently (around 15 minutes for acrylic varnish), before applying a second, brushed, coat.
Many acrylic gloss varnishes require a number of coats in order to achieve a good, hard, gloss finish, and the Humbrol product shown by Wojtek certainly needs at least three coats to achieve this.
If, when applying the second clear coat, the surface shows 'bloom' ( a cloudy patch or patches), do not be concerned with this - it is just the first coat being 're-activated' by the second, wet, coat on top and, allowed to settle and dry, should clear.
Whatever product is used, including 'Future', it is best to leave the surface to fully harden for between 12 and 24 hours, if applying by brush, before applying successive coats - that is 3 or more coats - after the first 1 to 2 coats, allowing each coat a few hours to fully harden. This will allow the surface to harden to the extent where successive coats have a better surface 'key', where the underlying surface has smoothed enough to allow a gloss coat to be built up evenly and smoothly, without reacting with the surface of the previous coats.
With all that said, it is still possible for tiny bubbles to be visible, some of which are caused by very tiny dust particles trapped as the varnish is applied.
If you have an airbrush, then a final, thin coat of the gloss varnish tends to hide most of this and, once the final finish coat is applied, particularly a clear matt or satin / semi gloss coat, most, if not all, of the bubbles should disappear, at least to the naked eye (brutal macro photos might reveal some !).
Whichever methods you use, once the gloss coats have fully hardened (at least 24 hours), polishing the surface with a dedicated polishing cloth, or a paper tissue, should provide a better surface appearance.
Finally, always remember that, as with any surface coating, two or more light coats are always better than one heavy coat.

Hope this helps.
I agree with the post above. Here is an example of applied two thin coats on a cardboard fuselage of B-24.. just used the large brush... no bubbles , white deposit etc ...

the general view ...
View attachment 574049

and the enarged shot ...
View attachment 574050

Thank you, all. How do you thin Future when brushing? Windex? Also, After applying Future straight from the bottle, Tamiya Black Panel Liner refuses to flow at all and just sticks to the surface. Is this because the Future is too thick and filling in the panel lines or is there something causing it to "stick'? Also getting a "streaking" effect when removing the panel liner with a cotton bud dipped in X-20 thinner.

723562-62039-98.jpg
 
Judging by the pic the problem with the Future was caused by the brush and the model surface that weren't too clean. The white deposit and grains are dust pieces soaked with the varnish thinner affected by the moisture.
Regarding your question .. the Future is for home using so it should be thinned with the clear water. But I don't recommend that. Instead of the water I would suggest the alcohol ( vodka ) also you may use the Tamiya or Gunze thinners for acylic paints.
Additionally, it is quite useful to add some of retarder liquid used for the acrylic colours usually.
 

Users who are viewing this thread

Back