GB-55 1/48 B-25D-1 Mitchell - MTO III

Ad: This forum contains affiliate links to products on Amazon and eBay. More information in Terms and rules

Thanks guys. Not sure why but the Testors decal sealer that I used seems to eat the printer ink. Not that I care for this little sideshow but worrying for future projects. Maybe because I used 2 coats.
I had this problem as well. Probably it's the ink, not the Testors sealer, because I could produce perfectly clear multi-colored decals once. Some years later I had the problem you describe (using different ink at that time). It could be the decal paper too - it ages when left in the box.
BTW I always printed decals with the highest ink level possible (photo, highest quality, vivid, best - whatever it is called) - do not save on it.
The stenciling is really "funky" though - great job!
Cheers!
 
Thanks guys. Looking ahead, CATCH 22 CATCH 22 I wonder if this is a belly gun added in lieu of the turret. Very faint but maybe?

Belly Gun..JPG
 
Thanks guys. Looking ahead, CATCH 22 CATCH 22 I wonder if this is a belly gun added in lieu of the turret. Very faint but maybe?

View attachment 691787
Nope, that's the trailing antenna which can be unrolled (it's a cable) and dragged after the plane in flight. Below a photo of a modern (restored) B-25 tr. antenna.
What we see is in fact a fixed steel pipe, the head at the end is a weight attached to the cable. The ball-socket is kind of awkward - the standard would be without it (see historical photo further below).
B-25J_Heavenly_Body_trailing_antenna.jpg

P.S. The position of the antenna is far back compared to the removed belly turret. Possible handheld guns will show more to the front.
H0dJurF.jpg
 
Last edited:
Thanks Greg and Yves. Forgot about the trailing cable stub...doh!

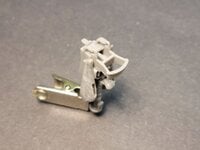
Today after painting the interior a basic chromate green (pics later on that) I tackled the recommended mods to the turret assembly that Yves posted earlier. These are necessary to both raise the turret pedestal and to make visible the skirting around the turret that, without the mods, appears as a gap between the turret and fuselage. To raise the pedestal, a piece of 0.02" card is cut to a square and a hole is drilled to accept the nub on the pedestal. The card is seen at bottom right and the nub on the pedestal is above it.

22102502.jpg


The shim is now glued to the kit mount.

22102503.jpg


Next comes the tricky job of cutting two rings from 0.04" card. For this I used a Olfa circle cutter which took many passes to cut through the thick card.

22102504.jpg


Next, one ring is glued to the top of the turret assembly:

22102506.jpg


The second ring is cut into two separate arcs to fit underneath the upper ring and between supporting bits.

22102501.jpg


Sorry for the blur as the depth of field on the magnifier setting on my phone camera is not very long at all but I think this tells the story. A quick dry fit shows that the new ring is a bit too big for the cut-out in the fuselage which is good. That way, The ring can be filed to make a tight fit. Next up will be to paint the turret and to show the interior paint. Thanks again for stopping by.
 

Attachments

  • 22102505.jpg
    22102505.jpg
    50.3 KB · Views: 24
Hey Paul Micdrow Micdrow , in post #63 you put up a picture of the rear armoured bulkhead that was installed just behind the upper turret and presumably just in front of the crew entry hatch. In that first picture you posted, repeated below, is this looking forward from aft of the bulkhead or looking aft from in front of the it? I assume it's looking forward otherwise the turret would be obscuring the bulkhead, plus I would think the door hinges backwards so it doesn't hit the turret?

armor-plate-jpg.jpg
 
Hey Paul Micdrow Micdrow , in post #63 you put up a picture of the rear armoured bulkhead that was installed just behind the upper turret and presumably just in front of the crew entry hatch. In that first picture you posted, repeated below, is this looking forward from aft of the bulkhead or looking aft from in front of the it? I assume it's looking forward otherwise the turret would be obscuring the bulkhead, plus I would think the door hinges backwards so it doesn't hit the turret?

View attachment 691848
I'm sure Paul will have another photo, but you are right: this is a view from the photographer's area (backside of the armoured bulkhead). I simply remembered it, that the door is on the left side, when looking from the radio-gunner's compartment to the tail.
l7H2jKC.jpg
 
Last edited:
Morning, sorry just got home from work Yves is correct. Currently looking for a better view but here is the chemical toilet that has been mentioned in past comments along with the service stepladder in place on early B-25's.

1.jpg
 
Thanks Paul. From you earlier post, the armour plate in the nav area shows up in a 1944 manual. I think I will leave that off unless someone insists that it should be there for my bird.
 
Thanks Paul. From you earlier post, the armour plate in the nav area shows up in a 1944 manual. I think I will leave that off unless someone insists that it should be there for my bird.

Correct that movable one is from the 1944 manual. I am guessing my part manual which is 1944 as well may be incomplete as I was hoping it would show the rear plate installed seems to be missing some of the back half equipment. Still looking for a better picture than the one posted. I do have a better picture of a side diagram of the service ladder installation if interested but you probably will not be able to see it along with armor unless you cut part of the side out as a inside outside view.
 

Users who are viewing this thread

Back