HARS Museum updates and sometimes requests

Ad: This forum contains affiliate links to products on Amazon and eBay. More information in Terms and rules

Sure, you could. But you probably won't. And even if you do, you can always try again. I think you have the right stuff to pull off anything asked. And we are always here to help.
A wealth of experience at your beck and call! That way all of us can share in the "Museum"!
Now go get 'em old wombat!
 
Thanks for the support yah old farrrrght.

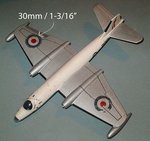
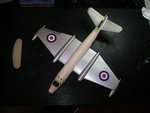
Got them deckles yesterday, they are on today!
Just have to put the little black lines onner and I can take it back on Saturday..

***I did repaint the wings silver, a rattle can from Tamiya!
 

Attachments

  • Canberra.jpg
    Canberra.jpg
    45.7 KB · Views: 106
  • Canberra 2.jpg
    Canberra 2.jpg
    31.6 KB · Views: 118
Last edited:
It sure does. Lines tomorrow, deliver on Saturday.

Pick up a full size print of the lettering for the Piagio. It will have to be lettered while the museum is closed/

Have done some artwork for a 40's Douglas aircraft logo for the tool trailer and see what transpires as it has to be approved by Others.

Got some two part epoxy for the wing of the 707 so will do that tomorrow as well.

Whew.
 
It sure seems that way Glenn, Wayne...............
I had one of the members tell me they want to See me There more often!!!!!!
It's 17 buck worth of fuel to get me there and back, and since I have no Personal income, I cannot deduct it!

Got to do some straightening out down there right quick.

The kid who is flying around the world comes in this Saturday to our air field to finish the trip!
 
If you're stuck for black lines, a lot of decal sheets have them separating the different options. I've used them for spitfire wing walk lines.

Geo

EDIT: Odd, today when I post something, I'll get a pop-up that asks me if I want to leave the page, click yes, and a double post occurs. The first one disappeared after editing, but not this one.
 
Last edited:
Thanks, it will go back tomorrow and will take the 707 wing with it's progress. Speaking of which, progress photos.

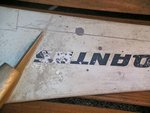
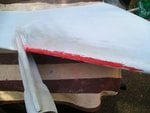
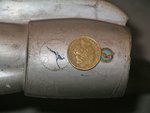
By the time I had taken the first shot I had given it a pretty good sanding all over and a coat of rattle can primer. The red is my tube Bondo. I gave the split in the leading edge a good amount of two part epoxy glue and then a finish with my Bondo to smooth and shape. The engine supports had been cracking some of the finish off, so I gave it some of the Bondo to fill the paint chips. You can see where the logo is, someone has painted a room dark gray, and splashed some of the paint on the wing..... duh! It's actually coming pretty good in spite of all the crazing, that being filled and sanded. I'll have a good coat of primer when I take it back Saturday, and bring the other wing home.

The fuselage will be a different story!

And finding the decals for the nacelles is gonna be a chore! Anyone ever seen these around?????
 

Attachments

  • 707-4.jpg
    707-4.jpg
    30.4 KB · Views: 108
  • 707-5.jpg
    707-5.jpg
    44.8 KB · Views: 105
  • 707-6.jpg
    707-6.jpg
    41.1 KB · Views: 82
  • 707-7.jpg
    707-7.jpg
    35.7 KB · Views: 93
  • 707-8.jpg
    707-8.jpg
    32 KB · Views: 75
  • 707-9.jpg
    707-9.jpg
    34.4 KB · Views: 105
If that 707 is as big as I think it is (probably an ex-travel agent's shop model), then I think you might have to make the decals Bill. Looking good so far though, and should look like new by the time you're finished.
 
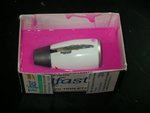
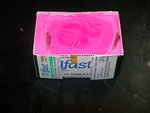
I've made the mold for the engine. I filled the hollow of the engine with clay up to the top, then pushed it on to the support still on the wing. This will keep the mold out of the inside of the engine. Made a box just oversize so as Not to use all my rubber. I attached a block to the bottom of the engine for support, and blue tacked that to the bottom of the box. This gives me an opening for pouring the plastic into the mold. Then filled it half way, well a bit over. Then two tooth picks before filling all the way when the first fill set. The tooth pick will align the halves.

Got to get some acrylic to make the part now.
 

Attachments

  • 747-10.jpg
    747-10.jpg
    36.6 KB · Views: 113
  • 747-11.jpg
    747-11.jpg
    39.8 KB · Views: 112
  • 747-12.jpg
    747-12.jpg
    33.6 KB · Views: 105
Went in to the museum today, lots of things happening.

1 Wasn't able to letter the piaggio, this will happen next Saturday.
2 Going to make a full size pattern for the Carabou, a wallaby sqdn logo for the vert stab.
3 Did an assessment of the Connie display models, the kind with the clear plastic so you can see inside. Have a lot of edge chips that need repair and then repaint in spots. The decals are peeling from the wings. I will make a mask, and spray paint them. This will look so much better!
4 There's an extra bench in the hangar......... I scored. It will be moved upstairs for me and I will have my own work station for modeling repairs. There are about a dozen models laying around in various states of demolition.
5 I pressed my case for an historic model display and I have my area supes backing on it. It just might take some time for the Vice Pres to come around. I'll have to make a mock display.

So it's all happenin! pictures when my workspace is settled with some planes for repair on it.
 

Users who are viewing this thread

Back