Hasegawa 1/32 P47D Republic Thunderbolt

Ad: This forum contains affiliate links to products on Amazon and eBay. More information in Terms and rules

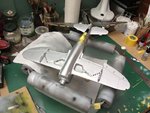
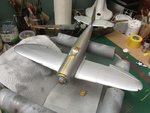
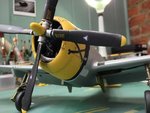
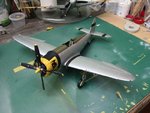
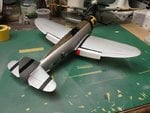
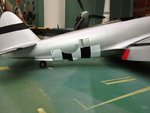
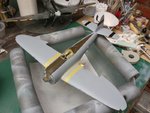
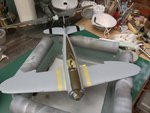
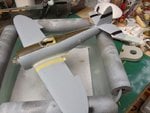
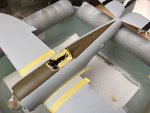
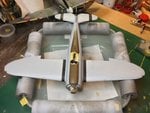
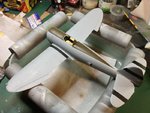
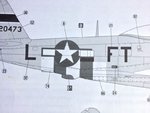
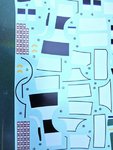
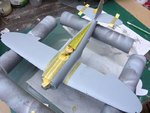
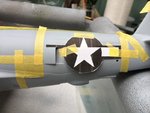
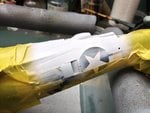
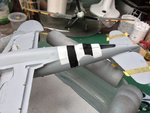
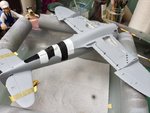
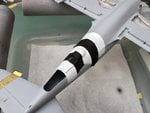
I'm back, not had any time to work on the Jug in the last week. Shed loads of masking was required I won't bore you with the photos only to say there was a lot of tape used. OD on the spine has gone down fine as has the black bands. The walkways were next. Now the fun begins as I have to re-mask accurately over the spayed areas. I've still yet to work out the best way of masking the invasion stripes with the possibility of using a combination of decals.
 

Attachments

  • 130103_1404.jpg
    130103_1404.jpg
    76 KB · Views: 104
  • 130103_1405.jpg
    130103_1405.jpg
    76.9 KB · Views: 106
  • 130103_1406.jpg
    130103_1406.jpg
    72.6 KB · Views: 108
  • 130103_1407.jpg
    130103_1407.jpg
    62.5 KB · Views: 105
  • 130103_1410.jpg
    130103_1410.jpg
    76.2 KB · Views: 106
  • 130103_1411.jpg
    130103_1411.jpg
    78.6 KB · Views: 104
Last edited:
Pretty much the same technique as the formation stripes on your Wildcat, I would think. White, mask, spray white again, black, and cover the whole mess against the silver and Bob is yer mother's "friend"!
 
Pretty much the same technique as the formation stripes on your Wildcat, I would think. White, mask, spray white again, black, and cover the whole mess against the silver and Bob is yer mother's "friend"!
Paul I thought Bob was your uncle? anyway it would be simple if it were the wings but I'm talking about the ones around the lower half of the fuselage which involves getting them to line up with the national insignia decal on both sides plus the intercooler exit doors and the turbo-supercharger underneath so unsure wether to go for the decals or mask and spray. The decals could be difficult as they are large and have to conform to the shape. Will have a long think on this one anyone thoughts? Oh and here's the Jug all masked up minus those invasion stripes.
 

Attachments

  • 130503_1412.jpg
    130503_1412.jpg
    64 KB · Views: 153
  • 130503_1413.jpg
    130503_1413.jpg
    52.2 KB · Views: 147
  • 130503_1414.jpg
    130503_1414.jpg
    46.1 KB · Views: 150
  • 130503_1416.jpg
    130503_1416.jpg
    77.3 KB · Views: 150
Last edited:
Paint them. I would use the closely trimmed decal as a guide as to where to start masking.
I guess it must be an American thing for a single mother to introduce a paramour to her kids as "uncle".
 
how about photocopying the decals and use the copies as the masks . You could copy them onto that frisk film if you were feeling flash or use tape etc to keep them from trying to escape ?
 
Was about suggest something similar to what dave suggested. I normally make the outline shapes of all markings (code letters, roundels or stars n bars etc) from strips of masking tape, and place them in the exact required positions. Then, mark out and mask as required, and paint the lines/stripes. On a NMF surface, the painted areas will then be masked, and the metal colours sprayed.
It takes a bit of time, and some fiddling, but it's the best, and probably only way to ensure everything will be in the right place and the right shape.
 
Man, GREAT ideas guys. Don't you just love cheap, multi function printers? I can't wait for the 3D printers to get to reasonable. Talk about scratch building.

Vaughan, excellent work. Very very nice recovery.

Dale
 
Thanks Guy for the input and suggestions. I've photocopied the decals and used them as a template so that I can line up the invasion stripes as accurately as possible. It was really tricky but it seems to have worked. Yet again it has required a fare bit of the old Tamiya tape but I have invested in a 40mm roll which makes life easier. The results aren't too bad but will require a little tidying up. Now will have to wait for the paint to go off enough to then re-mask the whole area in readiness for the aluminium to go down. In the mean time I will make a start on the canopy.
 

Attachments

  • 130603_1417.jpg
    130603_1417.jpg
    62.2 KB · Views: 132
  • 130603_1419.jpg
    130603_1419.jpg
    68.1 KB · Views: 136
  • 130603_1420.jpg
    130603_1420.jpg
    68.8 KB · Views: 134
  • 130603_1422.jpg
    130603_1422.jpg
    67.5 KB · Views: 141
  • 130603_1425.jpg
    130603_1425.jpg
    80.6 KB · Views: 143
  • 130603_1426.jpg
    130603_1426.jpg
    61 KB · Views: 140
Last edited:
Yes I'm pleased with the results, I don't think I could of pulled it off using the decals provided.

This afternoon I bit the bullet and masked off the invasion stripes and got down to spraying the aluminium. This a new bottle so things should be ok. It sprayed on ok but I don't seem to be able to achieve a really shiny reflective surface, yet when I spray smaller objects like drop tanks tail wheel bay doors I can get a good lustre. Oh well the paints down and the masking is off. The engine, undercarriage and flaps are a dry fit but it gives you an idea what she looks like. Now I've got to allow the aluminium to go off before I start to decal her up, the quandary is do I put a coat of Klear on first which will dull the finish or risk not using it at all. But on the other hand I will need to seal it somehow so that I can apply a wash to enhance the panel lines. Any suggestions?
 

Attachments

  • 130603_1427.jpg
    130603_1427.jpg
    87.5 KB · Views: 134
  • 130603_1428.jpg
    130603_1428.jpg
    81.9 KB · Views: 137
  • 130603_1431.jpg
    130603_1431.jpg
    60.6 KB · Views: 137
  • 130603_1432.jpg
    130603_1432.jpg
    75.4 KB · Views: 132
  • 130603_1434.jpg
    130603_1434.jpg
    72.1 KB · Views: 136
  • 130603_1436.jpg
    130603_1436.jpg
    57.6 KB · Views: 136
Last edited:

Users who are viewing this thread

Back