Post Your Models!

Ad: This forum contains affiliate links to products on Amazon and eBay. More information in Terms and rules

Hi chaps some fantastic models being shared here 8)

now for another of my mediocre offerings...

InTech 1/72 scale Armstrong Whitworth Whitley, its a good kit but you must be prepared to spend a lot of time with the craft knife and file on the components but if you stick with it it forms a half decent kit, I really enjoyed every second of it and would do it again if it wasn't for fitting everything else in :lol:

anyway now for the pics

inTech172ArmstrongWhitworthWhitl-4.jpg


The polish marking is so the kits "heritage" is shown as its a polish kit

inTech172ArmstrongWhitworthWhitl-3.jpg


inTech172ArmstrongWhitworthWhitl-2.jpg


inTech172ArmstrongWhitworthWhitl-1.jpg


You can see the navigators desk with his map on it

inTech172ArmstrongWhitworthWhitleyM.jpg


thanks Lancaster630
 
This is a kit I found at a model train show. That is a great way to get a kit cheap!

The B-29 is done out-of-the-box. It is finished with brushed Krylon silver paint. The decals are a mix of the kit and Microscale decals. I finished this kit around 2000.

I filled about every place I could find to get enough nose weight in it so it would sit on the nose gear! I am glad you can't see behind the top turret!

Bill G.
 

Attachments

  • B-29 Sized.jpg
    B-29 Sized.jpg
    40.5 KB · Views: 49
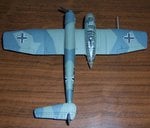
I built this kit in the 1990s. It is built out-of-the-box. I brush painted this kit with Testors Model Master RLM 70, 71, and 65. I used the kit decals and added a swastika on the tail.

I have always loved the Luftwaffe airplane. This is the second one I built. I built one back in High School about 1970. It got destroyed over the years. This one is much better.

Bill G.
 

Attachments

  • Bv-141V10 Sized.jpg
    Bv-141V10 Sized.jpg
    34.7 KB · Views: 51
  • Bv-141V10 Sized B.jpg
    Bv-141V10 Sized B.jpg
    89.9 KB · Views: 63
I built this kit around 2000. It is built out-of-the-box. I brush painted the kit with Testors Model Master RLM 70, 71, and 65. I used the kit decals. I made the black decal on the fuselage. First I used a copier to make a 1/72 scale sized view of the painting guide. Then I cut out the black patch. I traced this on one side on the back of a black decal sheet. I flipped the pattern over. I traced it again to get the other side.

The "tulip" decals for the nose didn't fit the way I liked. I just did the best I could. I wish Hasagawa had made this in one or two pieces instead of the way they did.

I did enjoy working on this kit.

Bill G.
 

Attachments

  • Fw-190A5 Sized.jpg
    Fw-190A5 Sized.jpg
    67.6 KB · Views: 45
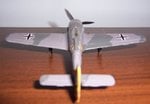
I built this kit about 2000. It is built out-of-the-box. I brush painted it with Testors Model Master RLM 74, 75, and 76. I used the optional R-2 cannon pack. I used the kit decals. I think I had to add the swastika from a Microscale set.

The kit is very basic. It was still a fun build. What is there not to love about the Fw-190 Butcher Bird!

Bill G.
 

Attachments

  • Fw-190A-1 B sized.jpg
    Fw-190A-1 B sized.jpg
    48.2 KB · Views: 50
  • Fw-190A-1 sized.jpg
    Fw-190A-1 sized.jpg
    56.7 KB · Views: 55
This is a kit I found at a model train show. That is a great way to get a kit cheap!

The B-29 is done out-of-the-box. It is finished with brushed Krylon silver paint. The decals are a mix of the kit and Microscale decals. I finished this kit around 2000.

I filled about every place I could find to get enough nose weight in it so it would sit on the nose gear! I am glad you can't see behind the top turret!

Bill G.

Nice model! I know what you mean about the nose weight - when I built mine oh so many years ago, I even ended up putting weight in all 4 nacelles!

Venganza
 
I bought this kit and the Microscale decals back in the 1970s. It has sat on the want to build shelf for many years. I started this kit in 2002, but set it aside when I got activated to go to Iraq. I got back to in 2008. I finished it just in time for a contest in 2008. It did not win. RATS!

The kit is built out-of-the-box. I did have to do some filling and sanding of the bottom seams. I used Squadron Green Stuff and a lot of elbow grease wet sanding! I painted it with Tamiya Semi Gloss Black Paint. I used the kit decals for the standard markings. I used the Microscale decals to make it the "Rapid Rabbit". I have loved that scheme!

This is a super kit. The fit is great. The filling of seams isn't that bad. The cockpit detail is so, so much better than the "old" Revell kit. And the decal sheet is very complete. I was surprised at how many decals go underneath!

The Rapid Rabbit was lost landing in Okinawa during the Vietnam War. It was trying to land in high, beyond the book, cross winds ahead of a tropical storm. A picture of the wreckage can be seen in the book "Spyplane" by David Donald on page 64.

Bill G.
 

Attachments

  • SR-71 A Sized.jpg
    SR-71 A Sized.jpg
    37.3 KB · Views: 45
  • SR-71 B Sized.jpg
    SR-71 B Sized.jpg
    48.2 KB · Views: 53

Users who are viewing this thread

Back