Navigation
Install the app
How to install the app on iOS
Follow along with the video below to see how to install our site as a web app on your home screen.
Note: This feature may not be available in some browsers.
More options
You are using an out of date browser. It may not display this or other websites correctly.
You should upgrade or use an alternative browser.
You should upgrade or use an alternative browser.
Revell 1/32 Me-109g
- Thread starter prem895
- Start date
Ad: This forum contains affiliate links to products on Amazon and eBay. More information in Terms and rules
More options
Who Replied?- Thread starter
- #162
prem895
Staff Sergeant
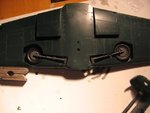
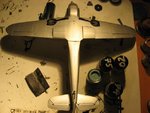
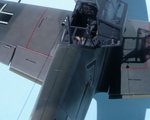
Well,now that we are back on course, I have sanded,fitted x3 and glued the wing sections and landing gear in place and then filled some small gaps with Contacta. I am finding that the lower part of the fuselage at the front does not seem to mate that nicely. Will do more investigation when I get home from this thing called work.Pics to follow tonight
- Thread starter
- #163
prem895
Staff Sergeant
I have a question regarding the Trumpeter 1/32 bf's. Trumpeter has 6 versions,e-3,e-4,e-7,f-4 and g-2,g-6. I am assuming that the E's have all the same parts,and depending on with one you make some parts are not used and they also have different decals. The G's F being the same way as well. Yes/No?
- Thread starter
- #164
prem895
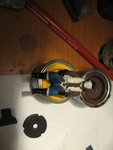
Staff Sergeant
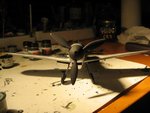
I hope I am not boring all you pro's out there,but this is the wing filled with contacta. Next wet sand to get rid of any seams
Attachments
Nice work so far!
- Thread starter
- #167
prem895
Staff Sergeant
Well,I guess it was only a matter of time before fit issues showed up.
Tony Hill
Tech Sergeant
Sweet!
- Thread starter
- #169
prem895
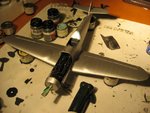
Staff Sergeant
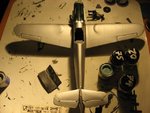
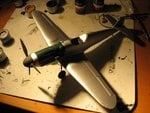
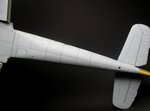
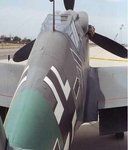
Well,after some fit issues. Wing to Fuge. This it what she looks like before RLM colour and camo go on. Ran out of grey primer so I used satin alum for base coat. I like it so for.
Attachments
Nice work so far!
meatloaf109
1st Lieutenant
A little more grey in the blue of the pants,...
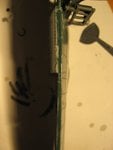
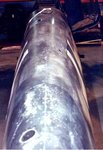
And not to be picky, but if you are wanting to learn, the seams are still visible where the fuselage halves join.
And I do aplaud your effort!
And not to be picky, but if you are wanting to learn, the seams are still visible where the fuselage halves join.
And I do aplaud your effort!
joker_86z28
Airman
- 80
- Dec 1, 2012
im digging it.
- Thread starter
- #173
prem895
Staff Sergeant
Meats,I know about the seams and the pants,but it is as good as this bird is going to get. I think the RLM colours will solve or at least make the seams less noticeable . Next stop Airfix 1/24 P-51D

- Thread starter
- #176
prem895
Staff Sergeant
Great news indeed. Then I am just fine then
meatloaf109
1st Lieutenant
I stand corrected. And to think I have been filling them all these years!
- Thread starter
- #178
prem895
Staff Sergeant
I almost filled it in last night,but I decided to let the base coat cure overnight. Good thing I did that. BTW does anyone have Swastika's for the tail to spare,I have some for a 1/32 ju87 but they are a little too big.Also I have some decals to trade them for if need be.
Crimea_River
Marshal
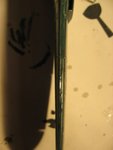
Speaking of seams, the one on the bottom between the wing and fuselage doesn't look like it got your usual attention but the rest looks great.
I've lots of swastikas but I'm not sure any are for 1/32 but will take a look. They should scale to 10mm.
I've lots of swastikas but I'm not sure any are for 1/32 but will take a look. They should scale to 10mm.
- Thread starter
- #180
prem895
Staff Sergeant
You saw that did you, Well I will readdress that tonight. I admit that I am getting board with this Revell offering and want to do a Trumpeter 1/32 early E. Up next is 1/24 Airfix P-51 BBdoll. Will post pic of corrections asap. Thanks CR for pointing that out,because I was going to leave it as is,knowing after I had painted the RLM colours that I would have said to myself."Why the hell did I let that slide?" Well back to Willie's Workshop
Users who are viewing this thread
Total: 1 (members: 0, guests: 1)