Ahoy
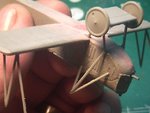
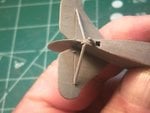
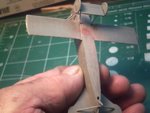
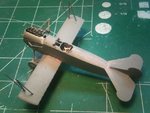
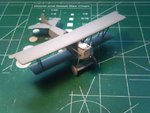
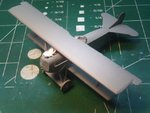
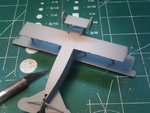
Okay Here is another update this makes the second update. Not much to build in these tiny WW1 subjects just plenty of patience and a good set of eyeballs. From the last update I cleaned and prepared all of the parts for assembly there are a few fit issues with this kit I would not recamend this kit for the Novis. In the beginning I forgot to mention this kit is a flash pig its everywhere and requires a lot of time in cleaning parts before assembly. The first fit issue is the joining of the bottom wing the fuselage is to wide to except the bottom wing I had to trim off 1mm on both sides of the bottom wing root to assure a perfect fit after this was achieved I had to drill open the location holes for the top and bottom wings and the fuselage sides to except the cabin and interplane struts. there were no holes on the kit just dimples. other then that everything else went together without fuss. As of now letting the structure dry over night to dry and tomorrow I will add the top wing to the completed structure. Next I will prime and prepare the model for the painting schedule. Here are the updates Fellas.
Ahoy
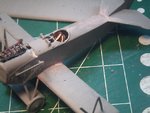
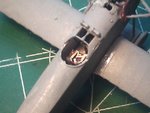
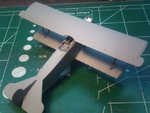
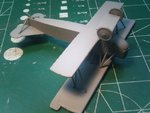
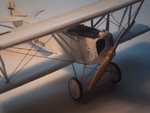
Thanks Fellas for all of your comments I am honored, As to the update The model has been masked off and primed ready for the paintwork. The paint schedule of all White the subject of Herman Goering's DV11 which makes life easier in the painting session. After that all is left is a couple parts rigging and the decals and she is done. I will post another start to finish build thread after this kit is done I would love to join the group build but don't know what the topic is. In view of this kit this is the first Roden kit I have built to be complete in honesty these kits are strictly on the cobb not a good choice for the Novis at heart. A lot of fit issues in the kit locating holes for the undercarriage and wing struts are all misaligned from where they are attached to, A total mess but I made it work fort me and here are the update pictures the next update will be the final reveal.
Looking great Boats and awaiting the rigging which scares the bejaysus outta me. Here is a link to all the Group Builds, the next one, Nov 1st– Sunday Mar 1st 2015 - GB 24-Mediterranean Theatre of Operations WWII.
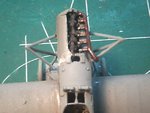
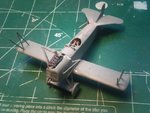
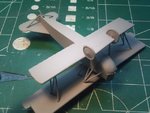
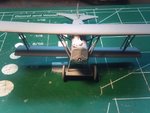
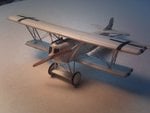
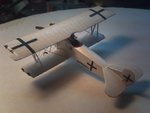
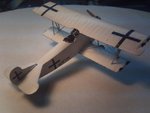
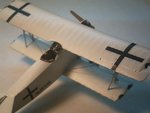
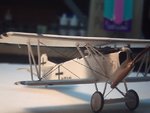
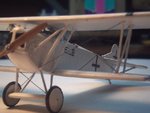
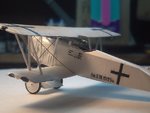
Okay Gents she is done man my eyeballs are tuckered out no more for these for a while. Okay before I close the build this kit is troublesome it presents a few fit issues and to top it off the decals fail apart from the carrier sheet. I been hearing these rodent kits are rubbish I quite agree. I have 7 more of these little devils in my stash pile and no hurry to build the,m. After I over came the fit problems the kit was airbrushed 2 coats of gray primer and let dry over night next I airbrushed satin white 3 coats and let dry over night again. Then gave it a coat of Krylon clear let dry and apply decals. The decals were saved with tedious labor of love to save them the effort worked. when the decals dried I airbrushed on one coat of matt clear and lastly the rigging the rigging is done with fusel wire. Here is the final reveal fellas.