Super detailing Guillow's P-51D Mustang

Ad: This forum contains affiliate links to products on Amazon and eBay. More information in Terms and rules

GeeDee,

Thank you for your encouraging words. The enclosed picture should address your questions as to whether or not my daughter was able to get up close to a Mustang. She was about all of ten years old when she was asked to pose next to this stranger with a straw hat. Even though I tried to explain to her who he was, it really didn't sink in. We were at the Reno air races.

It was years later, she ends up becoming a successful surgical nurse practitioner with a family of her own, when she discovered that man was none other than Mr. Bob Hoover himself & his legacy in aviation. She became a Mustang groupie right then & there. LoL....

I took a photo of this picture after it was enlarged, mounted & framed & hung up in the wall of her home.

I'll check out your link to your model. Thank you.

Cheers,

Gary
 

Attachments

  • 608B73CE-B962-4E22-BF8D-F7A114645253.jpeg
    608B73CE-B962-4E22-BF8D-F7A114645253.jpeg
    138.6 KB · Views: 59
Last edited:
GeeDee:
Wow! You certainly have one heck of a great project on your hands! Really impressed with the level of attention to detail and it's a full sized cockpit no less.

Very good.

Thank you for that link. It's really appreciated. Please feel free to visit this post anytime.

Cheers
 
Good afternoon to everyone,

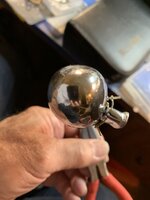
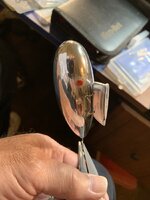
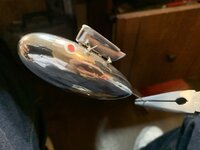
I had to go back a few pages to see where I left off on posting my progress on the Mustang, Whew! On my last post, I was in the middle of posting my research and finishing jp on my drop tanks but as fas as I can tell, I never posted my results. So, with that in mind:

I've enclosed my results. As you can see, I've decided to make the drop tanks and shackles as one unit to be fastened to the underside of the wing. This is to help my expedite my assembly onto the model. This is all in keeping with my goal of finishing the model as a highly polished restored Mustang, right down to the drop tanks.

My reasoning is, once the model is covered with Flite Metal, it will be very susceptible to damage. Even a slight brush with a finger nail is enough to cause permanent damage. A clear coat of paint will help, not totally prevent any damage. So, I know that the more I handle the covered model during the building, the greater the risks of damage to Flite Metal. Just the luck of the draw.

In the meantime, I've stored the drop tanks and shackles in a nice container lined with soft tissue. They will be one of the many items that will be installed at the last minute.
 

Attachments

  • P-51 drop tank 1.jpeg
    P-51 drop tank 1.jpeg
    86.7 KB · Views: 57
  • P-51 drop tank 2.jpeg
    P-51 drop tank 2.jpeg
    94.4 KB · Views: 61
  • P-51 drop tank 3.jpeg
    P-51 drop tank 3.jpeg
    95.3 KB · Views: 58
My next goal is to finish off the landing gears and the retracting inner doors.

At this stage, I'll post a step-by-step process of how I managed to create the inner gear door grooved patterns. I hope you will find it both entertaining and inspiring.

As with everything else, I've done lots of research and was surprised to find that there were differences even with the inner gear doors between the B/C variants and the D variants. What surprised me even more, were the polished patterns and zinc chromate differences between the D variants themselves. So once again, I exercised a bit of "artistic license" and mentally decided the easiest choice of the doors.

Here is the finished product. Not bad, eh?
 

Attachments

  • P-51 landing ger -18.jpeg
    P-51 landing ger -18.jpeg
    92.1 KB · Views: 42
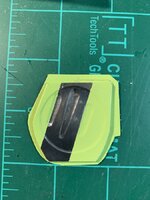
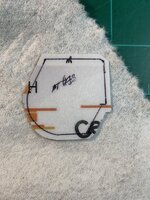
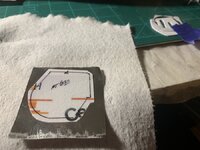
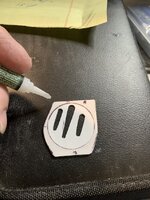
I decided to break down the inner gear door cover into. two separate sub assemblies. That last item is actually a paper template.

The first item on the extreme left is the outer cover. The two items will serve as the inner door cover with the grooved patterns and they will be glued together.
 

Attachments

  • P-51 landing gear -24-.jpeg
    P-51 landing gear -24-.jpeg
    90.1 KB · Views: 37
Last edited:
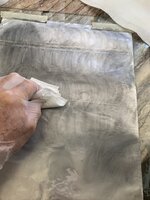
First thing needed to be done, was to polished the Flite Metal. It comes in rolls. However, like all metals. it needs to be polished. I've decided to do whole sheets so that I will have some left over for the next stages of modeling the Mustang.
 

Attachments

  • P-51 landing gear -19.jpeg
    P-51 landing gear -19.jpeg
    99.4 KB · Views: 35
Last edited:
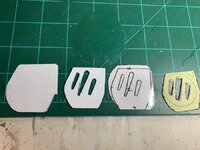
Here, you can see at a glance, the steps I took. to finish off the first of the two sub assemblies. In this case, it's the outer cover.

Note that when applying the Flite Metal, extra care was taken to use a soft tissue as background for laying it down. It was then burnished.

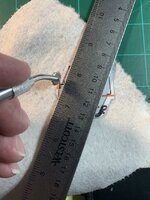
The next step was to use a simple straight edge and a pounce wheel to produce rivets from the inside to that the rivets will protrude out. On the curved portion, I simply used freehand and was very careful to follow the outlines.

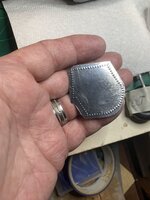
The last photo on the far right shows the final result for the outer cover.
 

Attachments

  • P-51 landing gear -22.jpeg
    P-51 landing gear -22.jpeg
    106 KB · Views: 49
  • P-51 landing gear -20..jpeg
    P-51 landing gear -20..jpeg
    88.6 KB · Views: 41
  • P-51 landing gear -21.jpeg
    P-51 landing gear -21.jpeg
    113.3 KB · Views: 46
  • P-51 landing gear -23.jpeg
    P-51 landing gear -23.jpeg
    91.9 KB · Views: 45
Last edited:
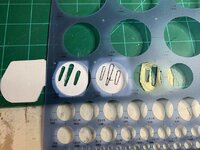
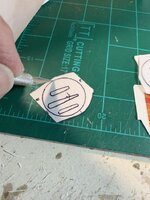
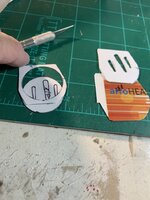
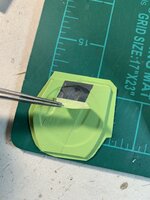
Here, the circle that was carefully drawn using a template is getting cut out using an X-Acto blade.

The remaining components are on the right. The outer door cover was not (yet) covered with the aluminum foil.
 

Attachments

  • P-51 landing ear 26.jpeg
    P-51 landing ear 26.jpeg
    93.8 KB · Views: 30
  • P-51 landing gear- 27.jpeg
    P-51 landing gear- 27.jpeg
    101 KB · Views: 33
Last edited:
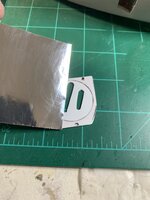
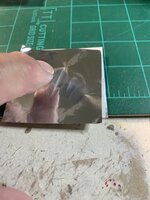
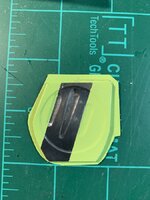
Next, I laid over the two pieces a small section of the polished aluminum foil.

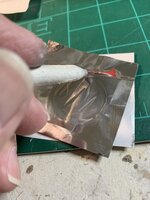
Then it was gently pressed into the grooved portion with my finger.

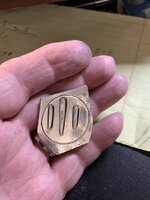
From there, the final images were burnished into the grooved pattern using a small burnishing tool

There you see the end results.
 

Attachments

  • P-51 landing gear -30.jpeg
    P-51 landing gear -30.jpeg
    88.7 KB · Views: 44
  • P-51 landing gear -31.jpeg
    P-51 landing gear -31.jpeg
    93.8 KB · Views: 37
  • P-51 landing gear -32.jpeg
    P-51 landing gear -32.jpeg
    91.6 KB · Views: 44
  • P-51 landing gear -33.jpeg
    P-51 landing gear -33.jpeg
    105.5 KB · Views: 41
Last edited:
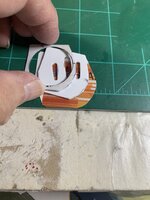
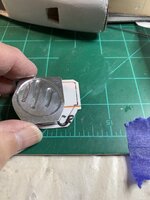
The sub assemblies were then masked and the inner portion was painted (my version)) of zinc chromate. The outer portion was left as highly polished metal.

The mask was removed

There, you see the end results of the complete inner door. I still have yet to add the hinges and the attachment details, but for the most part, inner door is complete.

I'll be working on the main landing gears and will be posting the results soon. There's a light at the end of this long tunnel.

Thank you for looking,

Cheers,
 

Attachments

  • P-51 landing gear - 35.jpeg
    P-51 landing gear - 35.jpeg
    98.2 KB · Views: 36
  • P-51 landing ger -18.jpeg
    P-51 landing ger -18.jpeg
    92.1 KB · Views: 37
Last edited:
Crop Duster, Thank you sir. It's greatly appreciated for your observations. Rough beginning and (occasionally) rough going along. I'm still trying to slowly figure out the best approach to achieve my desired results. I've found a mixture of simple, complex and off-the-wall concepts seems to work best. It really comes down to using my imagination as to what works, especially when one has only limited household tools such as a pair of scissors, tweezers, needle nose pliers (2), lots of pins of different types and sizes, a small hammer (to use when things don't fit well, I'll just hammer the thing into submission, then I end up throwing it away but feeling much better) and of course that all ever-present X-acto knife.

Insofar as your statement on glues, I totally agree with you. I've gotten myself glued to both my models and my fingers more times than I can count! I use CA most of the time, but each glue has its speciality and works for whatever job it's required. For parts that I need to carefully move around into its exact place, I'll use white glue. But I have to be careful not to move it around too much les I smear the glue over the exposed surface. For those areas that need extra strength, I'll use what we call Gorilla Glue. However, this. type of glue expands as it dries so one has to be careful on its application.

If I were to build this model all over again, it could be done within a matter of just four months or less. Most of the time is taken up by research ( I've seen many seemingly conflicting photos and documents of the same part, same cockpit layout, and more. So I end up taking a guess as what works best for that part or area or even employing my "artistic license", experimentation (that consumes a lot of time), practicing on scrap, and the list goes on.

My avatar is a Guillow's S.E.5 that I managed to super-detail.

Thank you for looking in and responding.

Cheers,

Gary
 
Well guys, I've been busy working on the Guillow's Mustang. I thought I'd post a short video instead of the usual still pictures. Let me know if this works

I still have to add the exhaust, variable duct to belly scoop, more decals, drop tanks, bullets to the open m/g bay & a few accessories but I'm seeing a light at the end of the tunnel.

Hoping to hear from you.

Cheers,
 

Attachments

  • IMG_8232.MOV
    73.8 MB

Users who are viewing this thread

Back