Super detailing Guillow's P-51D Mustang

Ad: This forum contains affiliate links to products on Amazon and eBay. More information in Terms and rules
Looks good enough to pass inspection, once it's all together.
And have a very Happy Birthday too.
 
Gentlemen:

Good afternoon; Just to let everyone know that I'm still active in modeling this Guillow's Mustang. Just finished the pilot's seat and temporarily installed for fit.
It's actually a composite of several seats. Some were good, others were bad and got the ugly in between.
 

Attachments

  • P-51 pilot seat model 22.jpeg
    P-51 pilot seat model 22.jpeg
    100.2 KB · Views: 60
Right now I'm working on the gun sight and I'm in need of your opinions and help. I've researched as much as I could find over the Internet and found several photos depicting the gun sight to be enormously big compared to the rest of the cockpit. Others, the gun sight appeared too small (scale models). I've come. up with something in between but to me it looks too big for scale. I could paint it overall black to visually look like it was smaller than it really is, but I've seen gun sights overall silver as well as black. Your help or opinions would be appreciated
 

Attachments

  • P-51 gun sight 3.png
    P-51 gun sight 3.png
    10.9 KB · Views: 58
  • P-51 gun sight 4.png
    P-51 gun sight 4.png
    17.8 KB · Views: 57
  • P-51 gun sight 2.png
    P-51 gun sight 2.png
    9.6 KB · Views: 56
  • P-51 gun sight # 6.jpeg
    P-51 gun sight # 6.jpeg
    84.6 KB · Views: 63
  • P-51 gun sight # 5.jpeg
    P-51 gun sight # 5.jpeg
    92.2 KB · Views: 65
  • IMG_5424.jpeg
    IMG_5424.jpeg
    1.6 MB · Views: 60
Thank you Mr. Wurger & Mr. Special Ed. It's greatly appreciated. Let me know if your thoughts on the gun sight so far. I still have more detailing to do, but wanted your opinions first.
 
Here's the gun sight temporarily installed on the instrument panel with everything else removed within the interior. I still have a bit more detailing to do, but essentially it's complete. Now i can move onto the landing gear and covers.
 

Attachments

  • P-51 gun sight # 7.jpeg
    P-51 gun sight # 7.jpeg
    105 KB · Views: 54
  • IMG_5447.png
    IMG_5447.png
    574.5 KB · Views: 53
Gnomey & Flite-Metal:
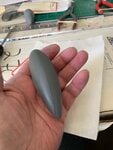
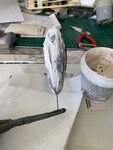
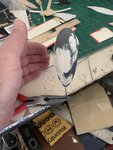
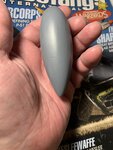
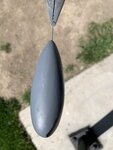
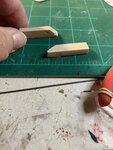
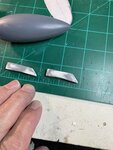
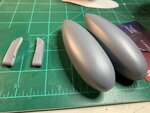
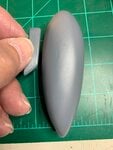
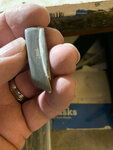
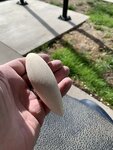
Thank you. I'm still working on the Mustang. The cockpit interior is essentially complete. I just finished the drop tanks & working in the shackles.
 

Attachments

  • D86A5520-A7AB-47F7-800C-79687B84E708.jpeg
    D86A5520-A7AB-47F7-800C-79687B84E708.jpeg
    627.1 KB · Views: 36
  • F68D1520-2837-43DA-8DC5-409DDFB7CF79.jpeg
    F68D1520-2837-43DA-8DC5-409DDFB7CF79.jpeg
    1.4 MB · Views: 35
  • 184E6A3D-1F43-486A-924A-7AB55EC5F9A0.jpeg
    184E6A3D-1F43-486A-924A-7AB55EC5F9A0.jpeg
    1.4 MB · Views: 31
  • DBC4058B-B437-4BA5-A3C1-E346AB659E5C.jpeg
    DBC4058B-B437-4BA5-A3C1-E346AB659E5C.jpeg
    1.1 MB · Views: 33
  • 95E25614-AE6C-4B23-BE84-3E7A9C9AE23E.jpeg
    95E25614-AE6C-4B23-BE84-3E7A9C9AE23E.jpeg
    1.2 MB · Views: 35
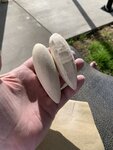
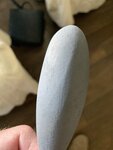
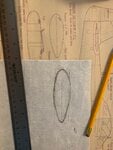
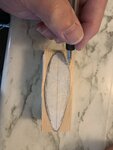
Making the tanks required constant sanding followed by more sealing. Then priming & sanding on top of the primer. Checking for any defects as rge chrome coating will reveal the slightest error or mistake.

I do not have a vacuum forming machine do this is the next best thing.
 

Attachments

  • 97FECF16-2111-4423-8496-FAA0A4AC3AFF.jpeg
    97FECF16-2111-4423-8496-FAA0A4AC3AFF.jpeg
    900 KB · Views: 34
  • 576EACD3-F5AB-4D96-81CE-CE861089BFCC.jpeg
    576EACD3-F5AB-4D96-81CE-CE861089BFCC.jpeg
    1.4 MB · Views: 34
  • 13FFB722-6655-431D-8847-5BAD964C105E.jpeg
    13FFB722-6655-431D-8847-5BAD964C105E.jpeg
    1.6 MB · Views: 31
  • 7EFBF53B-D6DF-4646-80CD-A653B31CEA3C.jpeg
    7EFBF53B-D6DF-4646-80CD-A653B31CEA3C.jpeg
    995 KB · Views: 31
  • 81CABD0D-BB4E-42CF-AEA1-02C9A99E462E.jpeg
    81CABD0D-BB4E-42CF-AEA1-02C9A99E462E.jpeg
    831 KB · Views: 34
These are my reference sources. My goal is to reproduce highly polished drop tanks. If I can reproduce them without adding the middle seam (to hide any defects that slipped through), then all the better.
 

Attachments

  • 3EC618AF-86BA-4861-B25B-B975D1E95F4D.png
    3EC618AF-86BA-4861-B25B-B975D1E95F4D.png
    267.7 KB · Views: 36
  • 29E8738A-2DF2-45EC-AB20-4CF84B16E387.png
    29E8738A-2DF2-45EC-AB20-4CF84B16E387.png
    308.8 KB · Views: 36
  • B945F48E-8549-4C09-B0E2-BB40469BD64A.png
    B945F48E-8549-4C09-B0E2-BB40469BD64A.png
    213.3 KB · Views: 37
  • BF8AB70B-5C40-4D88-A1CB-03D78F0C9E99.png
    BF8AB70B-5C40-4D88-A1CB-03D78F0C9E99.png
    326.1 KB · Views: 35
  • 6528C028-E1C3-45B0-A035-146CF964BB73.png
    6528C028-E1C3-45B0-A035-146CF964BB73.png
    166.8 KB · Views: 39
  • 57B98C31-CA0E-4461-B073-710B982F6DB3.jpeg
    57B98C31-CA0E-4461-B073-710B982F6DB3.jpeg
    57.2 KB · Views: 38
Here I'm fabricating the shackles. I'm using the same reference sources for reproducing the shackles. What is interesting is using the previous post of my reference source as an example, even the shackles have variations. Oy Vey!
 

Attachments

  • 8031D0E2-F7DD-4F6E-9192-6039D7DBDEE2.jpeg
    8031D0E2-F7DD-4F6E-9192-6039D7DBDEE2.jpeg
    973.1 KB · Views: 27
  • FFF22809-9669-48FD-B5A7-7D1C3EB69782.jpeg
    FFF22809-9669-48FD-B5A7-7D1C3EB69782.jpeg
    1.3 MB · Views: 28
  • B3E605FD-4771-4E5C-AC63-904ADA4FC847.jpeg
    B3E605FD-4771-4E5C-AC63-904ADA4FC847.jpeg
    742 KB · Views: 32
  • A6695B9E-824F-451B-8AC4-C1FCD1068886.jpeg
    A6695B9E-824F-451B-8AC4-C1FCD1068886.jpeg
    867.3 KB · Views: 29
  • 692C9B20-7BA2-4C89-A20F-45169EA85C75.jpeg
    692C9B20-7BA2-4C89-A20F-45169EA85C75.jpeg
    1 MB · Views: 30

Users who are viewing this thread

Back