Navigation
Install the app
How to install the app on iOS
Follow along with the video below to see how to install our site as a web app on your home screen.
Note: This feature may not be available in some browsers.
More options
You are using an out of date browser. It may not display this or other websites correctly.
You should upgrade or use an alternative browser.
You should upgrade or use an alternative browser.
Switcha's Lancaster pics
- Thread starter Wurger
- Start date
Ad: This forum contains affiliate links to products on Amazon and eBay. More information in Terms and rules
More options
Who Replied?- Thread starter
- #2
- Thread starter
- #4
Catch22
Major
Lookin good!
Good 'move' Wurger....
Switcha
Airman 1st Class
Thanks for the help guys and sorry to Ian for any confusion.
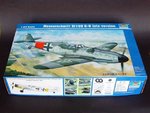
I have finished the Lancaster off and have given it to a friend So there will be no more pic's, sorry guys. But I have started a Trumpeter 1/24 109G so i'll post some pic's of that here when I get going.
Cheers Switcha.
I have finished the Lancaster off and have given it to a friend So there will be no more pic's, sorry guys. But I have started a Trumpeter 1/24 109G so i'll post some pic's of that here when I get going.
Cheers Switcha.
seesul
Senior Master Sergeant
Thanks for the help guys and sorry to Ian for any confusion.
I have finished the Lancaster off and have given it to a friend So there will be no more pic's, sorry guys. But I have started a Trumpeter 1/24 109G so i'll post some pic's of that here when I get going.
Cheers Switcha.
Is it this one???
Attachments
Screaming Eagle
Senior Master Sergeant
looking forward to it switch!
Switcha
Airman 1st Class
Is it this one???
Very close, but I'm a sucker for blue eyes

Actually it was a toss up but I liked the color on the early version more plus the eyes yellow flashes make a it much more appealing than the standard grey 109's of that era.
Does anyone have any pictures or color reference material for the engine bays of the 109G's. I have a lot of pictures of the cockpits such but hardly anything on the engines. The instructions are okey but....
Cheers Switch
Opps forgot to add the picture...All done now.
seesul
Senior Master Sergeant
So hurry up boys with the pics of G-6 engine bay, I wanna see that model finished asap
Heinz
Captain
great lanc Switcha! look foward to the 109
Very nice.
Switcha
Airman 1st Class
Hi guys, back again. The Photo etch seat belts i was after have arrived and i now have enough reference material to get started properly. For some reason this kit is full of ejector pin marks si the putty has been getting a workout.

The engine was painted with a cutom mix of flat black and a slight amount of silver to make it just metallic. The other metallic colours are Gunze 'Mr Color' paints.
There are 14 ejector pin marks in the cockpit area that needed to be filled, YUK.


I have painted behind the clear dash and also on the front.

The progress so far.


Any suggestions, tips etc would be appreciated.
Cheers Switcha

The engine was painted with a cutom mix of flat black and a slight amount of silver to make it just metallic. The other metallic colours are Gunze 'Mr Color' paints.
There are 14 ejector pin marks in the cockpit area that needed to be filled, YUK.


I have painted behind the clear dash and also on the front.

The progress so far.


Any suggestions, tips etc would be appreciated.
Cheers Switcha
Switcha that is real nice man!
Some very light drybrushing with some silver or my preference, Tamiya Sky Grey over the raised cockpit details to bring out and highlight some detail....
Some very light drybrushing with some silver or my preference, Tamiya Sky Grey over the raised cockpit details to bring out and highlight some detail....
- Thread starter
- #16
109ROAMING
2nd Lieutenant
Nice work!
Catch22
Major
Very nice!
Switcha
Airman 1st Class
Switcha that is real nice man!
Some very light drybrushing with some silver or my preference, Tamiya Sky Grey over the raised cockpit details to bring out and highlight some detail....
The eyes were getting a little fuzzy last night for drybrushing but I agree.
The black boxes on the floor cockpit wall are being painted with tire black and then the switches are going gloss black but I will then hit them with a light coat of grey to pop the details. For chips scratches I'm using Vallejo Gunmetal and also Vallejo's for the washes.
Cheers Switch
Heinz
Captain
Looking good mate 
Users who are viewing this thread
Total: 1 (members: 0, guests: 1)


