Follow along with the video below to see how to install our site as a web app on your home screen.
Note: This feature may not be available in some browsers.
Ad: This forum contains affiliate links to products on Amazon and eBay. More information in Terms and rules


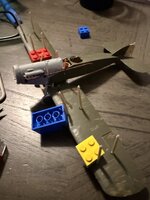
Oh a Lego build! I loveTrying to bring this one back to life. Some trial and error , losing tiny bits, scratch building and have made some progress
 it.
it.
The D1A2. I finally attached the little ones. Replaced weaklings with thicker plastic of same size and length.
View attachment 889856
B2M2 repeating the same process with the smaller ones on it as well.
View attachment 889857
View attachment 889858
Later today the machine guns and other tiny pieces needing attachment.

The source had them wrong then, I will change them out.Jesse I hope you know why these wing struts didn't fit there. Just yuo attached them incorrectly. These should have been moved more back in order to sit in the marked holes. Generally quite nicely but ...
View attachment 889879
The source had them wrong then, I will change them out.
Top wing fell off and will have to reattach.And for this reason it is better to have a look at a couple of images more and drawings comparing the kit content to the real aircraft. It is as basic as the main rule for gluing. The more details of the replicated plane you know the easier is assembling of its model.
View attachment 889895
the pic source: Mitsubishi B2M (1927)
Top wing fell off and will have to reattach.

 said
said