1:72 B-25B "Whirling Dervish"

Ad: This forum contains affiliate links to products on Amazon and eBay. More information in Terms and rules

Nice detail work and I sure hope the PVA weight idea works. I've often found the recommended weight on some kits is usually only just enough and a slight breeze will topple the machine, so I tend to overcompensate using fishing shot and Blu Tack. :D
Thanks, Vic.

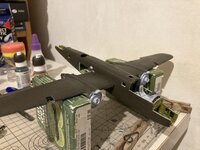
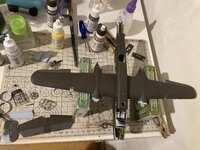
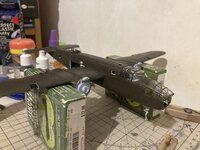
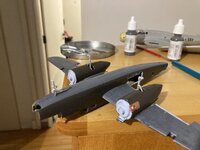
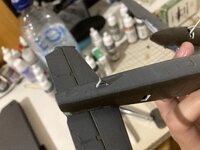
The PVA seems to have worked, though it left the area around the nose gear a bit gooey. Will clean it up later. The fuselage has received its second coat of OD and is ready for its coats of neutral grey. Canvas areas of the upper surfaces have been painted light OD, made by mixing Vallejo Dark Olive Brown with White. Horizontal stabilizer is now fully painted, as are the elevators. Lower surfaces were coated in regular Neutral Grey as I am not able to mix a shade that is just barely lighter to mimic light wear. Nacelles have been attached, sadly with a few gaps along the front and rear. Will break out the putty soon to cover these. Cowlings have received their first coat of OD, broken tail gun has been glued back together and painted. Nose gun has been attached in stowed position to the greenhouse with PVA and will be left drying overnight.
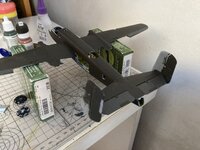
IMG-7803.jpgIMG-7806.jpgIMG_7804.jpg

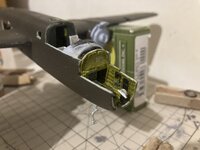
It's worth noting that Airfix lists a piece E6 as going in the nose, which looks like a row of ammo boxes, but this piece is nowhere to be found on the kit, and in fact there is no E sprue at all. This part is not correct for a B-25B anyway from the photos I've seen, so I think it's in the instructions by mistake. Mark Twain bombsight has been installed.
IMG_7807.jpg

I was originally going to leave the fuselage side panels without interior paint, but upon further inspection they are visible through the windows. They were my guinea pig for Vallejo US Olive Green, which looks to me like a good enough match for Zinc Chromate Green and is a lot easier to use than my airspray Mission Models paint, leaving a much more even color. These will only go in after I have attached the top turret, as having the sides open makes it a lot easier to align with its mounting hole.
IMG-7802.jpg

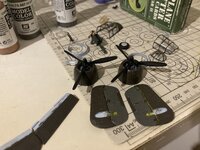
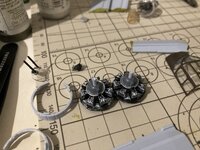
Lastly, the engines have been finished. Cylinders were drybrushed silver as best I could, gearbox housing was painted neutral grey with silver detailing and the propeller governor painted black. Very proud of how these turned out. Managed to attach them properly too, with the propeller shafts still being able to spin.
IMG_7805.jpg

More updates tomorrow,
-Matt
 
It's worth noting that Airfix lists a piece E6 as going in the nose, which looks like a row of ammo boxes, but this piece is nowhere to be found on the kit, and in fact there is no E sprue at all. This part is not correct for a B-25B anyway from the photos I've seen, so I think it's in the instructions by mistake. Mark Twain bombsight has been installed
E6 in the B-25B and E9 in the B-25C/D kits seems to be the same part (or is a number mistake in the B-25B instructions). These are the amo-boxes for the belt-fed 0.5 nose gun, which came with the intermediate B-25C/D models.
For the B-model (if you want to and have the patience) you can scratch the small single amo-boxes for the 0.30 nose gun, mounted on the right side of the bombardier's nose: 2 under the gun-stowage and 4 behind. On this photo you see the empty storage:
lztW2jy.jpg

And here with the amo-boxes. Position 333 is the amo-box taken out of the holder.
idwAVE2.jpg

In 1:72 these are very small parts, you can do just boxes+holders together or even omit them - it's up to you.
There are very nice 360 degrees cockpit- and back area views of the restored B-25D in the National Museum of USAF, depicting the B-25B innards pretty accurately. Have you checked those?
Scroll down to North American B-25B and choose from the 4 stations. Unfortunately there are mannequins in the front of the plane, obstructing the view.
Cheers!
 
E6 in the B-25B and E9 in the B-25C/D kits seems to be the same part (or is a number mistake in the B-25B instructions). These are the amo-boxes for the belt-fed 0.5 nose gun, which came with the intermediate B-25C/D models.
For the B-model (if you want to and have the patience) you can scratch the small single amo-boxes for the 0.30 nose gun, mounted on the right side of the bombardier's nose: 2 under the gun-stowage and 4 behind. On this photo you see the empty storage:

And here with the amo-boxes. Position 333 is the amo-box taken out of the holder.

In 1:72 these are very small parts, you can do just boxes+holders together or even omit them - it's up to you.
There are very nice 360 degrees cockpit- and back area views of the restored B-25D in the National Museum of USAF, depicting the B-25B innards pretty accurately. Have you checked those?
Scroll down to North American B-25B and choose from the 4 stations. Unfortunately there are mannequins in the front of the plane, obstructing the view.
Cheers!
Oh wow, I had seen the 360s before years back but completely forgot about them! It's certainly an impressive restoration, so many details done correctly.

Thanks for the photos, Yves! These are going in my collection, and may get used as reference if I ever decide to make a 3D model of the Mitchell (as I am with the Marauder) If I do, the B-25-NA, A and B will be the variants I model.

As for this model, I don't plan on scratchbuilding the ammo boxes as I do not have the patience for them. Besides, there's a lot more interior equipment visible in those photos that the kit is missing, such as the map cases and most of the equipment on the right side of the nose.
 
Thanks, chaps!

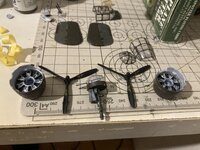
Engines have been fitted to engine cowlings, propellers test fitted. The holes in the props were too small for the shafts and the necessary hole was larger than my largest drill bit, so I had to use my hobby knife to widen the hole and clip the shafts short. Propellers are not yet glued in place and won't be for a while. Canopies have also been test-fitted, and the flaps were painted.
IMG_7815.jpgIMG_7809.jpg

Fuselage then received two coats of neutral grey, painted with a brush using flexible Tamiya masking tape. Getting the shape of the demarcation line right was difficult, but I'm happy with the results. I used a coat of OD first to keep the NG from leaking under the tape. Fuselage will be covered in varnish tomorrow so that I don't mess up the paint while handling it. Fuselage decals will probably be applied right after as well, since the fuselage will be harder to reach once the engine cowlings are attached.
IMG_7814.jpg

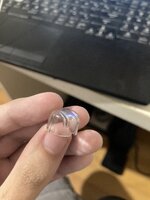
Lastly, a piece has been delaying me: the top turret dome. Why? Because it includes no molded lines for the turret ring. I tried inserting the turret unpainted, but it looks off. I tried using masking tape to paint the bottom of the turret OD, but I just have not been able to get it level or straight across the entire circumference. My current plan is to fill a very small cap with OD paint until the proper height and just plop it in there.
IMG_7810.jpg
 
Lastly, a piece has been delaying me: the top turret dome. Why? Because it includes no molded lines for the turret ring. I tried inserting the turret unpainted, but it looks off. I tried using masking tape to paint the bottom of the turret OD, but I just have not been able to get it level or straight across the entire circumference. My current plan is to fill a very small cap with OD paint until the proper height and just plop it in there.
View attachment 684951
If I may give you a tip for those missing frames, panels etc. on clear or other plastic parts.
I started using strips or shapes of self adhesive aluminum foil (the one HVAC-people use to tape the gaps of ducts). Cut to size, I glue them in the desired areas. The tape is very thin and flexible and can go over spherical surfaces as well if cut in narrow stripes (e.g. green houses, framing). This is enough to create an edge for painting later.
Same foil tape can be used as NM stripes on the inside of canopy framing too.
The glue is very good and does not allow the strips/shapes to come down after time. I'm using a foil-tape from Home depot, called Cantech (a Canadian product), not the cheapest one from Dollarama.
With a pin puncher you can cut out small circles and use them in many different cases - e.g. your ball-socket caps in the glazed nose, you are afraid to paint free hand.
To prepare for better adhesion of the paint I sand the surface of the aluminum foil with 800/1000 before (or after-depends on the area) applying it.
Cheers!
 
Last edited:
If I may give you a tip for those missing frames, panels etc. on clear or other plastic parts.
I started using strips or shapes of self adhesive aluminum foil (the one HVAC-people use to tape the gaps of ducts). Cut to size, I glue them in the desired areas. The tape is very thin and flexible and can go over spherical surfaces as well if cut in narrow stripes (e.g. green houses, framing). This is enough to create an edge for painting later.
Same foil tape can be used as NM stripes on the inside of canopy framing too.
The glue is very good and does not allow the strips/shapes to come down after time. I'm using a foil-tape from Home depot, called Cantech (a Canadian product), not the cheapest one from Dollarama.
With a pin puncher you can cut out small circles and use them in many different cases - e.g. your ball-socket caps in the glazed nose, you are afraid to paint free hand.
To prepare for better adhesion of the paint I sand the surface of the aluminum foil with 800/1000 before (or after-depends on the area) applying it.
Cheers!
Thanks again, Yves. I can certainly look into aluminum foil in the future, it might come in handy if I decide to do the XB-28 in NMF, because currently my silver paint is easily the worst one for canopies, as it just cannot be picked off in the same way the other paints can. I do wonder if covering the exterior of that model in foil could be an option, as iirc that one doesn't have rivet detail anyway and new panel lines can be scribed. Would certainly look more natural than brush-painted silver.

Regarding the pin punch and the ball socket mounts, there's just a lot of issues, including the small size, my unsteady hands, and their overall shape. As you know, the B-25B's ball sockets are recessed and have covers, which aren't round but instead a teardrop shape. I barely got the forward socket to look right when painting, and that one has the teardrop shape molded onto the part. It's just too small for me at this scale. I have considered poking my drill through some masking tape to make a circle mask, but I'd rather have no sockets than have them be the wrong shape.

However, that doesn't mean I'm done modifying the model. I've just noticed that the left side of the nose has some sort of intakes molded onto the outside. I don't know what these are for but they seem to be B-25C-1 parts and are absent from all photos I've seen of B-25Bs, including the Doolittle Raid birds. As such, I will be removing these from the model.

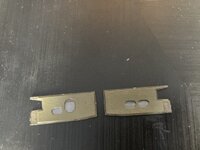
Regarding the turret, the dipping method failed but I came up with a not too complicated solution: I masked the bottom of the sides by using my thinnest Tamiya masking tape, keeping it in contact with the bottom rim. I then applied another stretch of tape parallel to the first, and removed the first and painted two coats. This has worked very well, with no paint bleeding under the tape. I opted to paint the leading edges of the wing flaps NMF just to stand out a bit more, two coats of each color with masking tape to help. Cowl flaps were painted and glued to the engine cowlings right after the back of the engines were painted. Vertical stabilizers received their second coat of OD, rudders might need a second coat of Light OD, which I hope I can replicate. Decals will be applied and deice boots will be painted on before the empennage assembly is completed. Wheels were touched up but I'm still not 100% happy with them.

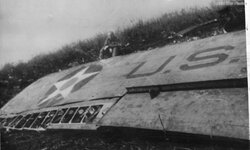
Propellers have received the relevant decals, those being the propeller specifications in yellow. I used the ones from the kit, though I feel these are too large. Looking at them now the Kitsworld ones seem to be more accurate, but I honestly forgot that Kitsworld included these since I only bought them for the noseart and serial numbers. The decals are already set with Microset and Microsol, c'est la vie. It seems that both Airfix and Kitsworld opted to print the large U.S. ARMY lettering on the wing undersides in black. I cannot tell from photos if the writing was black or insignia blue, my understanding is that the black lettering was not maintained for long. I'll have to check Dana Bell's books again. When I made liveries of these planes for War Thunder some 7 years ago I opted for insignia blue. In the end this doesn't matter for the model as I don't have any dark blue paint and will have to use either the Airfix or Kitsworld decals, but I'd still like to know for my own curiosity.
IMG_7816.jpgIMG_7823.jpgIMG_7825.jpgIMG_7824.jpgB-25B 40-2344 2.jpg
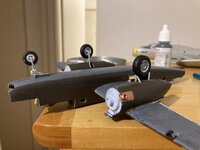
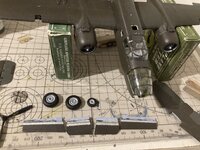
Photo 1: Photo from late last night, test fitting the wheels.
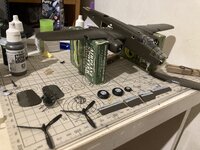
Photo 2: Painted stabilizers, turret, and cowlings. Props have received decals, engines have been painted, cowl flaps painted and attached.
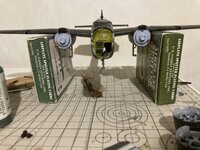
Photo 3: Test fitting the engines and canopies. Wheels and wing flaps have been painted.
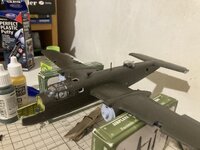
Photo 4: Same as above.
Photo 5: Doolittle sitting next to his wrecked B-25B, 40-2344. I think the U.S. lettering is insignia blue, but am not sure.
 
Not much progress today, was quite tired. Stabilizer has been mounted as level as I could get it, it desperately wanted to lean to starboard. It looks level to my eyes. Paint touched up in some parts, intakes near the nose cut off, antennas, cockpit canopy and tailskid attached.
815E1D04-C0F7-4A6A-B8AE-2249B8224611.jpegC62D995C-6FC5-41C9-B70C-526B246461D6.jpegE66DE7C6-2ED5-4D0F-9551-B9A153FFE02A.jpeg

What needs to be done (in order):
-Add fuselage decals
-Add second layer of light OD to rudders
-Add decals to fin and rudder
-Paint deice boots
-Attach fin to stabilizer
-Attach cowlings
-Paint undersides of nacelle and cowling
-Retouch demarcation line at stabilizer/fuselage joint and nacelle/wing joint
-Add wing decals
-Add darker patches of OD and NG over areas where War Games Markings would have been, as well as on engine cowl ring.
-Add main landing doors, struts and scissors
-Paint bottom of main gear doors neutral grey
-Add wing flaps
-Finish painting wheels
-Attach wheels and check CG
-Add weight to navigator's compartment or crawlspace as needed
-Attach remaining windows, nosecone and tailcone
-Add weathering
-Possibly rig antenna wires
 
Last edited:
Thanks for the kind words, gents!

I might have a more substantial update later tonight, but for now I wanted to take a brief aside to discuss markings.

7C2E3063-5D09-4871-9F7B-780A6A992E4C.jpeg

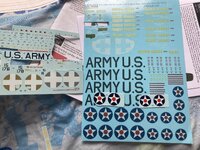
I have two references I can use for these: an official North American markings diagram for the B-25, B-25A and B-25B on aircorpslibrary and my extensive photo library. After the oversized propeller markings, I decided to measure all future decals.

My findings are as follows:
-NAA diagram has the demarcation line (which they call a fusion line) too high up, in a position closer to the markings on a B-25C and incorrect size for the serial numbers. This can be confirmed by checking any photo of a B-25A or B-25B.
-NAA diagram has the correct size and position for the insignias and "U.S. ARMY"markings and references specification 24114, which based on Dana Bell's books means that the US ARMY marking is insignia blue. That is what I think based on photos as well.
-Kitsworld's wing insignias are slightly oversized, being 12/16" in diameter while Airfix's are slightly undersized at 11/16". The correct size would be 11.55/16", 52" fullsized.
-Airfix's fuselage insignias are the correct size at 10/16" (45" in 1:1) while Kitsworld's are undersized at 9/16".
-Airfix's US ARMY marking is the correct size, with letters slightly over 5/16" in height (24" in 1:1), while Kitsworld's are double that height at 10/16" and also squished horizontally. Upon closer inspection, the Airfix markings are also the correct color, Insignia Blue.
-Serial numbers are roughly the same size on both.

I cannot mix and match insignias unfortunately because Airfix and Kitsworld used different colors for them, as you can see in the photo of the decal sheets. I'm going with Airfix's because their quality looks better and the blue matches their US ARMY marking, which I will also be using. I think in general I will stick with Airfix for all decals that aren't specific to 40-2303, where I will have to use Kitsworld's. I might honestly have to use the data block from Airfix despite it being for 40-2249 because it is correctly printed in black for the upper lines and a lighter color for the lower ones (they went with yellow, I used red in my livery, though comparing it to the color of the propeller warning stripe yellow is probably correct).

The Airfix datablock identifies the aircraft as B-25B 40-2249, while the Kitsworld option calls it B-25C 40-2303. I don't know what's better, having the wrong serial or having the wrong model.

I will be using Kitsworld's decals for the actual serial/radio call number and noseart.
 
Welp, the noseart decal, of which the sheet only included one copy, folded up immediately when I applied it to the model and broke in two. I applied Microset to the area beforehand this time so I have no idea what caused it, and I haven't had this issue with the Airfix ones. I tried dipping the decal back in water, which got it to unfold, but at that point the "sh" of "Dervish" was already gone. Whenever I tried to get the decal out of the water it folded over again, until finally the "Whirl" also broke off and I gave up.

To say I'm upset about this would be an understatement and I am still thinking of how to proceed. I do not have any means of making decals myself, and the noseart is very small to try to paint, not to mention that my handwriting is terrible. I could in theory simply switch to another of the 16 aircraft, but the only other option that interests me is the Ruptured Duck and I simply don't trust any of the Kitsworld decals not to fold over. This could be on me and not the decals themselves as I have not kept them in a ziplock bag for the past two months, but I had the exact same problem when I tried using some of the numbers from Kitsworld on my B-26, and at the time the decals were brand new. I might try my hand at freehanding the noseart with a tiny brush or pencil, If that doesn't work out... I don't know. Here's hoping the serial numbers don't fold up.

Update: Well the bad news just keep coming when it comes to the Kitsworld decals. Couldn't even get the serials off the backing paper before they started folding up. not too far gone yet but I'm doubtful I can rescue them. I fully admit applying decals is one of my weakest areas, but I haven't had issues with Airfix or Printscale's decals of the same size. Dreading the fact that I also bought Kitsworld decals for my future TBF project, here's hoping those fare better since they haven't been taken out of their packaging at all.
 
Last edited:

Users who are viewing this thread

Back