In between wrestling with my 1/48 p-51D, I have managed to get some things done on my fort. Gonna post what I have so far before I get too far ahead.

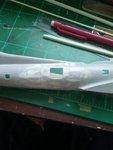
Back and forth with filling, sanding and scribing. Probably went 4 rounds with this in all. Forgot to take a pic of it with a unifying primer coat so you can actually see the final result, sorry for that. Will get it up in the next update. Thanks
 fubar57
 for the scale drawings, they helped immensely!
I scratch built 50 cal ammo boxes for the nose guns from styrene stock. I tacked them to a piece of styrene strip with a tiny bit of CA for easier handling. I painted these testors tan, a very light beige color. Then I mixed up a very small amount of raw umber and a little bit of raw sienna oil paint. I added a drop of Japan dryer to the mix, a liquid drying agent for oil paints. Using a dry, fine brush I streaked on a coat of oil paint onto the boxes. I then wipe off excess paint from the brush and continue removing paint from the boxes and wiping off the brush on a paper towel between strokes. Very soon you are left with a nice representation of wood. These are set aside to dry for a week or two, thanks to the Japan dryer, as opposed to a month or more without it.
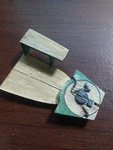
I made the wood shelf that is mounted above the navigator's table as well as the instruments that were mounted to it.
After a dip in Future, I masked the windows off on both nose panels. Luckily there is framing for the interior and the exterior, so this was relatively easy to mask inside and out. Strangely enough the starboard panel (not pictured here) had some ribs and stringers on the inside molded over the large window for the cheek gun. I carefully scraped the area down with my xacto and then polished the scratches out as best I could with sanding sticks. A coating of future helped further, but there were a couple tiny scratches that still show if the light hits it just right. Oh well, I suppose a crew member could have done it. I know it happened on occasion when I crewed Blackhawks even though we polished the windows almost daily.


I know its kind of hard to see, so I'll explain the pictures as best I can. The clear nose panels fit into a recessed lip. On the very front, this sticks out prominently from what should be the normal profile of the inner nose on the interior. Looking through the nose once completed, this would look very odd, extra framing on either side that is very thick and ruins the round outline of the inside circumference. I have colored the area I am speaking about with a black sharpie in the hope that it shows up better.
I decided I could remove this front frame to improve the appearance without compromising the integrity and proper placement of these panels.
The nose panels lined up just fine and were glued in. I know I should have taken before and after pictures with the fuselage halves together to demonstrate how much of a difference this makes, but I didn't think about it at the time. Sorry guys, hope it is still clear enough to understand what I mean.
That's all for now, I have more, but this post is long enough I think. Will post up more progress soon.
Chad


, but I'm sure more than a friend here, will help us learn more about "La Fortaleza Voladora" (it's my favorite bomber), so I'll keep an eye on the comments.