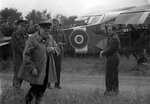
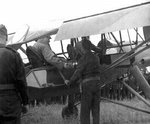
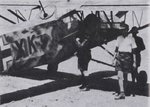
A famous Italian Storch

Ad: This forum contains affiliate links to products on Amazon and eBay. More information in Terms and rules

al49

Tech Sergeant
1,552
338
Dec 16, 2009
Milan, Italy
Hi everybody,
for Christmas I received as present the 1:32 Storch made by Hasegawa.
has_fi156_title.jpg

After some thought, I decided that I will try to replicate a bird that achieved some notoriety in the last months of the war in Italy.
In facts this bird, known with the serial number MM 12822, was intensively used by her pilot, Tenente Furio Lauri, for very dangerous missions behind to rescue allied pilot that parachuted themselves German lines.
As you can see from the profile, this machine was enlisted in the ranks of the British No. 1 Special Force and was given full three color camouflage.
MM 12822 prof.jpg


So I have two questions, the first one specifically for the RAF experts: which one are the three colors to be used?
Second. There will be no defensive MG, so I will have to replace the convex window with a 14 mm disk of transparent plastic, any suggestion on how could I cut this disk, using a compass cutter, without having to refill with something the tiny center hole left by the device?

Many thanks in advance for any suggestion.
Cheers
Alberto
 
Last edited:
This should be a good one Alberto. The camouflage appears to be RAF Dark Green, Dark Earth and Medium Sea Grey, partly oversprayed on top of the original colours. Slightly strange combination by this stage of the war, as the colurs would normally be as above, but with Ocean Grey instead of Dark Earth.
For cutting the disc of clear plastic, either place two layers of tape over the point where the compass point will be, to avoid penetration, or perhaps use a punch, if you can obtain one the correct size.
 
For cutting the disc of clear plastic, either place two layers of tape over the point where the compass point will be, to avoid penetration, or perhaps use a punch, if you can obtain one the correct size.


Alos you can make a template using a piece od aluminium plate ( obtained from a beer can for instance ). Just bore a hole with a drill bit of a little bit bigger diameter than the disc. Then put it on the clear plastic and go around the inner edge of the aperture with a sharp needle pushing it slightly down until the plastic is sawn.
 
Last edited:
Many thanks Terry and Wojtek for your suggestions, I will try to follow both of them quite soon, as a good result in cutting this disk is fundamental to start this project.
Alberto
 
Alberto , the part of the cockpit conopy was a little bit bulged. So I would suggest another way for making it. If I were you I would take a piece of a wooden stick that is circular in cross-section. Of course its diameter has to be fitted to the disk one. It means the stick has to be of a little bit smaller diameter that the disc.
Then, shape one of the stick endings in the way it was bulged like the disc was. The next step is to take a piece of thin clear plastic plate ( it can be a foil used for wrapping goods ) and warming it up. And then pull on the stick ending. Cutting it off at the top of the stick is a piece of cake. But you can have a nice disc with a kind of a side wall that is seen in pictures of the plane. The method is just the same like the one I showed in the thread.

http://www.ww2aircraft.net/forum/bu...w-make-your-own-pilots-seat-models-26095.html
 
Alberto,

Also you can try to find a wrapping used for medicines. They have already had blown up areas being of different shapes. These with round bulges are of different diameters and there shouldn't be any trouble with finding the correct one.

10752_leki2.jpg
 
Last edited:
It's just occured to me - the raised rear panel in the canopy was only fitted for the installation of a machine gun (MG15). The 'standard' canopy did not have this 'bulged' section.
If the gun was removed, then the aperture in the 'bulged' panel would probably be covered by either an alloy plate, or a piece of clear 'Perspex'. The later could be simulated by either a small,thin piece of clear plastic sheet, or by filling the hole with Micro Kristal Klear.
 
:shock:
:shock:
Many thanks Wojtek, I didn't realized that that round window was bulged as well!
In facts it doesn't looks to be like that in the above profile, that's evidently incorrect in this detail.
The original bird, restored to flight conditions, is shown in the Vigna di Valle museum and a photo I found after reading your note, confirms what you said.
So I will try the hot forming method you suggest.
Thanks again
Alberto
 
Just for your information, these are pictures of the bird in the Vigna di Valle museum
VdV a.jpg
VdV b.jpg
VdV c.jpg


and this is the detail I mentioned before:
finestra circ.jpg

Alberto
 
Yep.. that's it. But I have checked on the mount again. I went through a few book about the plane and noticed that there were Fi 156C-2 that could have had the part removed and replaced ( or left the cockpit open there ) with a glass disc. In other words these weren't armed and were used for transportation of wounded soldiers or personel. Look at these images I have found via the Internet, please. These can seem to be either flat or bulged. Anyway not as much as the one for the plane in museum.
 

Attachments

  • stroch rear cockpit.jpg
    stroch rear cockpit.jpg
    54.2 KB · Views: 282
  • stroch rear cockpit1.jpg
    stroch rear cockpit1.jpg
    48.8 KB · Views: 140
  • stroch rear cockpit2.jpg
    stroch rear cockpit2.jpg
    49.5 KB · Views: 147
  • stroch rear cockpit3.jpg
    stroch rear cockpit3.jpg
    70.6 KB · Views: 147
  • stroch rear cockpit5.jpg
    stroch rear cockpit5.jpg
    57.9 KB · Views: 161
Hi,
the round back window was a stumbling block that could have forced me to change subject.
So I followed the Woitek method and, after a few attempt I got this:

DSCN1753.JPG


that fits quite well onto the kit transparent as you can see here:
DSCN1752.JPG
DSCN1754.JPG
DSCN1755.JPG

not yet glued in place.
So I can go and I will start soon with the cockpit.
Cheers
Alberto
 
Looking very good Alberto. Now some of polishing and a drop of Micro Kristal Klear or ClearFix and voila. :thumbright:
 
Yes, some polishing is necessary plus some Future before painting frames.
I also have a quick question for the Luftwaffe experts: as far as it possible to know, in those non-armed birds, like this one, will the supports for cartridge drums be still there on the bulkhead or not?
MG det.jpg

I did a lot of searching but I didn't found any picture that could clarify.
Thanks in advance
Alberto
 
I'm only guessing, but as the clear panel for the gun has been replaced by a plain clear panel (i.e. no gun mounting point), and the rear area appears to have a forward facing seat, then it's probable that the racks for the machine gun magazines would have been removed, or not fitted in the first place.
 

Users who are viewing this thread

Back