Lovely work so far!
Navigation
Install the app
How to install the app on iOS
Follow along with the video below to see how to install our site as a web app on your home screen.
Note: This feature may not be available in some browsers.
More options
You are using an out of date browser. It may not display this or other websites correctly.
You should upgrade or use an alternative browser.
You should upgrade or use an alternative browser.
A pair of 1/48 Ta 152's/ Ta 152 H-1 also painted!
- Thread starter Ohm-men
- Start date
Ad: This forum contains affiliate links to products on Amazon and eBay. More information in Terms and rules
More options
Who Replied?SANCER
Senior Master Sergeant
I like it so far... definitivamente me gusta el experimento 
Saludos

Saludos
- Thread starter
- #23
So the saga continues...
A bit more rivetting on the wings of both models. The falcon kit is really easy to do. The vacu plastic is quiet soft and the rivett wheel rolls over it with ease. The wings of the Hobby Boss kit are of a much harder plastic and therefore a lot more effort.
Again the macro photography is quiet confronting, as it shows the parts magnified by more then 200%. Though with everything in the correct perspective, the rivetts look not exagurated.
The Falcon "H" is almost done rivetting and some work still needs to be done onthe HB "C" kit.
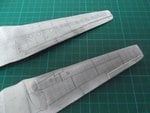
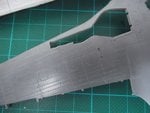
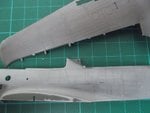
So far I like the added detail. But it's a lot of work (as previously stated) I will not do the rivett detail to all of my future builds.
I see it more as an experiment. I'm also not sure that the 1/48th scale is perfect for the rivett detail. I think that 1/32 scale models will benefit more from this added detail. .
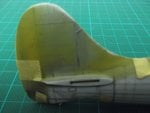
But it does look nice under a coat of paint. Here is some detail of a Eduard 1/48 Hawker Tempest that I did with the older Czech rivett wheels I have.
once sanded and polished and under a light coat of paint, the rivetts apear less exagurated and more realistic. For the Falcon Ta 152 H, it's more or less an experiment to see what can be done with a vacu kit base with added injection parts/kitbash and detail to see if it can look on par with a modren injection kit
The difference is that the rivett wheel used on the Ta 152's makes a rivett every 1 mm, where the rivett wheel on the Tempest made a rivett every 0.65 mm. So the overall rivett apearance is quiete different.
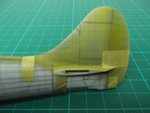
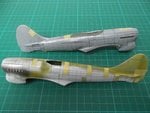
A bit more rivetting on the wings of both models. The falcon kit is really easy to do. The vacu plastic is quiet soft and the rivett wheel rolls over it with ease. The wings of the Hobby Boss kit are of a much harder plastic and therefore a lot more effort.
Again the macro photography is quiet confronting, as it shows the parts magnified by more then 200%. Though with everything in the correct perspective, the rivetts look not exagurated.
The Falcon "H" is almost done rivetting and some work still needs to be done onthe HB "C" kit.


So far I like the added detail. But it's a lot of work (as previously stated) I will not do the rivett detail to all of my future builds.
I see it more as an experiment. I'm also not sure that the 1/48th scale is perfect for the rivett detail. I think that 1/32 scale models will benefit more from this added detail. .
But it does look nice under a coat of paint. Here is some detail of a Eduard 1/48 Hawker Tempest that I did with the older Czech rivett wheels I have.
once sanded and polished and under a light coat of paint, the rivetts apear less exagurated and more realistic. For the Falcon Ta 152 H, it's more or less an experiment to see what can be done with a vacu kit base with added injection parts/kitbash and detail to see if it can look on par with a modren injection kit
The difference is that the rivett wheel used on the Ta 152's makes a rivett every 1 mm, where the rivett wheel on the Tempest made a rivett every 0.65 mm. So the overall rivett apearance is quiete different.


- Thread starter
- #25
As it stands now, it seams i've been a bit too enthousiastic with adding the rivetts to the Ta 152 H upper wings.
Upon studying the 4+ scale plans, it seams the wing had far less rivetts then the Ta 152 C wing (wich is actually very close to the A/D wing, rivett wise)
Given the nature of the vacu Falcon kit, I'm not sure I can still undo the "extra" rivett lines as filling and sanding the rather thin wing might cause more trouble and unrepareble dammage. So, I guess I have to life with those...
But seeing some pictures of the H-0 wing preserved at Garber, I'm not entirely convinced that the 4+ plans are completely accurate. It seams there are more rivetts present on the wings then the 4+ plans have drawn...
So, I think I'll go somewhere in between. Remove the most obvious wrong rivetts, but leave the rest. (just for the ease of mind )
)
I think I will leave the whole rivett process for larger sized aircraft, as imho 1/48th scale fighter aircraft as just a tad to small to add them...
I just had to try it I guess.
Though other then that, the Falcon Ta 152 H is taking shape faster then I imangined.
It's just a bit amazing that the guy who designed/made the masters of the kit back then made it so accurate in outline. So far the Dragon parts i'm using are just "Drop In's".

Upon studying the 4+ scale plans, it seams the wing had far less rivetts then the Ta 152 C wing (wich is actually very close to the A/D wing, rivett wise)
Given the nature of the vacu Falcon kit, I'm not sure I can still undo the "extra" rivett lines as filling and sanding the rather thin wing might cause more trouble and unrepareble dammage. So, I guess I have to life with those...
But seeing some pictures of the H-0 wing preserved at Garber, I'm not entirely convinced that the 4+ plans are completely accurate. It seams there are more rivetts present on the wings then the 4+ plans have drawn...
So, I think I'll go somewhere in between. Remove the most obvious wrong rivetts, but leave the rest. (just for the ease of mind
I think I will leave the whole rivett process for larger sized aircraft, as imho 1/48th scale fighter aircraft as just a tad to small to add them...
I just had to try it I guess.
Though other then that, the Falcon Ta 152 H is taking shape faster then I imangined.
It's just a bit amazing that the guy who designed/made the masters of the kit back then made it so accurate in outline. So far the Dragon parts i'm using are just "Drop In's".

Nice, that Falcon Vacform goes back a long way, built one of them many moons ago.
Looks good so far!
Crimea_River
Marshal
Some plans here you can check: Ta152H wing rivet patterns
There would have been rivets at every rib and stringer, not just at panel lines.
There would have been rivets at every rib and stringer, not just at panel lines.
- Thread starter
- #29
Thanks!
Thanks for the link, that are the plans I looked at. They differ a bit from the 4+ plans, but not much. Looking at the wing, I think I can fill the rivet's that should not be there.
Yesterday while mating the top and lower wing of the Falcon H, I noticed that the fit is less good then anticipated. Nothing I can't handle.
I'm currently detailing the landing gear bays and figuring out a way to fill the void where the engine is supose to be. I think I'm gonna use the back of a screwed up P-51 Verlinden engine that I have in my spares box and copy the set up for this provided in the Hobby Boss "C" kit. Obviously not the same engine, but close enough to have something sitting there. I'll see where it gets me.
Some plans here you can check: Ta152H wing rivet patterns
There would have been rivets at every rib and stringer, not just at panel lines.
Thanks for the link, that are the plans I looked at. They differ a bit from the 4+ plans, but not much. Looking at the wing, I think I can fill the rivet's that should not be there.
Yesterday while mating the top and lower wing of the Falcon H, I noticed that the fit is less good then anticipated. Nothing I can't handle.
I'm currently detailing the landing gear bays and figuring out a way to fill the void where the engine is supose to be. I think I'm gonna use the back of a screwed up P-51 Verlinden engine that I have in my spares box and copy the set up for this provided in the Hobby Boss "C" kit. Obviously not the same engine, but close enough to have something sitting there. I'll see where it gets me.
fubar57
General
Nice exhausting work
- Thread starter
- #31
Thanks!
The Hawker Tempests will be a duo. Though one will loose it's nose as I found an old KMC Tempest II conversion set. A bit of a "crude" set by today's standards, but never the less very usable.
Ta's are slowly progressing. Yesterday I made some engine bulkheads for the Falcon "H" in plastic card stock and addapted the Dragon wheel bays to fit the "H" wing.
I noticed that the Hobby Boss "C" has a piece of landing gear bay missing. Some 3 mm in width... Strange. I will fill this up with some plastic card. I looks they made these pieces a too short...
Looking upon another Ta 152 tread here, I noticed that the colour of the wheel bays was most likely unpainted aluminum and not RLM 02.
And ofcourse as it always goes.. i just got offered a mint unstarted Dragon/Trimaster Ta 152 H-1 for little money...
Not sure I want a third Ta 152 though...But it's tempting....
I want to do "Green 1" for the Ta 152 H. It's a H-1, but again info on this particular airframe is confusing once again... I'm far from a Fw 190/Ta 152 expert.
There is a nice profile on the web for Green "1", but no werke. nr. is given.
Some sources state "Renscke" flew this Ta, but I was under the impression this was "Yellow or Green "4"... And that it was a H-0
Crimea_River
Marshal
Willi Reschke is most associated with Green 9 but it's likely that he hopped around in different airframes.
- Thread starter
- #33
Thanks for clearing that up. It seams likely that the Jg 301 pilots pooled the Ta 152's they had at their disposal.
I have done a little work on the Falcon Ta 152 as I want to get it on par with the HB Ta 152 C first, so I can build them side by side.
I filled the unwanted rivet detail I made earlier and that should not have been there. I'm curious how it will look under a coat of paint.
But before that, I wanted to see if the model would look allright, so some dryfitting was in order.
I'm pleased with the result. Still a long way to go, but it looks prommesing.
It has the "lines" of the Ta 152 H imho.
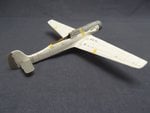
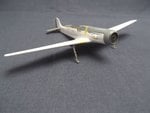
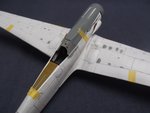
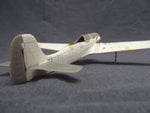
So far a plethoria of parts. We have Hobby Boss, Dragon/Revell, Airwaves and most likely some Eduard Fw 190 parts will find their way into this build. I'm still amazed how good all this parts fit the Falcon "shell". There is little to none work addapting these parts to the kit...
Next will be a "faux" engine to fill the otherwise void engine bay. I'm basing this on the Hobby Boss Ta 152 C kit.
It's a scratch plastic card wall that I hope to mate with a partial Mustang engine that will represent something of a Jumo.
It does not have to be that detailed/correct as not a lot of it will be seen. So, I'll get away with some "gizmologie"
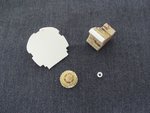
So, that's it for now. I didn't buy the Dragon Ta 152 H as it would distract me to much from this build.
Instead I got something better for the same price.... A 1/24 Airfix Fw 190 A...
I'm really happy with this as I was eyeing one for a long time...

I have done a little work on the Falcon Ta 152 as I want to get it on par with the HB Ta 152 C first, so I can build them side by side.
I filled the unwanted rivet detail I made earlier and that should not have been there. I'm curious how it will look under a coat of paint.
But before that, I wanted to see if the model would look allright, so some dryfitting was in order.
I'm pleased with the result. Still a long way to go, but it looks prommesing.
It has the "lines" of the Ta 152 H imho.


So far a plethoria of parts. We have Hobby Boss, Dragon/Revell, Airwaves and most likely some Eduard Fw 190 parts will find their way into this build. I'm still amazed how good all this parts fit the Falcon "shell". There is little to none work addapting these parts to the kit...
Next will be a "faux" engine to fill the otherwise void engine bay. I'm basing this on the Hobby Boss Ta 152 C kit.
It's a scratch plastic card wall that I hope to mate with a partial Mustang engine that will represent something of a Jumo.
It does not have to be that detailed/correct as not a lot of it will be seen. So, I'll get away with some "gizmologie"

So, that's it for now. I didn't buy the Dragon Ta 152 H as it would distract me to much from this build.
Instead I got something better for the same price.... A 1/24 Airfix Fw 190 A...
I'm really happy with this as I was eyeing one for a long time...

Airframes
Benevolens Magister
Good stuff, and I like that term 'Gizmology' !
- Thread starter
- #36
Thanks! I think the term "Gizmologie" originated from Shep Paine describing added detail to a kit that is not necesarely based on facts or pics, but more to fill a void or otherwise blank/empty spot on a kit build using parts or items that are on hand.
Not much to report on the builds. I'm now busy with the cockpits of both Ta-152's, but will most likely start over as I'm not too happy with the achieved results of the detail painting. Sometimes I have no trouble detail painting cockpits and at other times they become a complete mess. This is one of the latter.
Though, there apears to be a dilema regarding the C-1. Werke nr 110007 CI+XM, the sole subject of the Hobby Boss kit.
Acourding to their instructions this airframe was finished in RLM 74/75 over 76. The 4+ Publication states it was 81/82 over 76.
In B/W pics, these colours are not easy to determine. So, a question for the experts here.
Crimea_River
Marshal
Hitchcock's book has the camo as 75/83 over 76. Prop blades and spinner in 70. The "83" being the dark green, not brown or blue.
BTW, you'll no doubt see the flaking paint on the underside of the nose when you look at the reference pics.
BTW, you'll no doubt see the flaking paint on the underside of the nose when you look at the reference pics.
Lovely work so far!
- Thread starter
- #39
This build is slowly progressing. But I've managed to get a few bits and bobs done on this duo build.
First I made a dummy engine for the Ta 152 H based on the setup of the Hobby Boss Ta 152 C engine.
Here are both side by side.
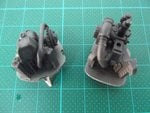
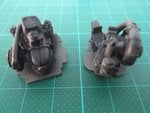
I'm not gonna add too much detail to these as little of them will be seen once in situ
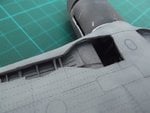
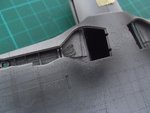
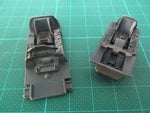
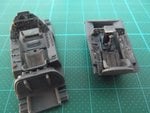
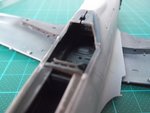
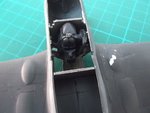
Next are the cockpits. Both straight from the box. For the Falcon kit this means the old Tri-master/Dragon/Revell Fw 190 A pit.
Upper part of the instrument pannel is not yet installed here. I might use this part of the Airwaves Ta 152 set.
Again, I do not worry much about details not much of it will be seen.
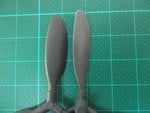
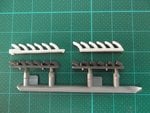
Then I looked at a spare Eduard D-9 prop reshaping it a bit to a Ta 152 prop. Still not 100% but close. And I had a look for a good substitute for the exhausts as the Falcon kit has none included. The closest I could find were those of a Eduard Tempest. These will need some additional work, but they have a good angle and their size is close to the Ta152 exhaust.
And last I decided to give acrylic paint another go after my Vallejo disaster expirience from a few years back. I read some good reviews on Lifecolor paints and I had to pleasure of having a long conversation witht the Dutch importer of these paints giving me all sort of tips and hints on how to use these paints. He gave me a small jar of Lifecolor RLM 76 to give 'm a try, free of charge. So, that's what I did.
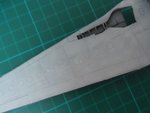
I must say they gave me a good impression.They paint rather nice with the airbrush if thinned correctly and they have a good paint coverage.
Painting with these takes more preparation then with enamels (my usual paint) but the fact they are absolutely odorless, not grainy when dried and thin enough are a big bonus for me. So I decided to give 'm a go and ordered a set of their "Regia Aironautica" paint with their thinner and cleaner.
For this "trial" I got hold of two Tauro Macchi Mc 205's. Not the greatest kits of this gracious Italian fighter, but a € 4,- a piece cheap enough for a future paint experiment.
First I made a dummy engine for the Ta 152 H based on the setup of the Hobby Boss Ta 152 C engine.
Here are both side by side.


I'm not gonna add too much detail to these as little of them will be seen once in situ


Next are the cockpits. Both straight from the box. For the Falcon kit this means the old Tri-master/Dragon/Revell Fw 190 A pit.
Upper part of the instrument pannel is not yet installed here. I might use this part of the Airwaves Ta 152 set.
Again, I do not worry much about details not much of it will be seen.


Then I looked at a spare Eduard D-9 prop reshaping it a bit to a Ta 152 prop. Still not 100% but close. And I had a look for a good substitute for the exhausts as the Falcon kit has none included. The closest I could find were those of a Eduard Tempest. These will need some additional work, but they have a good angle and their size is close to the Ta152 exhaust.


And last I decided to give acrylic paint another go after my Vallejo disaster expirience from a few years back. I read some good reviews on Lifecolor paints and I had to pleasure of having a long conversation witht the Dutch importer of these paints giving me all sort of tips and hints on how to use these paints. He gave me a small jar of Lifecolor RLM 76 to give 'm a try, free of charge. So, that's what I did.

I must say they gave me a good impression.They paint rather nice with the airbrush if thinned correctly and they have a good paint coverage.
Painting with these takes more preparation then with enamels (my usual paint) but the fact they are absolutely odorless, not grainy when dried and thin enough are a big bonus for me. So I decided to give 'm a go and ordered a set of their "Regia Aironautica" paint with their thinner and cleaner.
For this "trial" I got hold of two Tauro Macchi Mc 205's. Not the greatest kits of this gracious Italian fighter, but a € 4,- a piece cheap enough for a future paint experiment.
fubar57
General
Good stuff. Interested to hear your view on the paints. I've heard they were good but unfortunately for me, the cheapest I can find right now per bottle including shipping is almost $7.00
Users who are viewing this thread
Total: 1 (members: 0, guests: 1)
