Airbrush Newbie (1 Viewer)

Ad: This forum contains affiliate links to products on Amazon and eBay. More information in Terms and rules

r2800doublewasp

Senior Airman
310
1
Nov 21, 2008
Northern California
Hi,

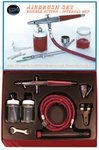
My friend and I are planning to both go in and buy an air brush together after saving up enough money. I just have a few questions on what are good airbrushes to get for a beginner.Moreover, what I would really like to know is the typical stuff: How to use it, what paints do you use, how to clean it and take care of it etc.

Thanks,

Jack
 
G'day Jack,

I have an Artlogic AC358, which was of a reasonable price. Its easy to use and I get good results.
As far as paint goes I use both Acrylic and enamel paints, use an old stocking to 'filter' the paints into a small bottle before thinning for use in the airbrush, The acylics can sometimes be a little 'lumpy', nothing worse than a small lump clogging up your airbrush mid stream, then having to pull it all apart to clean it.

As far as cleaning goes, i usually empty out any left over paint, add a decent amount of the thinner medium, give it a good swish around, empty that out again, add some more thinner, spray it through the airbrush. I usually finish up by spraying some warm soapy water through the brush regardless if I've been using water based paints or solvent based.

I usually dissasemble the 'nozel' and use a slovent based thinner to wipe over and remove any dried paint. I find the solvent removes the dried paint best.

cheers
pete
 
Enamel Paints thin (For ModelMaster paints atleast) I thin 50/50....

Acrylic with water or windex

I have an Aztek A470 which has 9 nozzles, the set comes with 6, and its siphon or gravity fed.

Cleaning I spray thinner regardless of paint.
 
The most important thing is "double action"! Meaning you can control air flow from nothing to maximum, as well as paint flow from nothing to maximum. "single action" airbrushes don't have this capability. Ask the seller to explain this with the airbrush in hand. cheers, bill
 
Defiantly get a double action. I started with a Paasche VL. Its a nice one to start with and I've seen them go new-in-box for under $30 on ebay. I still use the VL, but now I mostly use a Badger 100 gravity feed. It's more pricey, I saw it recently at squadron for $100. It is great for over all, or detail work. and is very easy to clean or change colors. the only thing I don't like about mine is the small attached color cup when I'm spraying a lot of paint but that's my one fault as I should have spent a little extra and bought the model with the extra large color cup.

1) The Paasche VL Kit
2) Badger 100G just like mine
3) The Badger 100LG I should have bought
 

Attachments

  • pas-vls-set.jpg
    pas-vls-set.jpg
    20.9 KB · Views: 108
  • !Bw7+SMgBmk~$(KGrHqYOKiIEwR!2fMdSBMLPTN1wdw~~_12.jpg
    !Bw7+SMgBmk~$(KGrHqYOKiIEwR!2fMdSBMLPTN1wdw~~_12.jpg
    7.8 KB · Views: 93
  • B-100-5.jpg
    B-100-5.jpg
    6.1 KB · Views: 119
The most important thing is "double action"! Meaning you can control air flow from nothing to maximum, as well as paint flow from nothing to maximum.

Agree completely. Be sure that it comes with surplus needles. And be ready to spend certain time cleaning the airbrush after every session. It is a device very sensitive to misuse. If you paint with acrylics remember that they leave solid deposits in the long time, but no matter what paint you use, my advice is disassemble it and clean deeply always. The most important point is not how to paint (you will learn it at last), but how to care the airbrush.
Cheers.

http://www.ww2aircraft.net/forum/pa...rials-guidebooks/airbrush-question-11105.html
 
Last edited:
I totally agree with the above. An airbrush is a precision instrument, not a lump hammer, and needs to be treated as such.
You'll find that for every minute of actually spraying, you should be spending between fifteen and thirty minutes cleaning!
A bit of an exageration, but not far off the mark! The 'brush will need to be blown through with thinners immediately after use, and then thoroughly cleaned around the nozzle, jet, chamber and especially the bottom and feed tube (if any) of the paint cup or bowl. NEVER use hard materials to clean, such as wire etc, and check with the supplier for suggested cleaning materials such as a foam cleaner etc.
Even allowing the 'brush to stand for half an hour with paint still in it will cause stoppages, and much quicker with acxrylic paints or varnishes, which set into a 'plastic' type of coating, which can ruin a 'brush and mean replacing needle, jets etc.
 
You didn't ask about this, but the other thing you'll want to consider is whether or not you want to get a compressor or make use of canned propellant. Most expert modellers with the time and money (I'm not one, unfortunately) invest in a good compressor designed for airbrushing - or rig a regulator up to a tank of compressed air (either way you are talking about 100-200 more bucks). This gives a steady, reliable airflow and lasts through any job. As a beginner, you'll probably want to start with propellant tanks and decide later if and when you are ready to go the full monty. The problem with propellant is that even big cans don't last long and that as the can empties the pressure drops unless you stick the can in a bowl of hot water. This can result in blotchy finish with paint splatters. Also, figure on using up at least one can on even a small model, so by the time you've painted 10 models or so, you'll wish you had bought a cheap compressor for 100 bucks. Finally, regardless of whether or not you use enamels or acrylics airbrushing is messy, requires careful masking, and stinks...literally. Find a place where you have good ventilation and your wife or girlfriend won't object to the fragrance of l'eau de thinner.

I use an Aztek double action with a 9 piece set of nozzles. They are easier to clean than many other brands with single nozzle/needle assemblies. But I find airbrushing such a hassle that I often only use mine on large kits that require lots of paint with a very smooth finish, such as ships. I often revert to careful hand painting many smaller models that don't require an exceptionally smooth finish, such as 1/72nd WW1 planes or armour.

Good luck!
 
Yes, the compressor. If you don't have access to one from a friend, consider these facts.
I bought one for 100 bucks, AU$, and I can't get more than 15lbs out of it, it is continuous, however it runs continuous as well. It is the itty bitty one with a tank under the motor. I do wish I could get 25lbs, just delivers paint a little more efficiently. If you can it would be good to "try out" a couple, borrow one or two if you can from a builder close by. Food for thought. Bill
 
I totally agree with the above. An airbrush is a precision instrument, not a lump hammer, and needs to be treated as such.
You'll find that for every minute of actually spraying, you should be spending between fifteen and thirty minutes cleaning!
A bit of an exageration, but not far off the mark! The 'brush will need to be blown through with thinners immediately after use, and then thoroughly cleaned around the nozzle, jet, chamber and especially the bottom and feed tube (if any) of the paint cup or bowl. NEVER use hard materials to clean, such as wire etc, and check with the supplier for suggested cleaning materials such as a foam cleaner etc.
Even allowing the 'brush to stand for half an hour with paint still in it will cause stoppages, and much quicker with acxrylic paints or varnishes, which set into a 'plastic' type of coating, which can ruin a 'brush and mean replacing needle, jets etc.

Why so much time? It takes me about 2 minutes to run thinner through and clean the cup...
 
Do you clean the jet, nozzle, needle tip etc H ? Running thinners through it is fine, and you're right, it only takes a minute or two. But, unless the other things mentioned above are cleaned after each use, eventually the 'brush will cease to work properly, if at all. You probably can't see it, but the paint/varnish builds up in the very tiny hole in the jet, and around the fluid nozzle. If this isn't cleane, the needle will eventually stick in the tip, which can lead to the needle, and the tip, needing to be replaced.
On average, it takes me about 15 to 20 minutes to clean the 'brush, and the parts (longer after spraying metallics), and then dry it and wipe it over, ensuring no paint is left even on the outside of the body. It always looks as if it's just been taken out of the box, which makes me know it's been cleaned after use.
 
Oh well off course I remove the nozzle and clean. Terry the Aztek A470 is just the brush and 6 different nozzles I let the nozzle sit in thinner for a few minutes but not to long since they're plastic. Over time thinner melts plastic :lol: I learned with one of the cases for the nozzle. Thank god not the nozzle itself! And I take a rag dipped in thinner and wipe down the outside.
 
The Aztek airbrushes are much faster to clean. I had one as my first airbrush years ago. I don't think it was even called an Aztek then, just 'Testors air brush' It was fine for overall work but I couldn't get it to do fine work and went out and bought a Paasche VL. I've herd good things about the Aztek brushes since so It could have been just the cheep one I had, I know it was not double action.
 
Glenn mine there are 9 different nozzles, the airbrush comes with 6 and the other three you have to buy if you want them. You can control paint flow by rotating a 'cylinder' shaped piece towards the back of the airbrush. It's gravity and siphon feed. I have a Badger aswell... not as easy to clean but still a great brush.

The Aztek sure wasn't cheap. It was 120 dollars so I asked for it for my birthday....:lol:
 
Gotcha. It makes life a bit easier with the separate tips. I nearly bought the same Aztec, as I had one over twenty years ago, courtesy of the company I worked for ( a huge, multi-national photographic manufacturer), who were planning to sell them under their own lable to the graphics industry. I advised against this as, although a good brush, they weren't designed for the hard, prolonged daily use in a graphics studio. My advice was listened to, and ignored. Six months later, the 'brushes were withdrawn from stock, following complaints from the industry!
At around the £80 mark, it's not cheap, but not as expensive as some, and works well for modelling use. You should be able to achieve fine lines, I think with the brown tip (?), but of course it takes practice.
 
Yep, been watching the instrutional DVD with the airbrush in hand and practicing the techniques for some time now.....I have a chart of what nozzles for what. But since I'm color blind I'll mix the colors up thinking I'm using red for covering larger areas (Example not actual color for covering larger areas) when in reality I had the pink nozzle for splattering hooked up and thinking what the hell am I doing wrong? :lol:
 
Glenn mine there are 9 different nozzles, the airbrush comes with 6 and the other three you have to buy if you want them. You can control paint flow by rotating a 'cylinder' shaped piece towards the back of the airbrush. It's gravity and siphon feed. I have a Badger aswell... not as easy to clean but still a great brush.

The Aztek sure wasn't cheap. It was 120 dollars so I asked for it for my birthday....:lol:

I bought my Testors at a craft store around 17 years ago and i don't think I paid more than $30 for it so it was probably the bottom of the line so that might have been the problem. It only came with 3 tips. I mostly use my Badger 100G now and am very happy with it. very easy to change colors, just wipe out the cup with a Q-tip, spray a little thinner, wipe again and thinner again and you're ready to go I use the Paasche VL for large areas as it can hold a lot of paint but cleaning is more involved. For very fine work I have a Sotar 20/20 I got dirt cheep, a$250 brush I got for a little over $100 very nice, but there is no protection for the needle and I dropped it once and cost me a fortune for a new needle and tip.
 

Users who are viewing this thread

Back