**** DONE: 1/48 CF-104 Starfighter - The Jet Age.

Ad: This forum contains affiliate links to products on Amazon and eBay. More information in Terms and rules

Good stuff Andy.
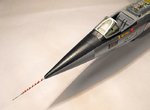
Are you going to have the camera ports masked, to be gloss black after the NMF is applied ? I'm guessing that's the simplest way, and would look just as effective as 'glazed' ports, given that's all that can be seen on the real thing, and the fact that it's mainly hidden beneath the fuselage.
 
Yikes, scary !
I've only just noticed - the gear doors on your model, as provided in the kit, are the 'bulged' doors for the larger wheels of the '104G, rather than the original, 'flat' doors.
Now, as far as I know, when the ex -RCAF/CAF aircraft were purchased by Denmark, apart from other mods bringing them in line with other NATO 'G's', they had the larger main wheels fitted, and the 'bulged' doors.
My Danish example has the original, 'flat' doors, which I was going to live with, but, if you think they'd be of use on your model, I'm happy to exchange them for your 'bulged' items, although mine have been painted (externally only) in the green finish.
Any use, or are you going to stay with what you have ?
 
Thanks everyone.

Yikes, scary !
I've only just noticed - the gear doors on your model, as provided in the kit, are the 'bulged' doors for the larger wheels of the '104G, rather than the original, 'flat' doors.
Now, as far as I know, when the ex -RCAF/CAF aircraft were purchased by Denmark, apart from other mods bringing them in line with other NATO 'G's', they had the larger main wheels fitted, and the 'bulged' doors.
My Danish example has the original, 'flat' doors, which I was going to live with, but, if you think they'd be of use on your model, I'm happy to exchange them for your 'bulged' items, although mine have been painted (externally only) in the green finish.
Any use, or are you going to stay with what you have ?

Huh, you know what? I never though to check on this as everything I've read to date was that one of the differences between the CF-104 and the US versions was that the the Canadian-built aircraft had larger main wheels, so I had just took it for granted that the bulges would be a natural part of this difference. Having now scoured my references, I see no CF-104s with the bulged doors. There are also no optional parts supplied with the kit so I'm happy to swap with you.

How about I bring the parts to Dux and you do the same? In the meantime, I will finish my build for the GB as is and do the conversion at a later date.
 
OK Andy, that's fine with me, as long as you're happy to remove the green paint (or use it as a base coat) on the exterior surface of the doors.
The kit parts (old ESCI F-104C kit) are provided as one-piece mouldings per side, i.e. wheel doors and gear doors, with a thin joint between them, so I'll carefully separate them - I'll take a close-up pic or two, and e-mail them to you.
Although I think the Danish birds had the 'bulges', I'd have to check, but I'd rather your model was accurate, as mine is just as a comparison between it two 'guises', and won't be seen outside of my cabinets, so it's not an important point to me.
 
Last edited:
Terry, don't get me wrong. I'm more concerned about you getting the doors you need as I could easily sand off the bulges to correct mine, though it would be a shame to do that if you could use them. I'll be happy to give mine to you if you want them and provided that the ESCI ones are a good match. We should exchange exact measurements in the e-mails.

In the meantime, a small update follows. I sanded down the panel lines and rivets on the camera pod and sprayed a coat of Alclad Black Gloss Base. This will not only serve as a good base coat for the polished aluminum finish but will also become the camera port wondows once appropriately masked. This coat needs to dry overnight so hopefully you'll see an update in 24 hours or so.

15090203.jpg


Also, before gluing on the canopy parts, I attended to a couple of nagging details that I should have addressed before gluing the fuselage halves together. The sides of the cockpit below the sills are incorrectly represented in the kit as there should be a shallow wall on both sides with the right side having a few additional details. This can be seen in the below cockpit sketch that was done by an active crew member on "Zippers":

10523969_10152597213343392_342468677649934308_n.jpg


So below is my attempt at tarting up these areas, with the minor additions seen as the white sheet styrene pieces. This look a bit better than the bare shelf and were a bitch to install at this late stage.

15090201.jpg
15090202.jpg


I've since painted these parts in the grey cockpit colour and have touched up the overspray areas on the seat to bring the colours back. The windscreen and rear canopy sections have also been masked and installed and I'll post some update pics tomorrow or Friday. Thanks for your continued interest.
 
Neat work on those side panels, in such an awkward position. Thankfully, I had a good cockpit pic and the line drawing in the Canadian book when I did mine.
I've e-mailed pics of the doors, and i'll measure them tomorrow and send the dimensions by e-mail - off to get a few hours kip, as it's 04.57 here, an my sleep pattern is up the pictures !
EDIT: Forgot to add, that's a brilliant pencil sketch !
 
Thanks again all.

Finished painting the camera pod. After masking the "windows", the whole pod was painted in polished aluminum and the masks removed. Yes, the dust on the gloss black was blown off before painting, and yes, more dust shows up on the finished pod. It's loose, honest! F!..ing close-ups.....

15090301.jpg
15090302.jpg


Next, I attended to the pitot tube which has a spiral of red and white. I originally tried to use a thin red decal for this purpose but I could not get the thing to conform to the tight curvature of the tube. I therefore elected to mask over the white and paint the red.

15090303.jpg


This is how it looks, loosely installed on the fuselage. I'm actually not sure I like it as the stripes are uneven so may redo it.

15090304.jpg


Here's a close-up of the canopy which has been masked and painted.

15090305.jpg


There's a spot of clear cement that is quite noticeable on the deck under the rear canopy that's now bugging me. I didn't see this happen because I had masked the clear part before gluing it onto the fuselage. I'll need to assess whether or not it's worth pulling the clear part off and fixing this after I sleep on it.

Long weekend coming up so I may actually get this one done on time. We'll see.
 
Thanks guys.

Geo, great point. It had crossed my mind to check my reference - after I had the mask on. I also noted that the application was inconsistent between different aircraft but think I'll definitely redo it now.
 
Tch, tch - I would have expected scale dust from you Andy!
Very nice work all round, and as for the pitot tube, I had a similar problem.
Having studied the drawings in the stuff Geo supplied, which showed width, pitch and number of stripes on the pitot, I tried for ages to successfully mask the brass part I used. I then checked loads of reference pics, and found discrepancies to the 'official' spec left, right and center, with the number of stripes, and the pitch and orientation varying, with 5, 7, 8 and 9 stripes and, as Geo pointed out, not all were perfect, either due to application, or weathering/wear.
This is how mine ended up and, ignoring the nasty Macro Monster, it looks good enough to the naked eye.
 

Attachments

  • DSCF0004 (15).JPG
    DSCF0004 (15).JPG
    49.5 KB · Views: 93

Users who are viewing this thread

Back