Aaron Brooks Wolters
Brigadier General
I agree with Wurger. But the pub sounds like a good idea to.
Follow along with the video below to see how to install our site as a web app on your home screen.
Note: This feature may not be available in some browsers.
Ad: This forum contains affiliate links to products on Amazon and eBay. More information in Terms and rules
Perseverance is the key to drinking well, I am a master of that.The pub was mediocre tonight, and I wasn't in the mood anyway - struggled to drink a couple of pints, and came home early.
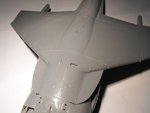
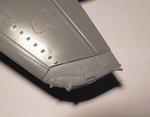
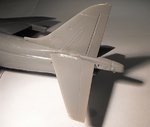
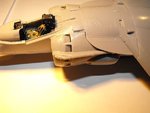
But - it got me out of the house for a couple of hours, and another test-fit has now confirmed I'm on the right track.
Should have this sorted tomorrow, hopefully with minimal, or maybe no filler - pics when it's done.