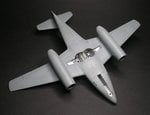
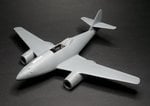
**** DONE: 1/48 Me262A-1a KG(J)6 - Jet/Recon/Transport GB

Ad: This forum contains affiliate links to products on Amazon and eBay. More information in Terms and rules

Thanks!

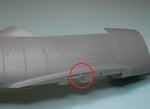
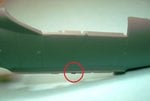
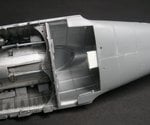
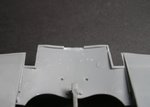
further work, added the ejector chute pieces, filling and sanding necessary for both also fixed the front end and added the nose cap for a nice clean fit.

another little fix was to redo the circular rivets on the large lower panel, some of which all but disappeared when filling and sanding the joint line, so I grabbed a suitably sized small brass rod filed the edge to a champfered point and then carefully pressed and turned it into the plastic to resurect the circular rivets, to maintain the consistency I went along both the front and rear lines to ensure they were all the same....
 

Attachments

  • 73_Ejector Chute panels_4548.jpg
    73_Ejector Chute panels_4548.jpg
    56.2 KB · Views: 71
  • 74_Ejector panel gap_4556.jpg
    74_Ejector panel gap_4556.jpg
    35 KB · Views: 71
  • 75_Circular rivets_4551.jpg
    75_Circular rivets_4551.jpg
    45.1 KB · Views: 79
  • 77_Nose cap fitted_4561.jpg
    77_Nose cap fitted_4561.jpg
    44.9 KB · Views: 74
  • 78_Nose cap fitted_4565.jpg
    78_Nose cap fitted_4565.jpg
    41.2 KB · Views: 81
Last edited:
Thanks Guys, for looking in, got what appears to be all of the stuff sorted on and around the nose now, have added the rudder so that just about takes care of the fuselage now.
next step is to add the wing assembly...
 

Attachments

  • 79_Lower Nose Surface Done_4573.jpg
    79_Lower Nose Surface Done_4573.jpg
    57.5 KB · Views: 60
  • 80_rudder fitted_4572.jpg
    80_rudder fitted_4572.jpg
    40.2 KB · Views: 59
  • 81_Fuselage  Wings_4576.jpg
    81_Fuselage Wings_4576.jpg
    53.3 KB · Views: 61
Well Andy, wanted to try one to see what's what, it's not that bad just need a bit of extra attention here and there...

Ok on to the next stage, I like to do fuselage and wings separate then bring them together, noticed in the early stage a little item that would interfere with the wing to fuselage fit so removed the obstruction and the fit went down well.
Also decided the rear section of the wing to fuselage needed a bit of support to ensure some strength seeing as though there was a slight gap in this area.

and now wings and tail in place....looks like an Me262 now!
 

Attachments

  • 82_Fuselage Side_4394.JPG
    82_Fuselage Side_4394.JPG
    28 KB · Views: 86
  • 83_Fuselage Side_4396.JPG
    83_Fuselage Side_4396.JPG
    35.6 KB · Views: 77
  • 84_Rear Fuselage to Wing Support_4581.jpg
    84_Rear Fuselage to Wing Support_4581.jpg
    58 KB · Views: 73
  • 85_Wing support slot_4578.jpg
    85_Wing support slot_4578.jpg
    33.6 KB · Views: 78
  • 86_Lower Surface_4594.jpg
    86_Lower Surface_4594.jpg
    48.9 KB · Views: 89
  • 87_Main Assembly done_4584.jpg
    87_Main Assembly done_4584.jpg
    49.5 KB · Views: 77

Users who are viewing this thread

Back