Navigation
Install the app
How to install the app on iOS
Follow along with the video below to see how to install our site as a web app on your home screen.
Note: This feature may not be available in some browsers.
More options
You are using an out of date browser. It may not display this or other websites correctly.
You should upgrade or use an alternative browser.
You should upgrade or use an alternative browser.
**** DONE: 1/48 Messerschmitt Bf 110 G-2 - Me/ Fw Group Build.
- Thread starter Gerry
- Start date
Ad: This forum contains affiliate links to products on Amazon and eBay. More information in Terms and rules
More options
Who Replied?Crimea_River
Marshal
Agree with all. Love those Quickboost exhausts - used 'em on mine too.
Vic Balshaw
Major General
Echo Andy's comments, incredible exhaust detail.
bl**dy good work Gerry!
- Thread starter
- #305
Gerry
Staff Sergeant
Looks great Gerry, can't wait to see her finished.
Me too Gnomey, but possibly for different reasons!
Thanks Terry, Jerry, Andy, Vic and Wayne for your continued interest, both practical and supportive. It incentivises me to press on through the drudgery bits.
It's back to masking the canopy today, which funnily enough, tends to be set aside to work on the more interesting bits!
Canopy time for me too!
A4K
Brigadier General
Sweet work Gerry, good on ya!
- Thread starter
- #308
Gerry
Staff Sergeant
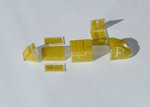
Thanks Wayne and Evan. I eventually got the finger out and finished masking the canopy, both insides and out, as it's going to be posed open. Because of this, it was a bit trickier and it took a little longer than I thought it would. I brushed a coat of Klear on to the mask edges, which will hopefully stop any paint bleed onto the perspex. When cured overnight it'll get airbrushed, and then we'll see if it worked.
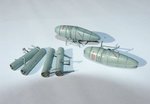
As well as this, I have been working on the underwing stores, which are now ready for mounting, - my next task. The drop tanks got a few dents put in, but they're not obvious from these photos.
As well as this, I have been working on the underwing stores, which are now ready for mounting, - my next task. The drop tanks got a few dents put in, but they're not obvious from these photos.
Attachments
Airframes
Benevolens Magister
Nice work Gerry. I remember masking the canopy of my '110, for the first GB - what a b@ll ache !
Erich
the old Sage
lovely work on the Züsatztanks/ slow and easy though, just a thought since they look pretty new the decals/writing would probably be missing from the fuel tanks......
Vic Balshaw
Major General
Looks good Gerry.
good stuff on the masking!
- Thread starter
- #314
Gerry
Staff Sergeant
lovely work on the Züsatztanks/ slow and easy though, just a thought since they look pretty new the decals/writing would probably be missing from the fuel tanks......
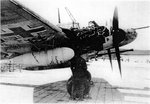
Thanks Erich for your observation. Am I right in understanding that what you're saying is that the stencils look too fresh on what are 'well used' drop tanks and would be much more worn or painted over in this case? If that is more accurate, then they would be easy to remove or paint over. However, my reason for including them was because they were indicated in the decal positioning instructions and because of the evidence in the photos below. Please excuse the poor quality, as they are printed off the internet and rescanned for posting. If this argument doesn't change your mind, or there's no other support for including them from the Forum, I'll get rid of them.
Thanks also Terry,Vic, Jerry and Wayne. I'm now racing to get this finished before the deadline expires.
Attachments
Crimea_River
Marshal
I like what you've done with the tanks and tubes Gerry.
Erich
the old Sage
as I said some had complete stenciling some partial some and most did not, the stenciling indicates a newer tank. do as you wish Gerry it will work.
T Bolt
Colonel
Real nice Gerry!
Nice work Gerry!
nice work Gerry
- Thread starter
- #320
Gerry
Staff Sergeant
Thank you gentlemen. I've neglected the Forum over the last few days as I've been scrambling to get this build finished and I've still a lot to do. I took Erich's advice, and after studying my reference shots of M8+EM, have sanded most of the stencilling off the fuel tanks and repainted, as they don't show on the photos. While waiting for these to dry and be weathered again, I got on with the rest of it.
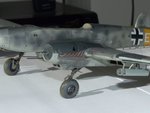
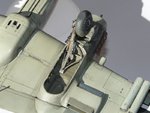
Photo 1. I was able to attach the undercarriage, the mortar tubes under both wings and add the landing light and slats. The lower section of the nacelles have been 'dirtied-up' to conform to the reference pictures.
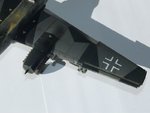
Photo 2. A detail shot of the undercarriage and wheelwell, with the port tubes in position. The bay doors have still to be fitted.
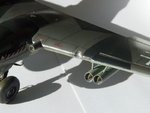
Photos 3 4. The port wing with the slats fitted and the tubes slung underneath. The landing light was a bit of a challenge. As I was sanding some flash off the kit part, it pinged off the tweezers, never to be found again. I had no option, other than to scratch-build something. After some panic, I hit on this solution. I found a piece of transparent sprue and cut a section to fit the hole. After polishing, I cemented it into position and added a disc of silver paint to represent the bulb. The 'glass' cover over the housing is a strip of Sellotape, cut around the housing panel lines. Because the wing was highly glossed, this has disappeared, except over the opening. Before the plane gets a matt coat, I'll have to remember to mask the 'glass' section to keep it glossy.
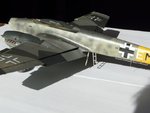
Photo 5. I added the ladder, the large aerial and the IFF aerial. I kept the ladder white because any reference shots I have found would seem to suggest it was a single colour rather than red/white stripes. If this is wrong, it's an easy enough fix.
As well as this, the canopy has now been painted and is awaiting unmasking. The aircraft has been given an overall coat of matt varnish and is drying overnight. When dry, pastel exhaust and gun stains will be added and the remaining parts added. I'm aiming to get this finished by the weekend, as we're almost on the deadline.
Attachments
Users who are viewing this thread
Total: 1 (members: 0, guests: 1)

