**** DONE: Curtiss P-40E-1 S/L Keith "Bluey" Truscott - Aircraft of the Aces GB.

Ad: This forum contains affiliate links to products on Amazon and eBay. More information in Terms and rules

Cheers Guys

Sorry about the slow progress thus far. Small update tonight.

Pic 1
I've joined the rear fuselage to the main part, before the joining the halves. At this stage I am concentrating on getting the panel seams lined up, and I'll worry about the gaps later.

Pic 2
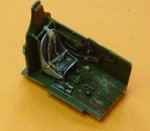
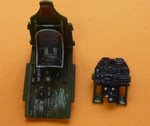
The plastic seat on the left is not too bad. I bought an Ultracast seat, but it really isn't necessary. I thinned down the sides of the plastic seat and will use it instead. Another thing I found was that the seat rails on the resin version are narrower that the Hasegawa ones, requiring more work, if I were to fit the resin replacement, to fit the armour plate. The resin will go to spares.
Pic 3
Radiators painted. Interior green ducting. The early radiators were brass, and the later ones were aluminium. You can;t see much of these once it's all closed up, but I'll give it a wash of burnt umber to finish off.

Pic 4
Gear bay interiors. I've picked out the aluminium tubing for hydraulic lines.

Pic 5 6
Prop prepped and ready for decals.

Cheers for now. 8)

Peter
 

Attachments

  • prop 001 resized.jpg
    prop 001 resized.jpg
    46.7 KB · Views: 101
  • prop 002 resized.jpg
    prop 002 resized.jpg
    50.4 KB · Views: 99
  • radiators 001 resized.jpg
    radiators 001 resized.jpg
    44.1 KB · Views: 92
  • seat 001 - resized.jpg
    seat 001 - resized.jpg
    58.9 KB · Views: 99
  • fuselage 003 resized.jpg
    fuselage 003 resized.jpg
    70.6 KB · Views: 87
  • gear bay 001 resized.jpg
    gear bay 001 resized.jpg
    45.6 KB · Views: 86
Agreed. The P-40 kits with a separate tail can really be a pain. Looks like you've made it work Peter.
 
Last edited:
Cheers Guys


Pic 1
I concentrated on the cockpit area this week end. The first decision was not to go with the photo etch that I had bought for the task. I had a good look at the plastic and the Hasegawa is very good. So good I think that only some belts will be necessary. To start, I had sprayed the IP white.

Pic 2
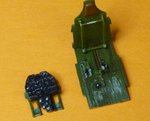
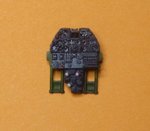
Here I have coat ed the panel in flat black, and picked out the instrument dials and pointers by scratching through to the white underneath. REd was used for the mag switch and warning lights. The gun charging switches where pained silver with red tips. When this was done I added a drop of clear gloss to the instrument faces.

Pic 3
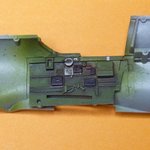
I carried on with the rest of the interior, which was painted interior green and then I detailed the switch boxes, throttle and other items. Followed up by a wash of black and then burnt sienna. A bit more dry brushing went on after this photo.

Pic 4
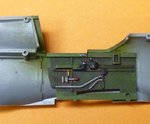
Did the same with the other interior areas on the fuselage that would show.

Pic 5
Call me crazy, but I bought these placard decals a while back, and it was time to put them to use.

Pic 6 7
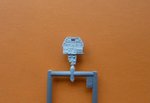
Placards added to the side walls in places. These correspond to reference pic I have. I also placed a couple on the lower Instrument Panel.

Pic 8
Here, I've started assembly of the cockpit tub, and added some aluminium chipping and scrapes to the seat frame and floor.

Pic 9
Seat added

Pic 10
Seat belts added and the floor made a bit more 'muddy'. The P-40e's delivered to Australia only had a lap belt, and not the full harness, so these were swapped out for the British style Sutton Harness, which I've added instead on the American style. These planes got awfully dirty, so I have no hesitation in added dirt, wear and tear.

Pic 11
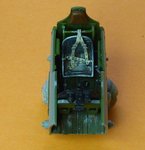
Cockpit tub completed, nearly. I need to add the gunsight and the sun shield, but I'll do that after installation.

Pic 12
While I was at it, I added a wash to the gear bays. I think this area should be a whole lot worse, so I may do more. There is some belief that mud accumulated in the gear bays of one Aussie P-40 operating from Milne Bay led to it's crash while attacking the Japanese invasion force.

Well, that's the end of that update. I've moved ahead in other areas, so it won't be too long before the next.

Cheers for now.

Peter
 

Attachments

  • cockpit 001 resized.jpg
    cockpit 001 resized.jpg
    46.3 KB · Views: 82
  • cockpit 011 resized.jpg
    cockpit 011 resized.jpg
    71.3 KB · Views: 103
  • cockpit 010 resized.jpg
    cockpit 010 resized.jpg
    89.1 KB · Views: 101
  • cockpit 009 resized.jpg
    cockpit 009 resized.jpg
    69.4 KB · Views: 99
  • cockpit 007 resized.jpg
    cockpit 007 resized.jpg
    71 KB · Views: 101
  • cockpit 006 resized.jpg
    cockpit 006 resized.jpg
    72 KB · Views: 92
  • cockpit 005 resized.jpg
    cockpit 005 resized.jpg
    84.7 KB · Views: 100
  • gear bay 002 resized.jpg
    gear bay 002 resized.jpg
    46.1 KB · Views: 92
  • cockpit 004 resized.jpg
    cockpit 004 resized.jpg
    46.4 KB · Views: 99
  • cockpit 003 resized.jpg
    cockpit 003 resized.jpg
    59.6 KB · Views: 95
  • cockpit 002 resized.jpg
    cockpit 002 resized.jpg
    45.3 KB · Views: 92
  • IP 001 resized.jpg
    IP 001 resized.jpg
    42 KB · Views: 91
WOW! Really nice work Peter! I've been wondering about those placards ever since they came out, now I know they look good. Is this the same company that makes the individual dial decals?
 

Users who are viewing this thread

Back