- Thread starter
- #61
Thanks Guys, been all over the place lately and not on as much as I could, still chipping away at her though....but stalled a couple of times.....
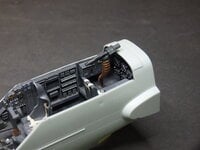
the forward fuselage was kicked inwards a tad so the Upper canopy had an overhang on each side....luckily i don't glue both sides of the fuselage to internal components just in case I need some movement, so I added a small piece of Plasticard as a shim to spread the cockpit side enough to get the canopy to sit correctly. You can just see the White shim at the 8 o'clock position in the first picture beneath the starboard internal panel, seen better from the back through the rear access hatch.
Next the Lower fuselage/ canopy panel painted internally and glued in place, followed by the rear "glass" for the access hatch and lower side windows.

