**** DONE: GB-59 1/48 Ki-61-Id TONY- WW2 PTO V

Ad: This forum contains affiliate links to products on Amazon and eBay. More information in Terms and rules

Awesome mate, cheers for sharing the mix idea too. I will try that.
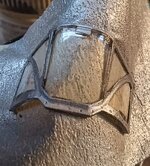
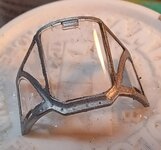
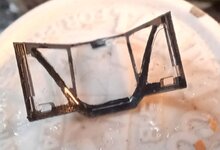
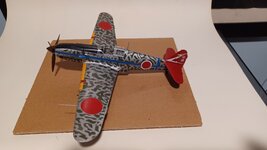
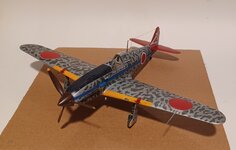
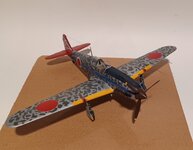
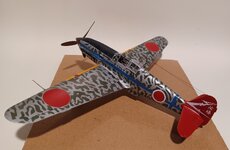
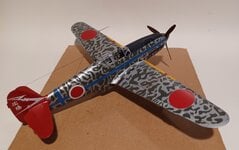
Works great and you can tint the shade to look best on whatever surface you're doing, did a mid gray on this metal finish to simulate wear and grime in the panel lines.
 
Decals done, I gave it an overall spray of Tamiya semi gloss spray then mixed up a batch of my weathering wash, made of a mix of black, white and red brown tempra paint, a couple of drops of Dawn dishwashing soap and a little water. I brushed it overall the model. When dry I will take a damp paper towel and rub off most of the mixture, leaving it in the panel lines.
Liking the wash detail. Ready to do a serious application on my current build.

The Dawn? What does it add to the application; or removal? I can see water making the tempra a bit thinner and easier to swish around, but the dish washing fluid??
 
That's a rather nice result. You're doing a bang up job. I never have any luck weathering.
Thanks. You should try the tempra paint mixture for weathering, worse case if you don't like it, it will come right off with water until you seal it with dullcoat.
 
Liking the wash detail. Ready to do a serious application on my current build.

The Dawn? What does it add to the application; or removal? I can see water making the tempra a bit thinner and easier to swish around, but the dish washing fluid??
The Dawn breaks down the surface tension of the water allowing it to flow better. It also makes it easier to wipe off with a damp paper towel. Don't wet it too much or it will wipe off the panel lines too.
 
The Dawn breaks down the surface tension of the water allowing it to flow better. It also makes it easier to wipe off with a damp paper towel. Don't wet it too much or it will wipe off the panel lines too.
Thanks. I'm debating between using my tempra, of which I have all the primary plus brown tones, or using some Vallejo wash. I have some grey and other colors coming in tomorrow and will be giving the paint mule a workout. The plus with the tempra, though, is that it will come off (at least 95%) as opposed to the thin residuals that the Vallejo will leave. And I do have Dawn. I'll assume the fragrance is immaterial !!
 
Thanks. I'm debating between using my tempra, of which I have all the primary plus brown tones, or using some Vallejo wash. I have some grey and other colors coming in tomorrow and will be giving the paint mule a workout. The plus with the tempra, though, is that it will come off (at least 95%) as opposed to the thin residuals that the Vallejo will leave. And I do have Dawn. I'll assume the fragrance is immaterial !!
Can't go wrong with the tempra, you can probably get 3 colors and a thing of Dawn at the Dollar tree for less than a bottle of Vallejo wash! And to me the finish looks better for overall weathering, the Vallejo and Tamiya wash seems better for aileron and flap outlines but seems too dark for overall fuselage panel lines.
 
Dull coated it tonight, waiting for bottom coat to dry. I did the clear parts as well, after masking with the Tamiya mask (just follow the lines with a steel ruler and sharp blade) painted them black, then sprayed them aircraft silver, then the wash, wiped most of it off and dull coated it. Just peeled off the paper and was happy it worked perfectly!
 

Attachments

  • 20230908_205513.jpg
    20230908_205513.jpg
    198.1 KB · Views: 8
  • 20230908_205513.jpg
    20230908_205513.jpg
    198.1 KB · Views: 9
  • 20230908_205622.jpg
    20230908_205622.jpg
    86.6 KB · Views: 8
  • 20230908_205720.jpg
    20230908_205720.jpg
    61.6 KB · Views: 8
  • 20230908_205720.jpg
    20230908_205720.jpg
    61.6 KB · Views: 9
Almost finished, after dull coat dried I attached the clear parts. Had a little fitting the rear canopy, had to really press it down and put a couple of dabs of superglue along the tracks. Got lucky, it dried, held it in place, and didn't fog any of the clear. Still need pylons, formation lights and an antenna.
 

Attachments

  • 20230908_230407.jpg
    20230908_230407.jpg
    555.4 KB · Views: 13
  • 20230908_230430.jpg
    20230908_230430.jpg
    242 KB · Views: 13
Almost done, added the antenna wires with Modelkasten line, hit the lights with silver, Tamiya clear red and blue, then a dot of UV glue to give a gloss look. Only thing left is the underwing racks for the fuel tanks. And final weathering.
 

Attachments

  • 20230910_151140.jpg
    20230910_151140.jpg
    320.8 KB · Views: 8
  • 20230910_151236.jpg
    20230910_151236.jpg
    338.1 KB · Views: 9
  • 20230910_151348.jpg
    20230910_151348.jpg
    479.3 KB · Views: 9
  • 20230910_151311.jpg
    20230910_151311.jpg
    386.5 KB · Views: 8
  • 20230910_151439.jpg
    20230910_151439.jpg
    493.1 KB · Views: 8

Users who are viewing this thread

Back